

You can build a professional website without coding by using WordPress, web hosting, and an AI website builder like GravityWrite. Start with a domain name, install WordPress, connect GravityWrite, select a template, and generate your pages. Then use Elementor to customize the content, images, and design before launching your site.

Quick Answer
To build a website without coding, register a domain, choose WordPress hosting, install WordPress, and connect GravityWrite’s AI Website Builder plugin. Enter your business details, choose a template, generate and import your pages, and personalize them with Elementor. Finally, test your website on mobile, check its security, and publish it.
Affiliate Disclosure: This article contains a promotional hosting link. If you purchase through it, we may earn a commission at no extra cost to you. Our guidance is intended to help you compare options and choose services that meet your needs.
Key Takeaways
- WordPress lets you create and manage a website without writing code.
- You need a domain, hosting, and an installed WordPress website before using GravityWrite’s builder.
- GravityWrite generates starter pages, images, and content based on your business details.
- You must import generated pages into WordPress before editing them with Elementor.
- AI generation uses your GravityWrite plan allowance, so review your details before generating pages.
- A professional website needs accurate content, mobile-friendly layouts, security, backups, and working contact options.
At a Glance
| Time Required | Allow several hours for initial setup and editing. A larger website or complex hosting setup may take longer. |
|---|---|
| Difficulty | Beginner-friendly. No programming knowledge required. |
| Tools Needed | Domain name, WordPress-compatible hosting, a self-hosted WordPress installation, GravityWrite account and plugin, and Elementor. |
| Cost | Depends on your domain, hosting, GravityWrite plan, and optional premium services. Check renewal costs and usage limits. |
| Best For | Small businesses, personal websites, portfolios, agencies, blogs, and basic service websites. |
Table of Contents
- Before You Start
- Step 1: Pick a Name for Your Website
- Step 2: Get Your Domain and Hosting
- Step 3: Install WordPress and Log In
- Step 4: Install the GravityWrite Plugin
- Step 5: Connect WordPress to GravityWrite
- Step 6: Add Your Website Details
- Step 7: Choose a Website Template
- Step 8: Customize Your Template
- Step 9: Generate Your Website With AI
- Step 10: Review and Edit Your Website
- How to Keep Your WordPress Website Secure
- Post-Launch Checklist
- Troubleshooting Common Problems
- Bonus Tips for a Professional Website
- Frequently Asked Questions
- Conclusion: Launch Your Website With Confidence
- Sources
Before You Start
Before building your website with AI, decide what you want visitors to do. Your goals will affect the pages, content, and design you need.
For example, a local service business may need service descriptions, testimonials, a contact form, and a quote request button. A blog needs readable posts, categories, and clear navigation. A portfolio needs project examples, strong images, and an easy way for clients to contact you.
Prepare These Details First
- Website Goal: Decide whether you want to attract clients, share information, showcase work, or sell products.
- Target Audience: Identify the people who will visit your website.
- Business Details: Prepare your business name, service descriptions, location, and contact information.
- Branding: Gather your logo, brand colors, images, and preferred fonts.
- Pages: Decide which pages your website needs.
- Call to Action: Choose what visitors should do, such as contacting you or requesting a quote.
Check WordPress Compatibility
This tutorial focuses on a self-hosted WordPress website, commonly called WordPress.org. GravityWrite’s official documentation identifies this setup as the intended environment for its website builder plugin.
WordPress.com is a separate hosted service. Plugin installation depends on its available features and plan, so do not assume that the same setup steps will work on every WordPress.com website.
If you already have a self-hosted WordPress website, you can skip the domain and hosting purchase steps.
Pro Tip: Plan your pages before opening the AI builder. Most small business websites need Home, About, Services, Contact, and Privacy Policy pages. Add a blog, portfolio, or booking page only when it supports your goal.
Step 1: Pick a Name for Your Website
Your domain name is the web address people type to visit your site. A short, memorable name can make your business easier to find and remember.
For example, a restaurant might choose a name such as DeliciousEats.online or TastyBites.com, if available. A local service business may prefer a name that reflects its location or main service.
Check domain availability through a reputable registrar before making your decision. Also search for similar business names and trademarks to reduce the risk of confusion.
Tips for Choosing a Strong Domain Name
- Choose a short name that is easy to spell and pronounce.
- Avoid unnecessary numbers, hyphens, and unusual spellings.
- Select a name that will still fit your business if you expand.
- Check matching social media usernames if you want consistent branding.
- Avoid names that closely resemble existing trademarks.
- Compare registration and renewal prices before buying.
Should You Choose .com or .online?
A .com domain is familiar to many internet users. However, alternatives such as .online may work well for digital businesses, creators, and agencies.
The extension alone does not guarantee better Google rankings. Choose a domain that matches your brand, audience, and budget.
Step 2: Get Your Domain and Hosting
You need two basic services to make your website accessible online:
- Domain Name: The address visitors use to reach your website.
- Web Hosting: The server service that stores your website files and makes them available online.
For beginners considering WordPress hosting, WebSpaceKit hosting is one option to review. Some WebSpaceKit offerings include WordPress-related services and qualifying domain bundles. Check the current plan details before purchasing.
Do not choose a hosting provider based only on its introductory price. Compare its features, renewal rates, support, and backup options against other WordPress-compatible hosts.
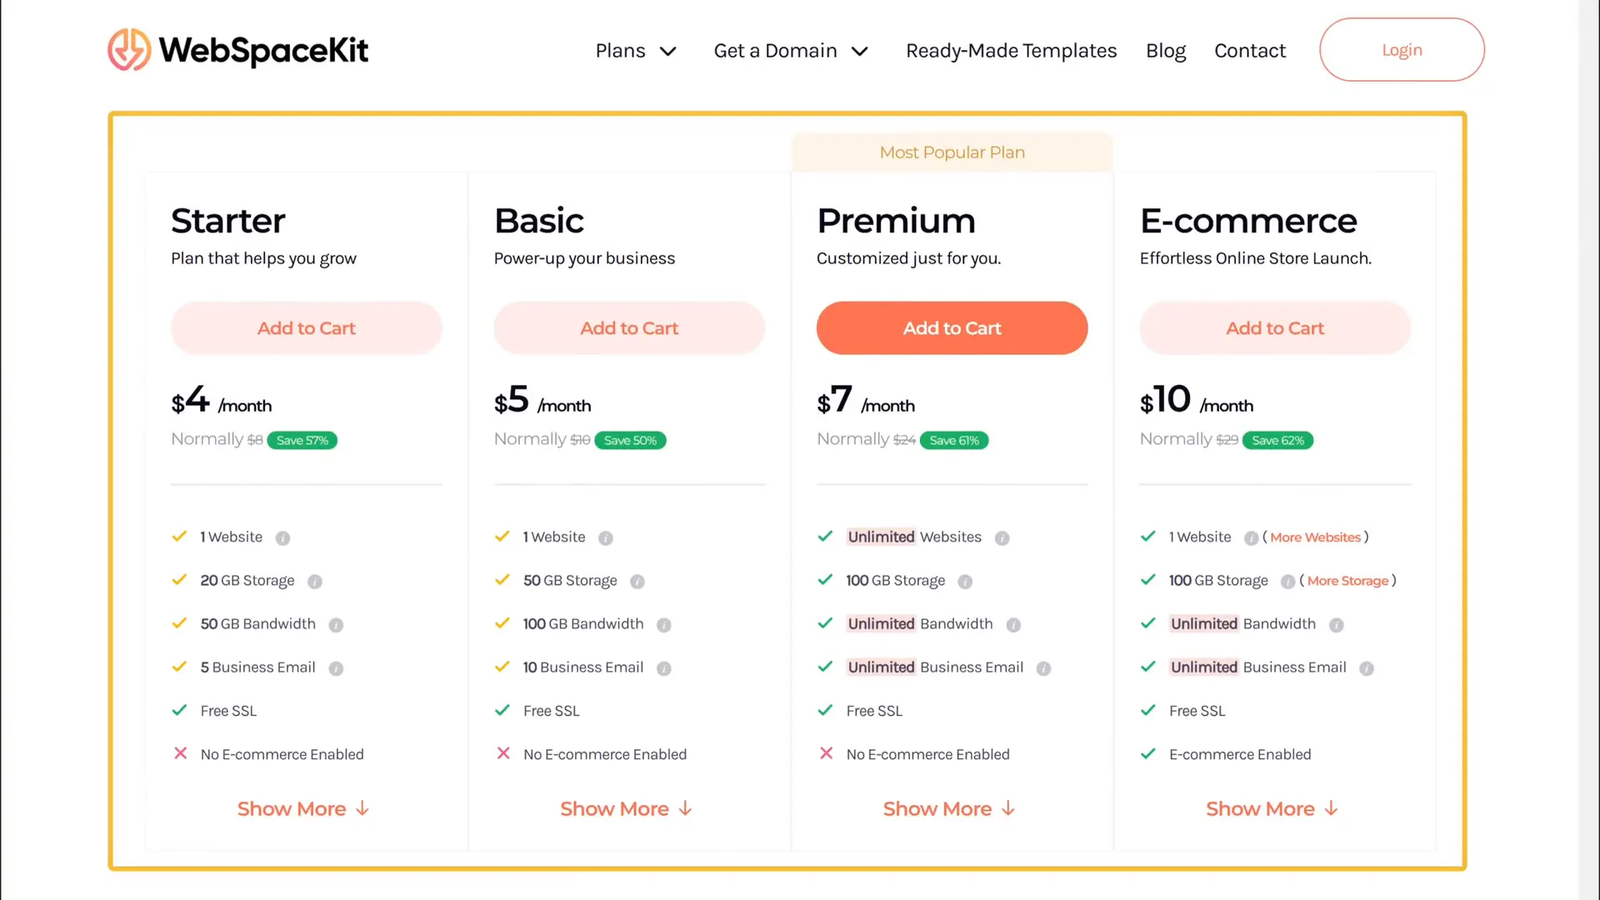
What to Look for in a Hosting Plan
- WordPress Support: The server should meet current WordPress requirements.
- SSL Certificate: Look for HTTPS support to protect connections between your website and visitors.
- Backups: Check whether automated backups are included and how restoration works.
- Storage and Resources: Choose limits that match your planned website size.
- Customer Support: Check support channels and availability.
- Renewal Pricing: Compare the cost after introductory discounts expire.
- Domain Terms: Check which extensions qualify for promotional registration.
How to Purchase Hosting
- Visit your preferred hosting provider.
- Choose a WordPress-compatible hosting plan.
- Compare introductory rates, contract length, and renewal charges.
- Register a new domain or connect one you already own.
- Review the included services and any optional add-ons.
- Complete checkout and follow the account activation instructions.
Some hosting providers install WordPress automatically. Others require you to install it from the hosting control panel.
Domain activation and DNS updates can also take time, so your website may not become accessible immediately after payment.
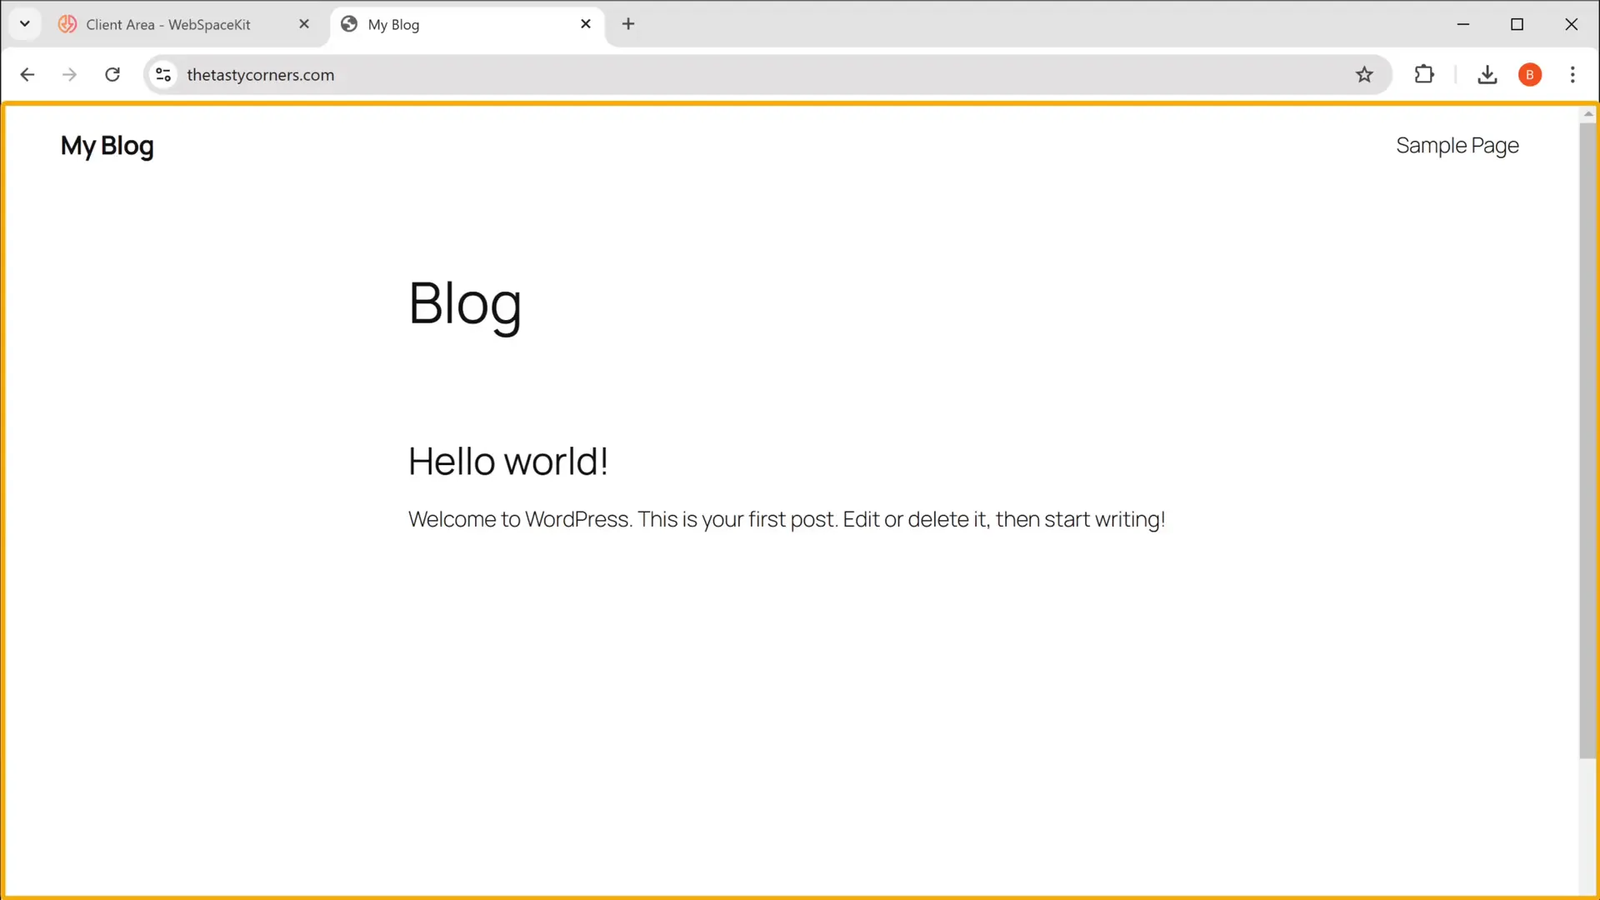
Note: Hosting plans may have different storage limits, renewal rates, refund rules, and domain benefits. Read the terms for the exact plan you are buying. Longer contracts do not always mean lower total costs.
Step 3: Install WordPress and Log In
WordPress is a content management system that lets you manage pages, blog posts, themes, plugins, images, menus, and website settings.
Before logging in, confirm that WordPress is installed on your hosting account.
Install WordPress If Needed
- Sign in to your hosting dashboard.
- Find the WordPress installation option or supported one-click installer.
- Choose the domain where you want to install WordPress.
- Create your WordPress administrator username, password, and email address.
- Complete the installation and save your login details securely.
Your hosting provider may use a different setup interface. Follow its documentation if these options are not visible.
You can also review the official WordPress automated installation guide.
Log In to Your WordPress Dashboard
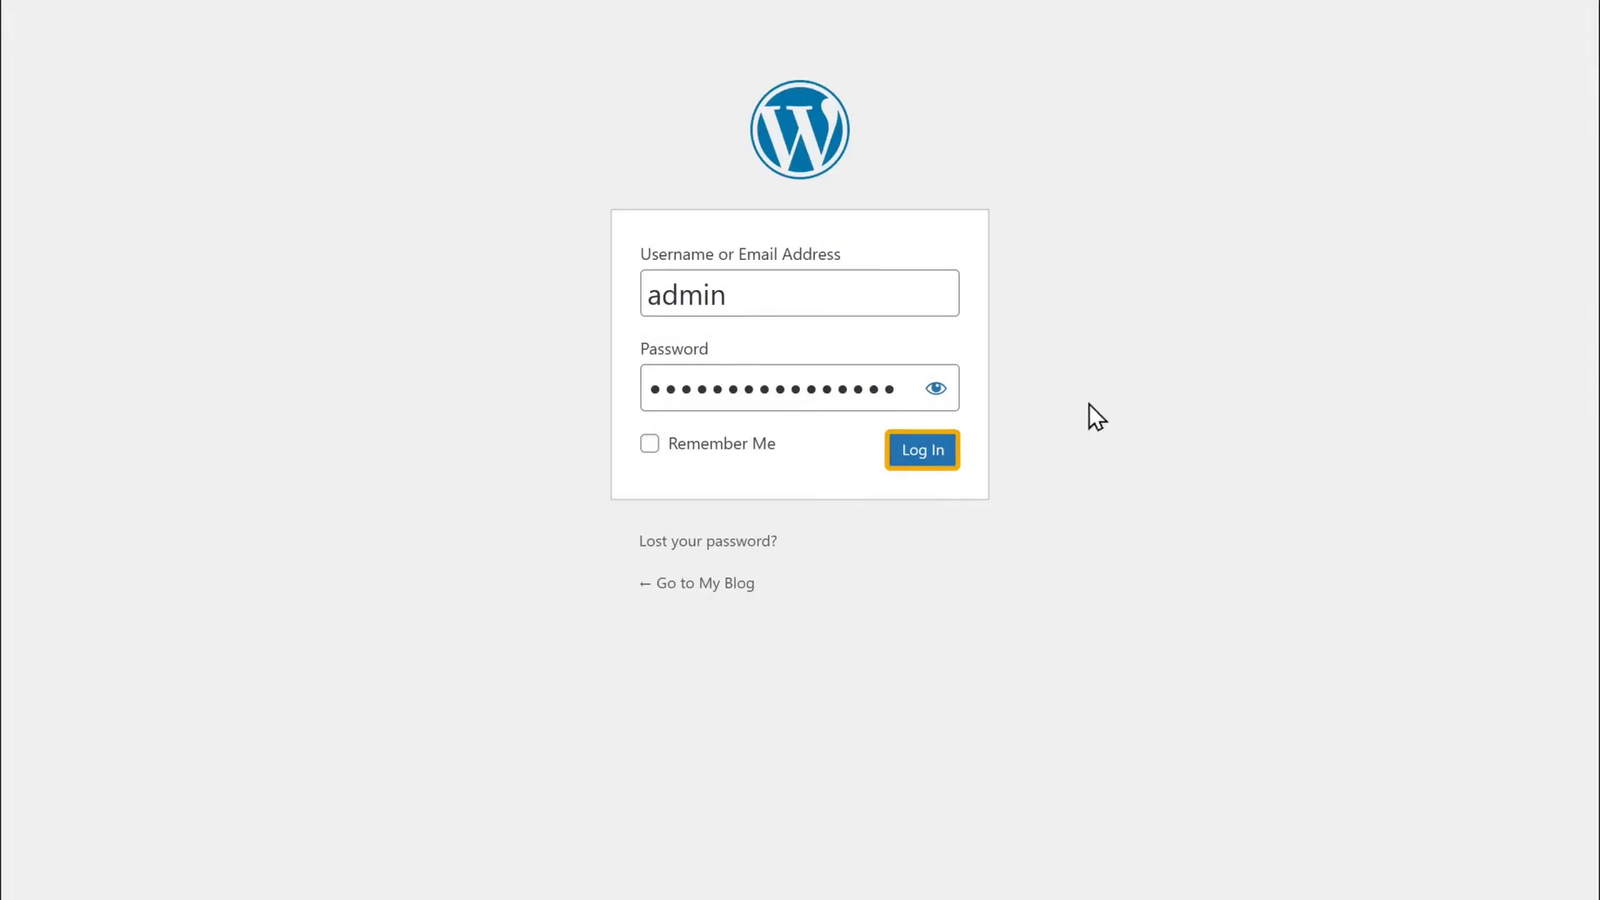
After installation, open https://yourdomain.com/wp-admin, replacing the example domain with your own.
Enter the administrator credentials created during WordPress installation. Some managed hosts provide a direct dashboard login instead.
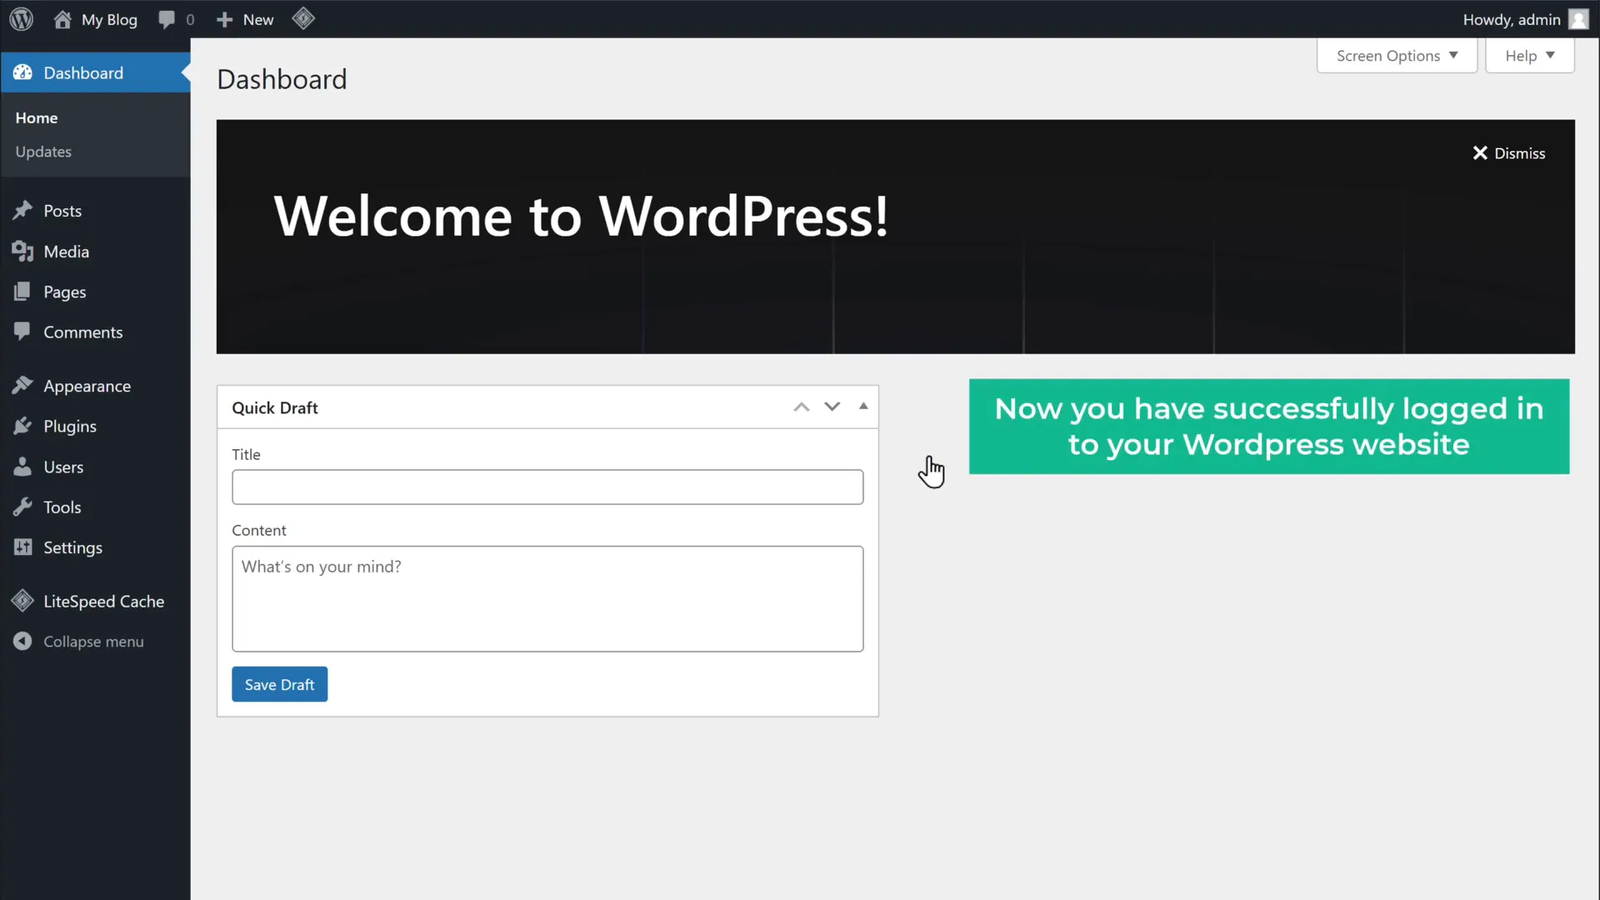
The WordPress dashboard is your website’s control center. You can create pages, manage plugins, upload media, configure settings, and update your content from this area.
Important WordPress Settings to Check
- Site Title: Go to Settings > General and enter the correct website name.
- Timezone: Choose the correct timezone for scheduled posts and timestamps.
- Admin Email: Confirm your email address for important notifications.
- Permalinks: Go to Settings > Permalinks and choose an appropriate URL structure. Post name is a common option for new websites.
- HTTPS: Confirm that your website loads securely with an SSL certificate.
- Search Visibility: Under Settings > Reading, review the search engine visibility option before your site goes live.
Pro Tip: Choose your permalink structure early. Changing URLs after publishing can require redirects to protect existing links and search traffic.
Step 4: Install the GravityWrite Website Builder Plugin
The GravityWrite AI Website Builder helps generate WordPress pages, layouts, images, and starter content using AI.
Instead of designing every section manually, you provide details about your website and choose from available templates.
How to Install GravityWrite
- Open the official GravityWrite AI Website Builder page.
- Click Download WP Plugin to obtain the plugin file.
- Log in to your WordPress dashboard.
- Go to Plugins > Add New Plugin.
- Select Upload Plugin.
- Choose the downloaded ZIP file.
- Click Install Now.
- After installation, click Activate Plugin.
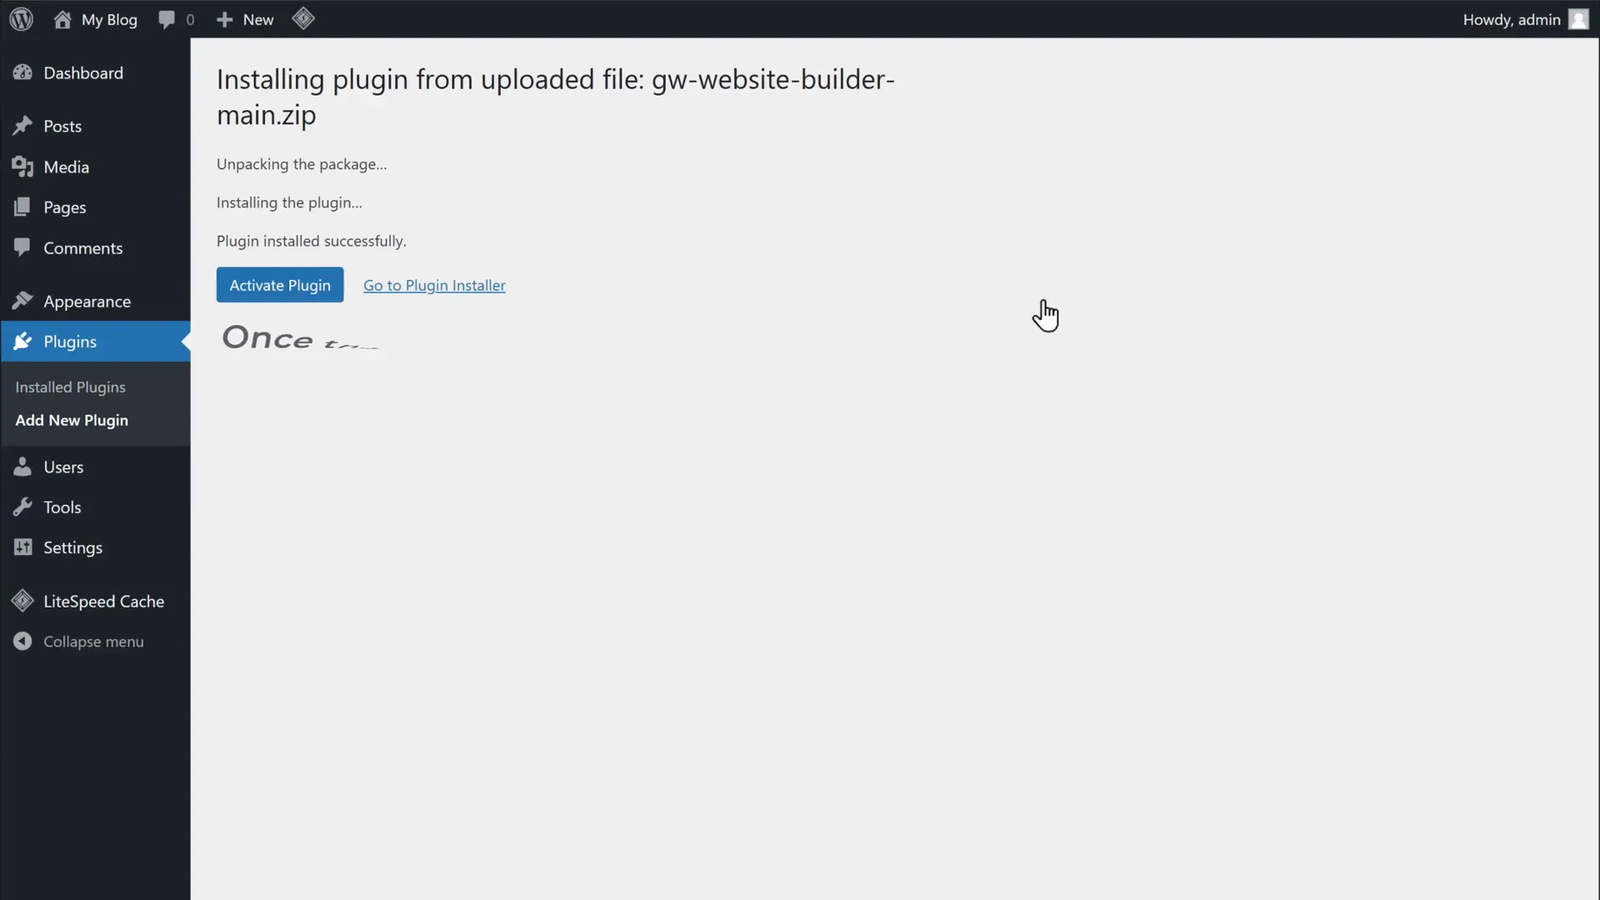
Once activated, look for GravityWrite in your WordPress administration area.
If the plugin does not appear, check your Installed Plugins list and confirm that activation succeeded.
Warning: Download WordPress plugins only from trusted, official sources. Unknown ZIP files may contain harmful code or introduce security and compatibility problems.
Step 5: Connect WordPress to GravityWrite
Connecting GravityWrite to your WordPress website lets the builder generate pages for your site.
You need a GravityWrite account to complete the connection. You can sign in with an existing account or create one during setup.
Connect Your GravityWrite Account
- Open the GravityWrite option in your WordPress administration menu.
- Click Let’s Get Started.
- Select Continue with GravityWrite.
- Sign in to your GravityWrite account, or create an account if you do not have one.
- Click Continue and follow the remaining setup prompts.
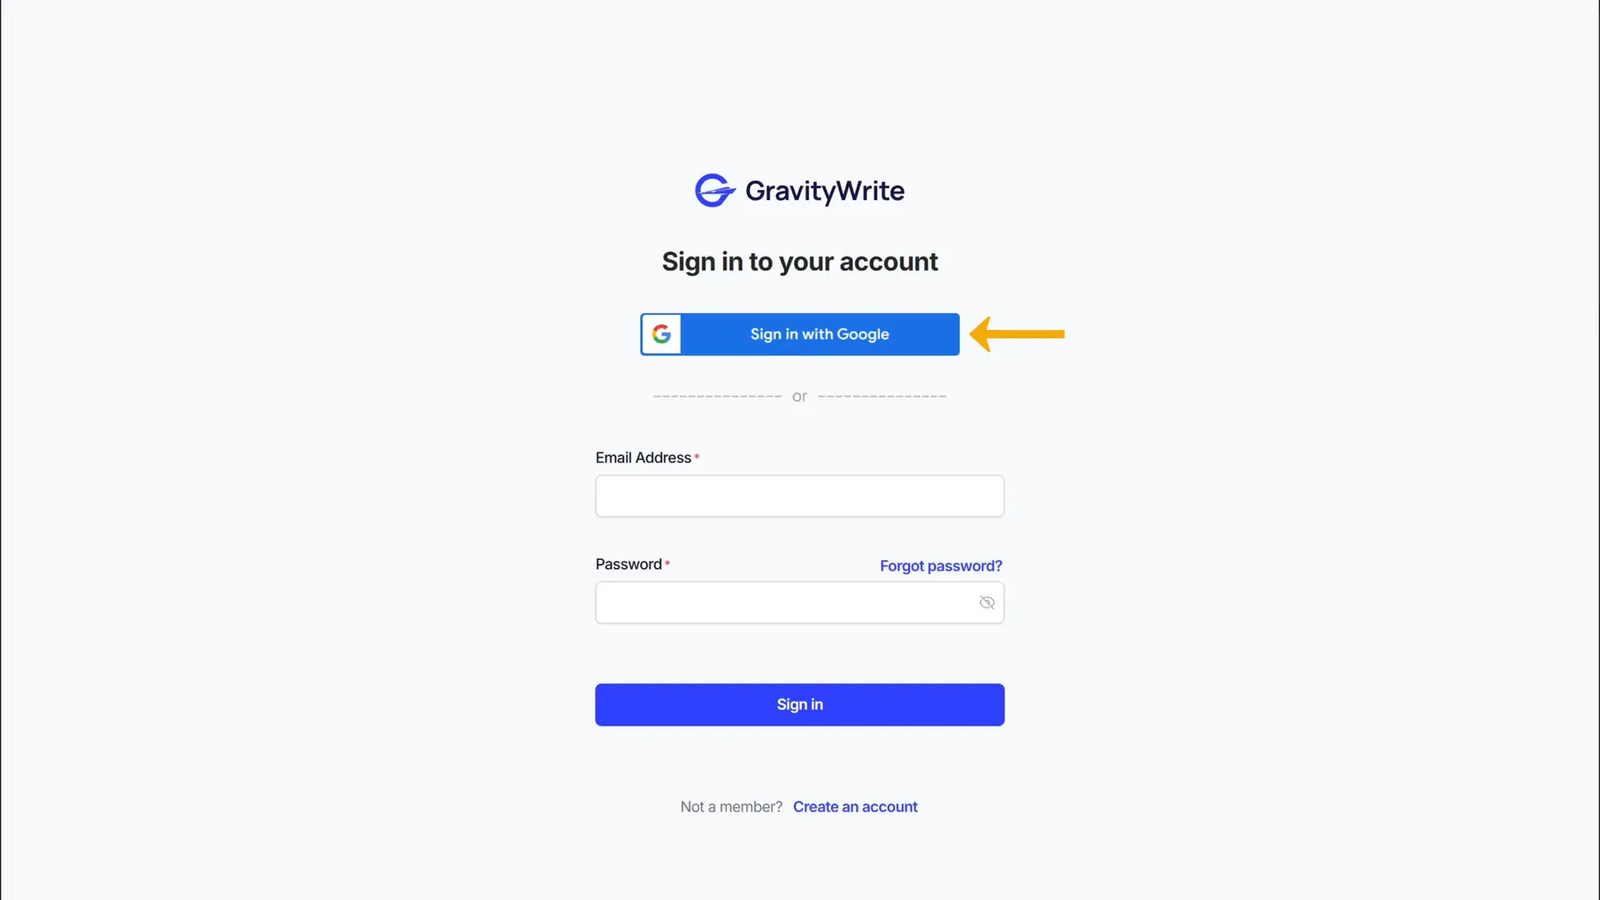
After signing in, you should reach the builder’s website setup process.
If the connection fails, confirm that you are using the correct account and that your WordPress installation can communicate with GravityWrite.
Note: Screen labels and sign-in options may change as GravityWrite updates its interface. Follow the account connection instructions shown in your current dashboard.
Step 6: Add Your Website Details
GravityWrite uses your business information to create a relevant website draft. Clear information helps the AI select suitable content and wording.
Enter Your Website Information
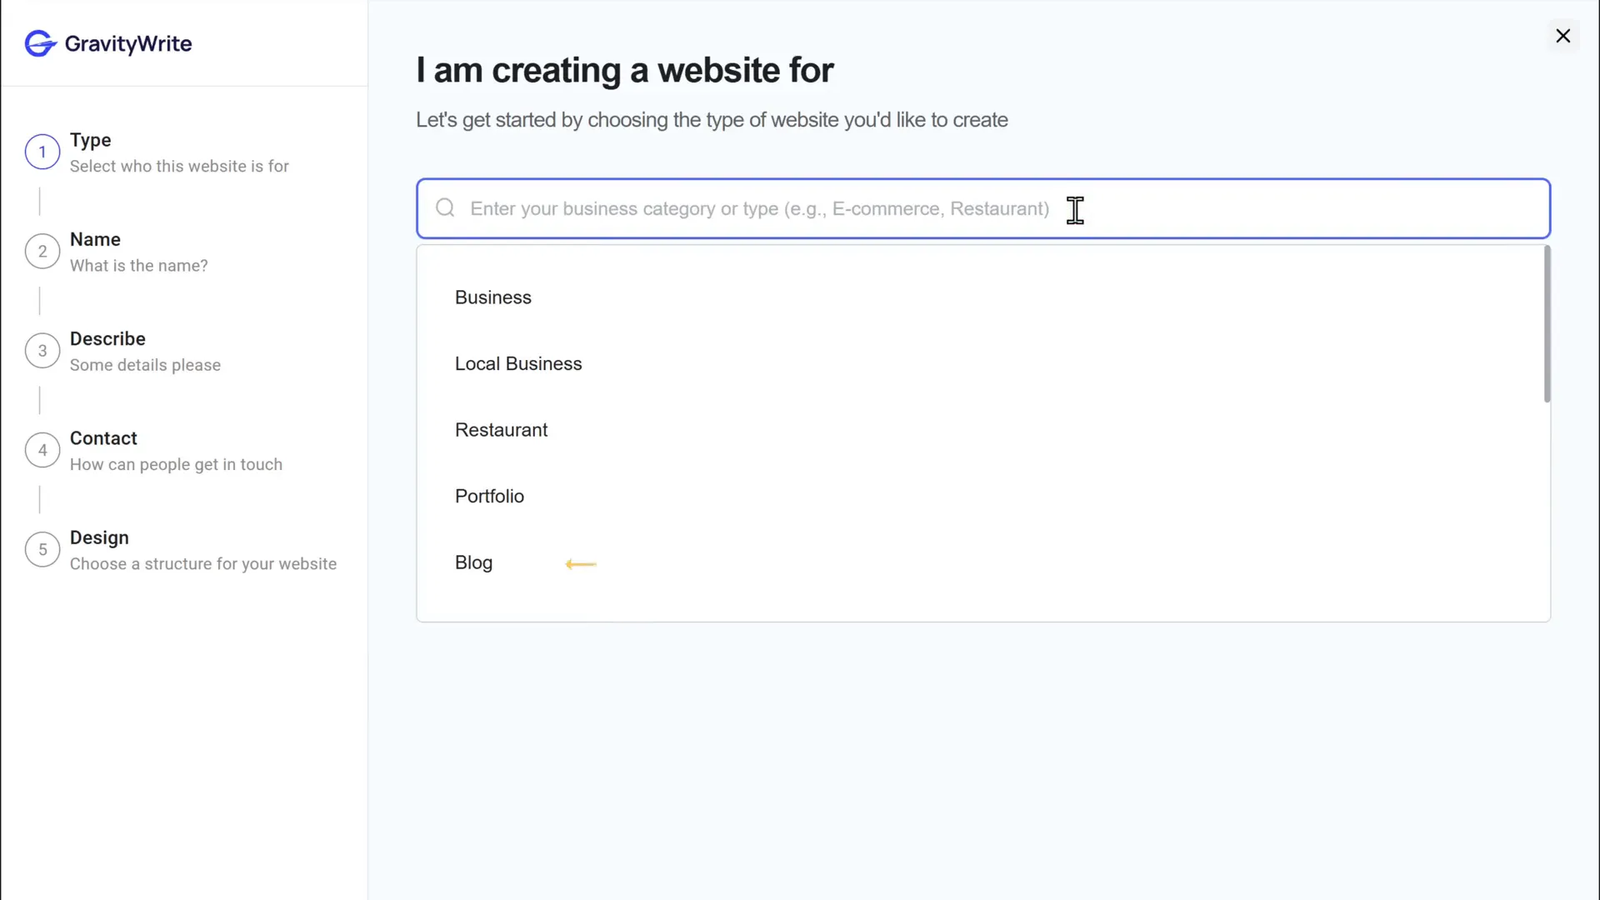
- Business Type: Select the category that best matches your website, such as a restaurant, agency, portfolio, or local service.
- Business Name: Enter your official business or project name.
- Business Description: Explain what you offer, who you serve, and what makes your business different.
- Contact Details: Enter an email address, phone number, or business location if you want these details displayed.
The official builder also provides an AI Auto-Generate option to help create business information. You should check every generated detail before continuing.
You can explore additional writing features at GravityWrite if you need help preparing descriptions for your website.
Example Business Description
A vague description such as “We sell cakes” gives the AI little direction.
A more useful example is:
“Sweet Crumbs Bakery creates custom birthday cakes, wedding cakes, cupcakes, and dessert boxes for customers in Austin. We focus on fresh ingredients, personalized designs, and convenient ordering for celebrations and special events.”
This example gives the AI information about the business, location, products, and customer needs.
What Makes a Good AI Website Description?
- Explain the main service or product.
- Identify the target customer.
- Mention the service location when relevant.
- Describe what makes the business different.
- Specify a suitable tone, such as friendly or professional.
- Include the main action visitors should take.
Pro Tip: Do not let AI invent awards, customer reviews, business history, or services. Only publish claims that you can confirm.
Step 7: Choose a Template for Your Website
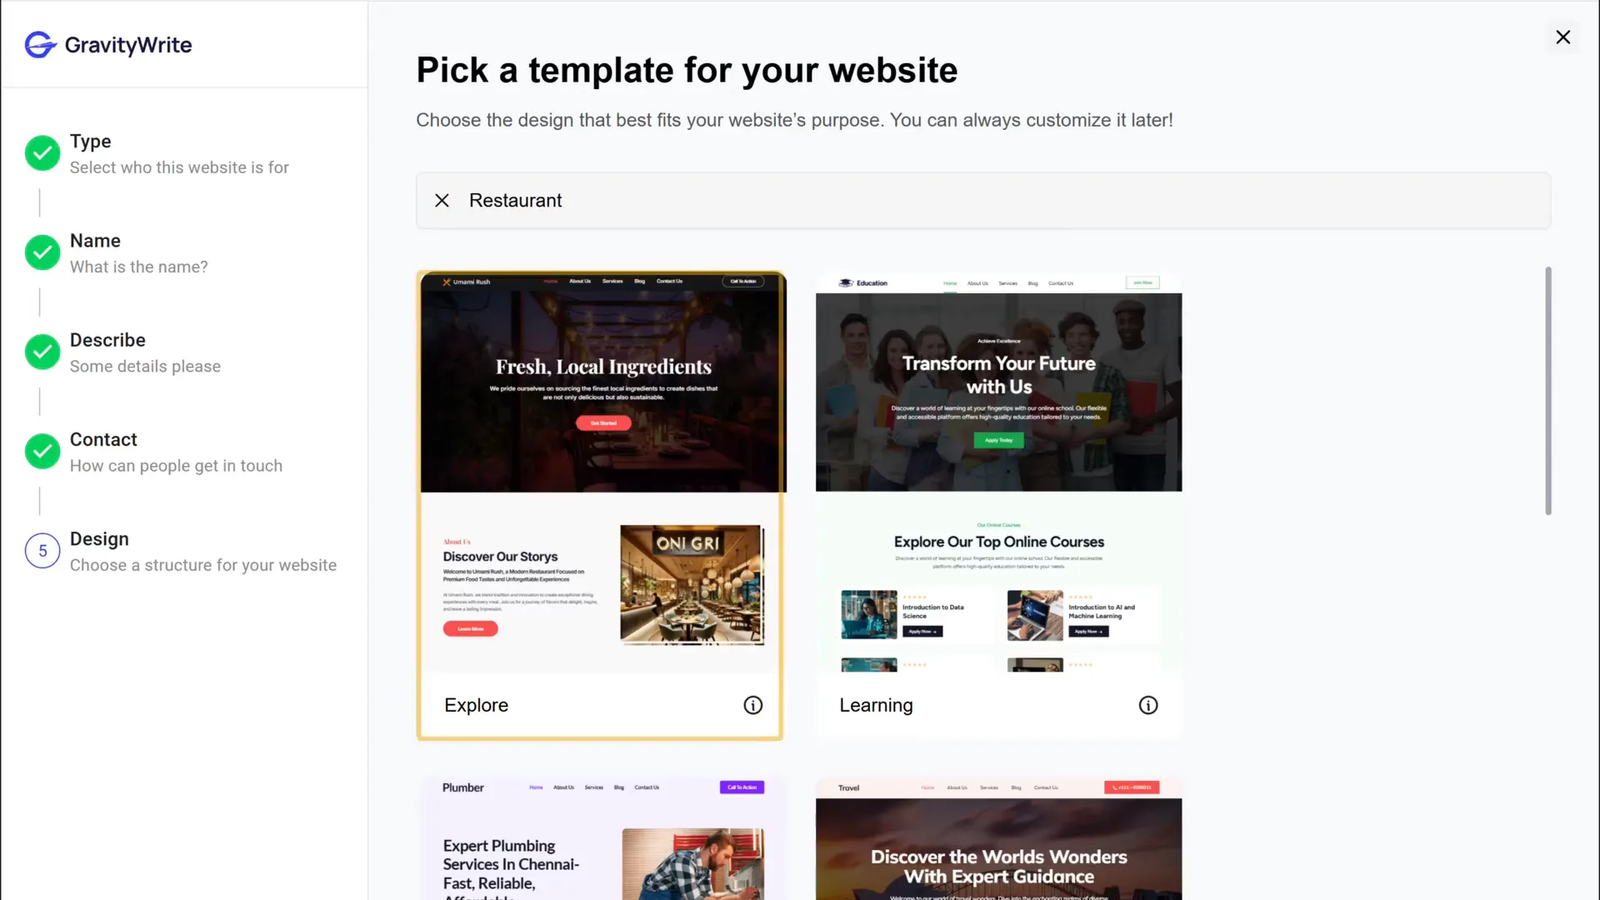
A website template provides a ready-made design structure. GravityWrite offers templates for different business types and visual preferences.
Choose a template based on your website’s purpose, not just its colors or images.
How to Choose the Right Template
- Choose a layout suited to your business type.
- Look for simple navigation and clear page sections.
- Check that important buttons are easy to find.
- Prefer readable text and a clean design.
- Consider how the layout will appear on mobile devices.
- Choose a template with space for your services, portfolio, or testimonials.
Once you find a suitable template, select it and click Continue.
GravityWrite will show a review of your website details. Check the information carefully before selecting Start Customizing.
You can correct mistakes in your business details before generating the website.
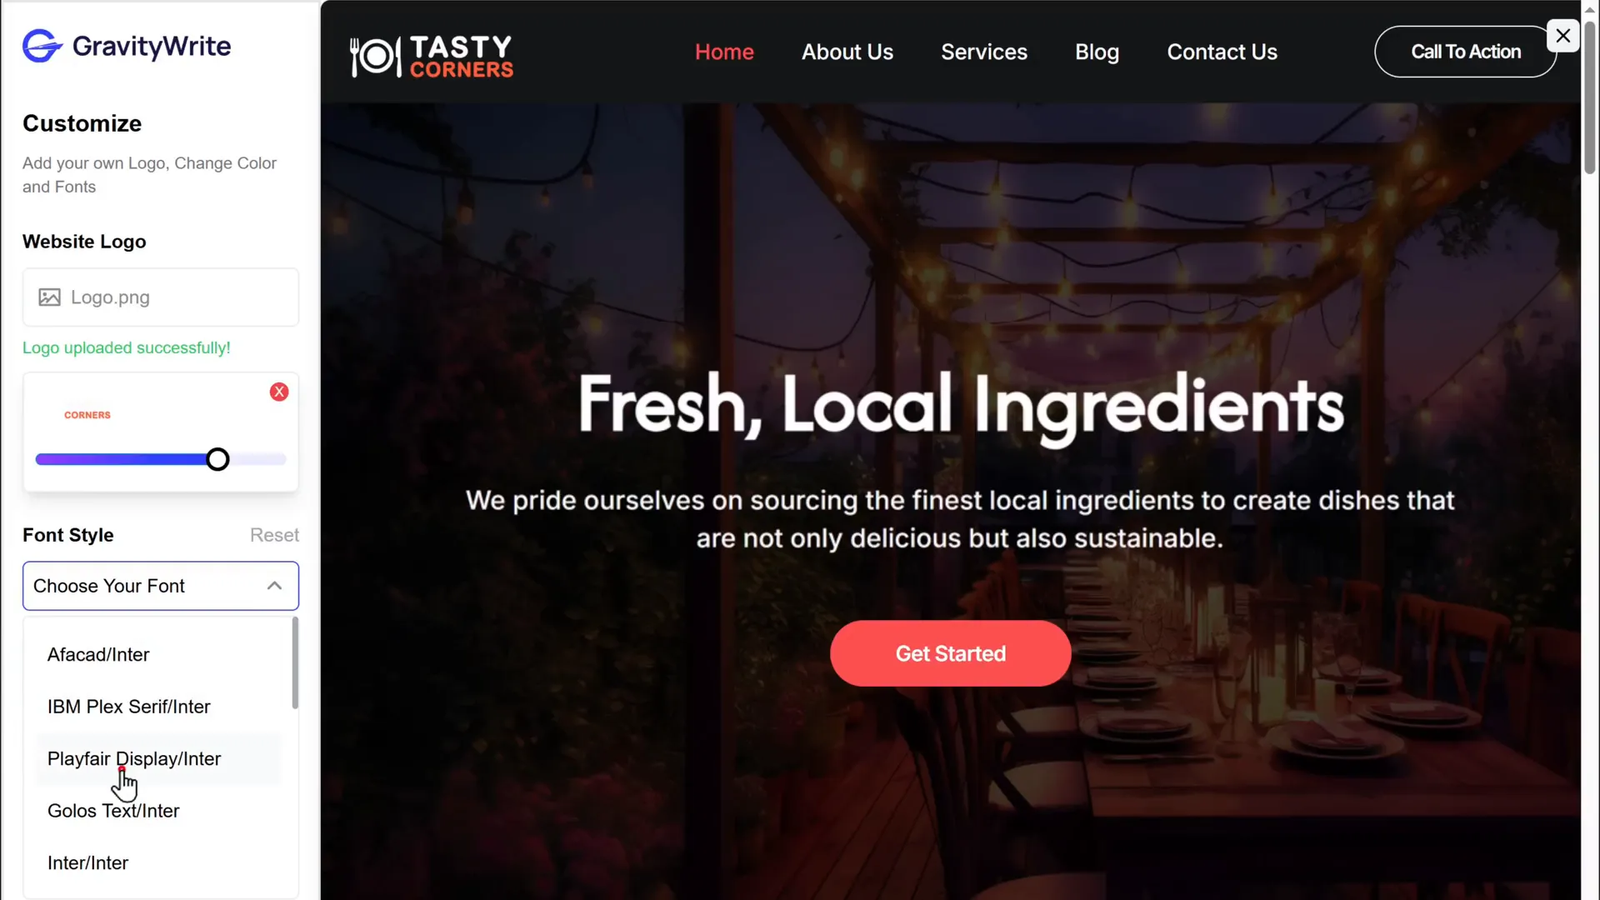
Step 8: Customize Your Template
Now you can adjust the template to match your brand. Focus on your logo, colors, and fonts before generating the website.
- Logo: Upload your business logo if you have one.
- Fonts: Choose a readable font pairing.
- Colors: Select a color scheme that reflects your brand.
- Preview: Review the website design before moving forward.
Simple Design Tips for Beginners
Use one main brand color and one accent color. Choose fonts that remain readable on smaller screens.
Avoid using too many colors, decorative fonts, or large images that distract from your message.
Keep buttons consistent across your website. For example, use the same color and wording for all primary contact buttons.
Review the available preview before starting the AI generation process.
Step 9: Build Your Site With AI-Generated Content
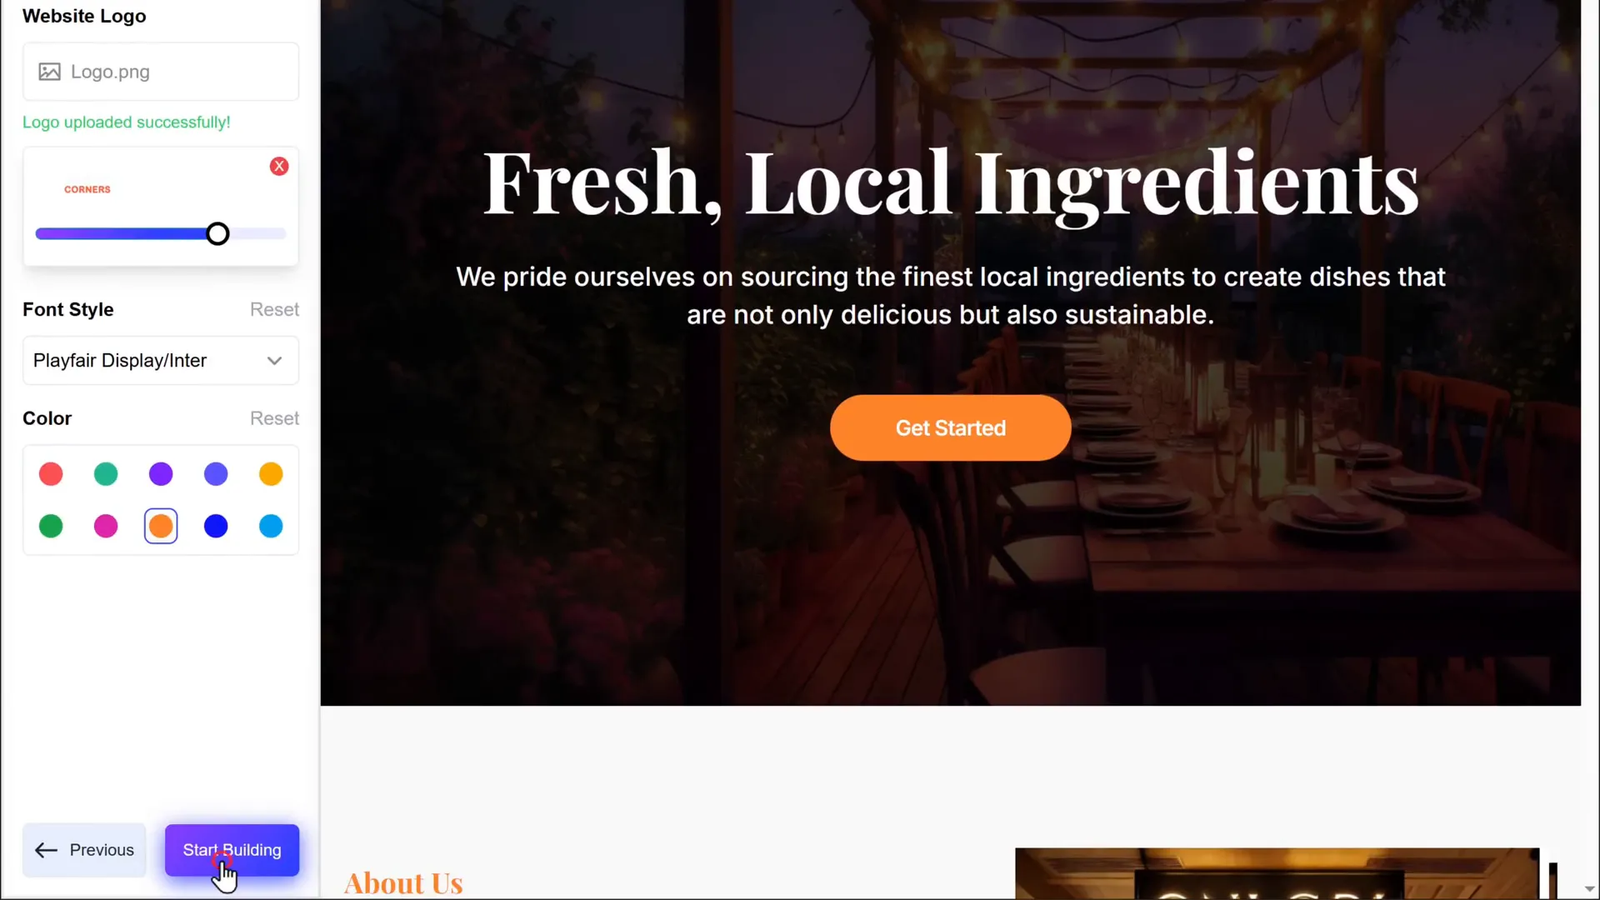
After customizing your template, click Start Building to generate your homepage.
GravityWrite uses the business details and template you selected to create starter content and images.
Review and Save Your Homepage
When the homepage is generated, review its content and design.
According to GravityWrite’s documented workflow, click Keep & Next to accept the generated homepage and continue to the remaining pages.
Generate Additional Pages
You can also create pages such as About Us, Services, and Contact.
- Review the additional pages offered by the builder.
- Choose whether to keep a default page or generate content for your business.
- Use Generate Page when you need a customized page.
- Select Skip for pages you do not need.
- Review your selected pages and import them into WordPress.
The interface may allow you to generate customized images as part of the page creation process.

Understand GravityWrite’s Generation Limits
GravityWrite’s official documentation explains that generated words count toward the allowance of your active plan.
It also states that generated content cannot simply be regenerated within the same completed process. If you need to change generated content through the builder, you may have to restart customization.
After importing pages into WordPress, you can edit their content directly with Elementor instead.
Warning: Review your business details and template selection before generating content. Avoid unnecessary generation attempts, because they may consume your plan allowance.
Keep a Record of Your Website
GravityWrite’s documentation advises users to save their website URL because the builder does not store a history for returning to previous generated websites.
Keep your domain, WordPress login information, and relevant builder details in a secure location.
AI provides the first draft of your website. Your review and real business information turn that draft into a useful website for visitors.
Step 10: Review and Edit Your Website Content
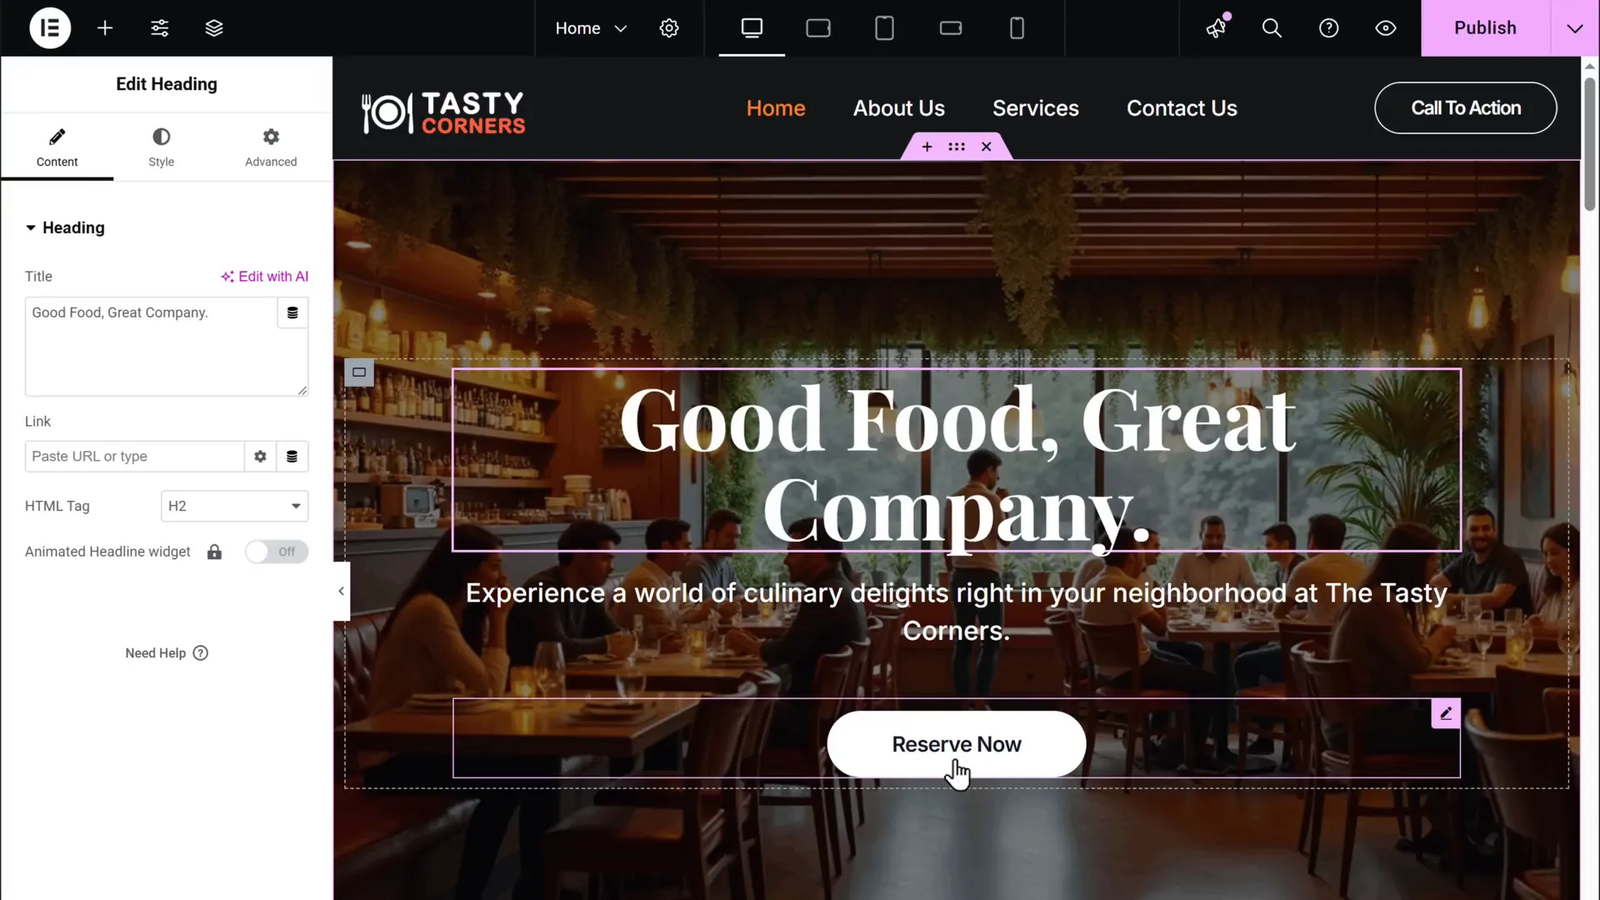
Once your pages are imported, use Elementor to customize the design and content visually.
If Elementor is not already installed, go to Plugins > Add New Plugin, search for Elementor Website Builder, and install and activate the official plugin.
How to Edit Your Imported Pages
- Open your WordPress dashboard.
- Go to Pages > All Pages.
- Choose the page you want to edit.
- Select Edit with Elementor.
- Click a text element to change its wording.
- Select buttons to update their text and links.
- Replace placeholder images with your own licensed images.
- Preview the design on desktop, tablet, and mobile.
- Click Update or Publish, depending on the page status.
If you want to explore other website development methods, see our related WordPress web-tool tutorial. You can also explore WordPress theme and AI development ideas for additional approaches.
What to Review Before Publishing
- Business Accuracy: Check your company name, services, prices, location, and opening hours.
- Brand Voice: Replace generic AI text with language that reflects your business.
- Calls to Action: Use clear button labels such as “Request a Quote” or “Book a Consultation.”
- Images: Remove irrelevant placeholders and use appropriate licensed or original photos.
- Contact Information: Confirm that your email address and phone number are correct.
- Mobile Layout: Review font sizes, image proportions, buttons, and spacing.
- Navigation: Test the menu and footer links.
- Accessibility: Use readable contrast, descriptive alt text, and meaningful link labels.
Make Your Website Mobile-Friendly
Many visitors will use phones to browse your website. Elementor includes responsive editing tools that let you preview and adjust layouts for different screen sizes.
Check for text that is too small, buttons that are hard to tap, and images that overflow the screen.
For detailed instructions, see Elementor’s responsive editing documentation.
How to Ensure Your Website Remains Secure
Website security should be part of your setup process, not an afterthought.
WordPress sites can be targeted by automated login attempts, spam, and attacks against vulnerable software. Good maintenance reduces these risks.
Basic WordPress Security Practices
- Keep Software Updated: Update WordPress core, plugins, and themes when supported updates become available.
- Use Strong Passwords: Create unique passwords for your administrator and hosting accounts.
- Enable Two-Factor Authentication: Add a second login verification method when available.
- Use HTTPS: Confirm your SSL certificate is installed and working.
- Remove Unused Plugins: Delete plugins and themes you no longer need.
- Limit Administrator Access: Give users only the permissions required for their work.
- Install Trusted Security Tools: Consider security monitoring or firewall features appropriate for your site.
- Maintain Backups: Keep regular backups that include both website files and the database.
Back Up Your Website Before Major Changes
A reliable backup helps you recover from errors, failed updates, or accidental changes.
Check whether your host provides automated backups. You can also use a reputable WordPress backup tool if needed.
Store important backups separately from the website when possible, and test that you can restore them.
WordPress recommends backing up your website before major updates. See its official update documentation.
Warning: Do not leave outdated plugins active or reuse weak administrator passwords. If your website shows unexpected redirects, unknown users, or suspicious changes, investigate promptly and seek qualified help when necessary.
Post-Launch Checklist
After building your WordPress website, test it as a visitor would. A good launch involves more than checking whether the homepage looks attractive.
Website Launch Checklist
- Confirm that the homepage opens correctly.
- Test all navigation menus and footer links.
- Check every page on desktop and mobile.
- Test contact forms and verify that emails arrive.
- Review business names, descriptions, and contact information.
- Replace unfinished text and irrelevant placeholder images.
- Confirm that HTTPS works correctly.
- Add an appropriate privacy policy for your data collection practices.
- Check your website’s indexing settings.
- Set SEO titles and meta descriptions for important pages.
- Check that images are appropriately sized for fast loading.
- Confirm your backup system works.
Set Up Basic WordPress SEO
Search engine optimization helps search engines understand your website and can help visitors discover your content.
Start with these basic tasks:
- Choose one clear topic for each important page.
- Write a descriptive page title and meta description.
- Use meaningful headings and natural keywords.
- Add internal links between related pages.
- Write descriptive image alt text where the images convey information.
- Make sure important pages can be accessed through navigation or internal links.
Submit Your Website to Google
You can use Google Search Console to monitor indexing and search performance.
After verifying website ownership, find your WordPress XML sitemap and submit it through the Sitemaps section of Search Console.
Submitting a sitemap helps Google discover URLs, but it does not guarantee that your pages will be indexed or ranked.
Read the official Google sitemap documentation for more information.
Troubleshooting Common Problems
Most beginner website problems involve installation, account connections, plugin compatibility, missing pages, or display issues.
The WordPress Login Page Does Not Open
Make sure WordPress is installed and your domain points to the correct hosting account.
Try the login link provided by your host or the usual /wp-admin path. If your domain was just registered, DNS changes may still be taking effect.
The GravityWrite Plugin Does Not Activate
Confirm that you downloaded the correct plugin ZIP file from the official source.
Check for WordPress or server compatibility problems. If WordPress reports a specific error, review it before changing other plugins.
Contact your hosting provider or GravityWrite support if the problem continues.
GravityWrite Will Not Connect to WordPress
Confirm that you are signed in to the correct GravityWrite account.
Refresh your WordPress dashboard and retry the connection. Check whether security tools or browser settings are interfering with the setup.
If the issue persists, use GravityWrite’s official support documentation rather than repeatedly reinstalling the plugin.
The AI Content Looks Too Generic
Generic content often appears when the website description lacks specific business details.
After importing pages, edit weak sections with Elementor. Add your actual services, customer benefits, examples, and brand voice.
If you decide to restart the GravityWrite generation process, check your remaining plan allowance first.
Some Generated Pages Are Missing
Open Pages > All Pages in WordPress and check whether the pages were imported.
Also check whether you skipped a page during the builder process or left it out of the selected pages.
If a page exists but is not visible in your navigation menu, add it to the appropriate menu.
Elementor Will Not Open
Check whether Elementor is installed and activated. Then confirm that the page can be edited with Elementor.
Try clearing the relevant cache and opening the editor in another browser. Plugin conflicts, server resource limits, and theme-related issues can also affect loading.
Use Elementor’s troubleshooting documentation if the editor continues to fail.
The Website Looks Bad on Mobile
Open the page in Elementor and switch to the mobile preview.
Check font sizes, image spacing, layout direction, and button dimensions. Save the changes and test the page on a real phone when possible.
Bonus Tips for a Professional Website
A website can look attractive but still fail to help visitors. These practices can improve its usefulness and long-term quality.
- Choose a Brandable Domain: Pick a name that customers can remember and type easily.
- Use AI as a Drafting Tool: GravityWrite can help you prepare content, but every important claim needs human review.
- Keep Software Updated: Maintain WordPress and your active plugins.
- Focus on Search Intent: Make sure each page answers the questions your visitors are likely to have.
- Add Genuine Social Proof: Use authentic customer testimonials, project examples, or case studies. Do not invent reviews.
- Make Contact Easy: Provide a clear way to call, email, or send an inquiry.
- Improve Page Speed: Avoid oversized images and unnecessary plugins.
- Use Clear Navigation: Help visitors find important pages without searching through complicated menus.
- Review Your Website Regularly: Update outdated service details, prices, and business information.
Common Mistakes to Avoid
- Publishing Unedited AI Copy: Review generated content for inaccurate or generic claims.
- Choosing an Overly Complex Template: Use a layout that supports your actual business goals.
- Ignoring Mobile Visitors: Check responsive layouts before publishing.
- Forgetting Contact Forms: Test forms and email delivery rather than assuming they work.
- Skipping Backups: Prepare a recovery option before major changes.
- Buying Too Many Plugins: Install tools only when they solve a clear problem.
- Ignoring Renewal Costs: Consider recurring expenses before selecting hosting and premium plans.
Frequently Asked Questions
Do I need any coding knowledge to build a website using this method?
No. WordPress, GravityWrite, templates, and Elementor let you build and customize a website without writing code. You still need to learn basic website settings and how to manage content.
How much does it cost to build a website using this method?
The cost depends on your domain, hosting plan, GravityWrite allowance, and optional premium plugins. Some hosting packages include introductory domain offers, but you should check renewal charges and plan restrictions before buying.
Can I customize my website after it is built?
Yes. After importing your generated pages into WordPress, you can use Elementor to edit text, images, buttons, layouts, and design settings.
Will my website be mobile-friendly?
GravityWrite provides responsive website templates, and Elementor offers mobile editing tools. However, you should still test every page on mobile devices and fix any layout problems.
Can I add a blog or online store to my website?
Yes. WordPress supports blog posts, categories, and other publishing features. You can also install WooCommerce to add online store functionality. More complex stores may require extra setup and configuration.
How do I get help if I run into issues?
Start with your hosting provider’s support resources. You can also review WordPress, GravityWrite, and Elementor documentation. For complex technical or security problems, consult a qualified WordPress professional.
Should I publish AI-generated content without editing it?
No. Review every AI-generated page for accuracy, brand voice, factual claims, contact details, and usefulness. Replace generic content with information that reflects your real business.
Conclusion: Launch Your Website With Confidence
Building a website without coding is easier when you follow a clear process. Start with a memorable domain, choose suitable hosting, install WordPress, and use GravityWrite to generate a website draft.
Once the pages are imported, review and customize them with Elementor. Add your real business information, check the mobile layout, test your forms, and protect the site with updates and backups.
Remember that a generated website is a starting point. Accurate content, useful design, and regular maintenance are what help turn it into a professional website.
If you plan to build a hotel, rental, or restaurant website, read our guide to WordPress booking plugins and themes for additional functionality.
Sources
- WordPress Learn: Dashboard Overview — official guidance for navigating the WordPress dashboard.
- GravityWrite AI Website Builder — official overview of the AI WordPress website builder.
- GravityWrite: How to Use the AI Website Builder Plugin — official instructions for installation, setup, generation, and page importing.
- Elementor Page Builder Plugin — information about Elementor’s WordPress editing features.
- WooCommerce Plugin Directory — official information about WordPress e-commerce functionality.
- WordPress Automated Installation — official instructions for supported WordPress installation methods.
- Google Search Central: Build and Submit a Sitemap — guidance for submitting website sitemaps to Google.
Last Updated on October 31, 2026 by Logan Carter


3 comments