


An AI agent can do more than answer a question. It can read a request, check your approved knowledge base, decide what action is needed, and use connected tools to complete the next step. In this guide, you will build a simple customer support AI agent in Make that can reply to common emails and escalate complex issues to Slack.
Quick Answer
An AI agent uses artificial intelligence to perform specific tasks by connecting to your existing software. You can build one in Make by defining a trigger, uploading a knowledge base, and linking it to specific action tools like email or Slack. This setup automates routine responses while delegating complex issues to your team.
Key Takeaways
- A Make AI agent works best when it has a clear trigger, a focused system prompt, a reliable knowledge base, and limited tools.
- Use the agent for repeatable support tasks, such as answering FAQs, drafting email replies, and routing complex messages.
- Keep sensitive actions restricted. Let the agent escalate refunds, complaints, account issues, and billing problems instead of handling them alone.
- Test the workflow with real support examples before turning it on for customers.
At a Glance
| Time Required | 30 to 60 minutes for a basic email support agent |
| Difficulty | Beginner to intermediate |
| Tools Needed | Make account, AI provider connection, support inbox, FAQ or policy document, and Slack or another escalation channel |
| Best Use Case | Automating routine customer support emails while sending risky or complex cases to a human team |

How the system fits together
Before starting your build in Make, understand how the individual components interact. This modular approach keeps your workflow organized and easier to troubleshoot:
- Trigger: The event that starts the process, such as a new email arriving in your support inbox.
- AI Agent: The central brain that reads the message, retrieves context, decides what to do, and chooses the right tool.
- Knowledge Base: Reference documents like FAQ pages, shipping policies, return rules, product specifications, or internal support notes.
- Tools: Specific scenarios the agent can run to perform actions, such as sending replies or posting alerts in Slack.
- Scenario: The automated pipeline in Make that connects your trigger, agent, filters, and tools.
Think of the setup as a controlled support workflow. The trigger brings the request in, the agent evaluates it, the knowledge base keeps the response accurate, and the tools let the agent take approved actions.
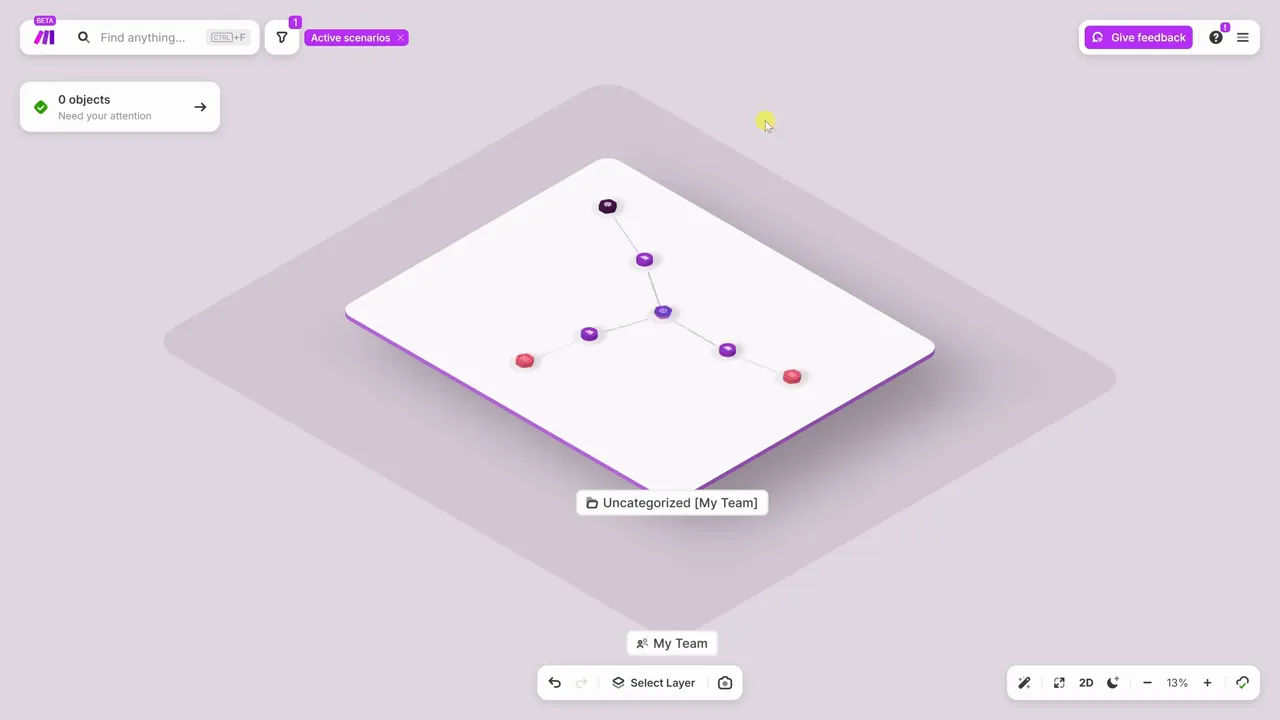
Building your first AI agent
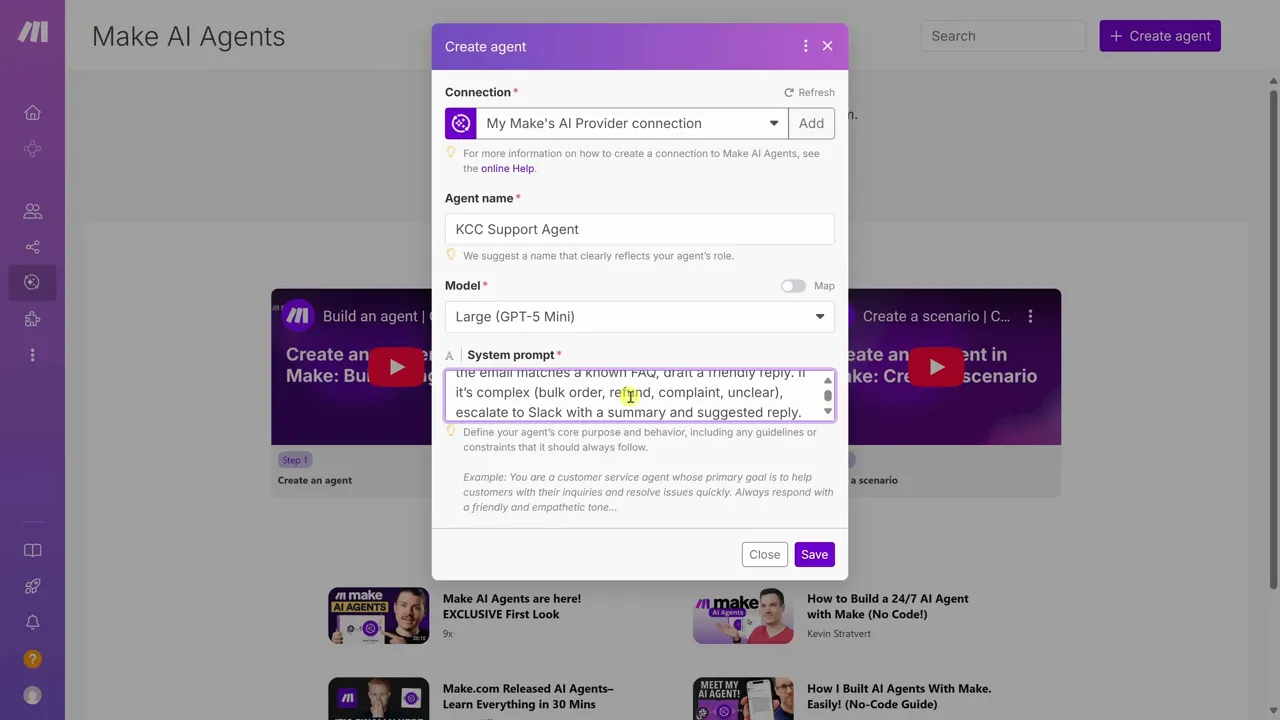
Sign up for Make and open your organization dashboard. Select AI Agents from the menu and click create. The platform gives you a visual interface for building agents without writing code.
Follow these steps to set up your agent:
- Connect your preferred AI provider to access available language models.
- Assign a clear name to your agent, such as Customer Support Agent.
- Select a model that balances speed, cost, and reasoning capability for your support needs.
- Write a system prompt that explains the agent’s responsibilities, decision rules, escalation rules, and output format.
- Test the agent with sample support emails before connecting it to live automations.
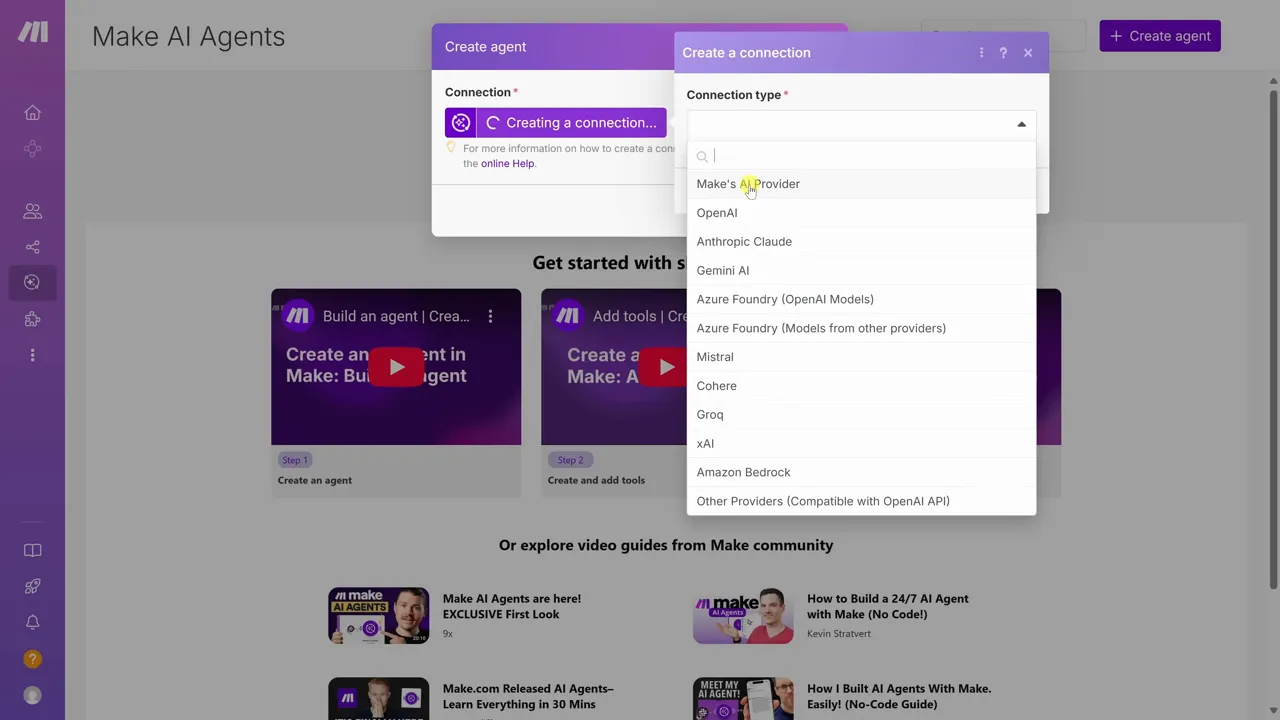
Selecting the AI model
Make integrates with different AI providers. Choose a model based on the complexity of your support requests. A simple FAQ workflow may not need the most advanced model, while billing questions, policy interpretation, or multi-step requests may need stronger reasoning.
When comparing models, consider:
- Reasoning quality: Can the model understand messy customer emails and choose the right next step?
- Speed: Will customers receive replies quickly enough?
- Cost: Does the price per request make sense for your support volume?
- Context window: Can the model handle long emails, order details, and relevant policy text?
- Reliability: Does the model follow your prompt and formatting rules consistently?
Prioritize OAuth for connected apps like Slack or Gmail when available instead of relying on static API keys. OAuth-based connections are easier to manage and reduce the risk of exposed credentials.
Refining your system prompt
Your system prompt sets the boundaries for your agent. Be direct about what the agent can do, what it must avoid, and how it should format its output. A vague prompt creates inconsistent replies, while a specific prompt makes the workflow easier to test and improve.
Example prompt instructions:
Manage support emails for the business. When an email arrives, consult the FAQ. If a match exists, draft a friendly HTML response. For complex issues like refunds, complaints, legal concerns, damaged orders, or billing problems, provide a structured summary and escalate the message to the team via Slack. Never process financial transactions, refunds, account changes, or legal claims.
Warning: Do not give the agent open-ended permission to send refunds, change accounts, approve discounts, delete records, or make financial decisions. Keep risky actions behind human approval.
Adding a knowledge source
An agent performs best when it has relevant context. Upload documents like FAQs, company policies, product specifications, refund rules, delivery timelines, and troubleshooting steps to serve as the agent’s knowledge base.
A strong knowledge base prevents the agent from guessing. It also gives your support replies a consistent tone and keeps answers aligned with your actual business rules.

Preparing your data
Organize your information into clear question-and-answer pairs for the best results. Keep each answer concise, specific, and current. Avoid burying important policy details inside long paragraphs.
Good knowledge base entries usually include:
- Customer-facing questions written in plain language
- Clear answers with exact rules, time frames, and limits
- Escalation notes for edge cases
- Approved wording for sensitive topics
- Last-updated dates for policies that may change
After uploading your documents, run test queries inside the agent configuration. Confirm that the agent extracts the right information, follows your formatting rules, and refuses to answer when the knowledge base does not support a confident response.
Pro Tip: Add escalation instructions directly inside your FAQ file. For example, mark refund disputes, chargebacks, angry complaints, and damaged orders as “send to human review.”

Setting up the automation trigger
A trigger acts as the starting point for your Make scenario. For a support workflow, configure an email trigger that watches for new messages in your support inbox.
The trigger should bring in enough data for the agent to understand the request. At minimum, pass the sender address, message ID, subject line, email body, and any useful metadata such as the inbox folder or label.

Configuring trigger filters
Use filters to ensure the scenario only processes relevant messages. This prevents the agent from responding to newsletters, system alerts, spam, internal notifications, or messages that should never receive an automated reply.
Useful filters include:
- Inbox or folder: Process only emails that arrive in your support inbox.
- Subject rules: Exclude automated receipts, delivery alerts, and no-reply messages.
- Sender rules: Skip internal team members or known system addresses.
- Attachment checks: Escalate messages with invoices, legal notices, or sensitive documents.
- Keyword filters: Escalate messages containing words like refund, chargeback, complaint, urgent, attorney, damaged, or cancel.
Note: Filters are not only for organization. They also reduce automation errors by keeping the agent focused on messages it is allowed to handle.
Integrating the agent into your workflow
Add your AI agent module to the scenario immediately after the email trigger. Map the necessary fields, such as sender address, subject, message ID, and body content, into the agent module. This allows the AI to see the full request and generate an appropriate response or escalation summary.
Do not pass unnecessary data into the agent. Clean, focused inputs make the workflow more predictable and easier to debug.

Optimizing the message payload
Keep the data passed to the agent clean and minimal. Include the raw email body for analysis, but remove unnecessary quoted threads, signatures, tracking links, and duplicated text when possible.
Standardizing the output format also helps later modules work correctly. For example, ask the agent to return one of two paths:
- Reply path: A ready-to-send HTML email response for simple FAQ matches.
- Escalation path: A short summary, urgency level, customer email, subject, and reason for human review.
You can also ask the agent to include a confidence level. If confidence is low, the scenario should send the message to your team instead of replying automatically.

Building agent tools
Tools enable your agent to perform actions. Build separate scenarios for each action to maintain flexibility. For this project, you need an email reply tool and a Slack escalation tool.
Keeping tools separate gives you more control. You can test, pause, update, or restrict one action without breaking the whole agent workflow.

Creating the email reply tool
Define inputs for the message ID and the reply text. Use the Outlook or Gmail module to send the response. Ensure the module is configured to process HTML so your formatting remains intact.
The email reply tool should only receive approved output from the agent. To reduce risk, keep the tool limited to replying inside the same thread rather than starting new conversations or emailing unrelated addresses.
A simple reply tool usually needs these inputs:
- Message ID: The original email thread or message to reply to.
- Reply body: The HTML response generated by the agent.
- Recipient check: A validation step that confirms the response goes back to the original sender.
- Fallback path: An escalation route if required fields are missing.

Creating the Slack escalation tool
Build a scenario that sends messages to your team’s Slack channel when the AI identifies a complex issue. Include the email subject, body summary, customer address, urgency level, and reason for escalation so your team can respond quickly.
A strong Slack escalation message should include:
- Customer name or email address
- Email subject
- Short summary of the issue
- Why the agent escalated it
- Suggested next action
- Link or reference to the original message, when available
The safest support agent is not the one that answers everything. It is the one that knows when to stop and send the issue to a person.

Granting agent permissions
Finalize your agent by opening the configuration settings and selecting Add Tools. Select the email and Slack tools you created. Assign descriptive names to each tool so the agent understands exactly when to call it during a conversation.
Use names that describe the action clearly, such as:
- Send Approved Support Reply: Use only when the answer is fully supported by the FAQ and safe to send.
- Escalate Support Email to Slack: Use when the email involves refunds, complaints, billing, legal issues, damaged orders, unclear context, or low confidence.
Write tool descriptions in plain language. The agent should know what each tool does, what inputs it needs, and when it must not use the tool.
Testing the AI agent before launch
Before turning on the workflow, test it with realistic support emails. Include simple questions, confusing requests, angry complaints, refund requests, and messages that do not match your FAQ.
Your test set should include:
- A simple store-hours question that should receive an automated reply
- A shipping policy question that should use the knowledge base
- A refund request that should escalate to Slack
- A complaint with emotional language that should escalate
- A vague email with missing details that should ask for clarification or escalate
- A spam or newsletter message that should be ignored by filters
Review the scenario history after each test. Check whether the agent selected the correct tool, used the right source information, followed your formatting rules, and avoided actions outside its permissions.
Monitoring and improving the workflow
Once your agent is connected to its tools, it can manage incoming requests with minimal supervision. Still, you should monitor the scenario logs during the first few days to ensure the agent follows your prompt correctly.
Track these signals:
- Wrong tool use: The agent replies when it should escalate, or escalates simple FAQ questions too often.
- Low-quality replies: Responses sound generic, miss context, or fail to answer the customer’s question.
- Knowledge gaps: The agent cannot answer common questions because the FAQ is incomplete.
- Formatting issues: HTML replies break, Slack messages lack key details, or fields map incorrectly.
- Cost spikes: The model is too expensive for the volume or complexity of the task.
Use these findings to improve your FAQ, adjust your system prompt, add filters, or narrow the agent’s permissions. Always review important customer interactions to maintain quality control.
Common mistakes to avoid
AI agents are powerful, but small setup mistakes can create poor support experiences. Avoid these issues when building your first workflow:
- Using a vague system prompt: Give the agent specific rules, not broad instructions like “handle support.”
- Skipping escalation rules: Clearly define which topics require human review.
- Uploading messy documents: Clean FAQs and policy files produce better answers than scattered notes.
- Giving too many permissions: Start with limited tools and expand only after testing.
- Ignoring logs: Early scenario history helps you catch bad routing, missing fields, and weak replies.
- Letting the agent guess: Tell it to escalate or ask for clarification when information is missing.
Sources
- Make AI Agents — supports the general workflow for creating agents and connecting them to automation tools.
- Make Gmail integrations — supports using Gmail modules for email-based automation workflows.
- Make Slack integrations — supports using Slack modules for team notifications and escalations.
- Notion AI agent guide — related internal resource for understanding AI agent workflows.
- Zapier vs n8n comparison
Last Updated on June 27, 2026 by Logan Carter

