


Building a custom WordPress theme can feel difficult when you are not a developer, but AI coding tools can make the first draft much easier. In this test, I used the free MiniMax M2 model through OpenRouter with KiloCode to generate a working WordPress theme, repair missing files, and test everything in a local WordPress environment before using it on a real site.
Quick Answer
You can build a full WordPress theme for free by using the MiniMax M2 model through OpenRouter and KiloCode. The AI can create the main theme scaffold, but you still need to test it locally, fix missing files, correct asset paths, and confirm that posts, images, menus, and templates work before publishing.
Key Takeaways
- A clear, structured prompt helps MiniMax M2 generate a usable WordPress theme scaffold faster.
- AI-generated themes still need manual testing because templates, image paths, or WordPress functions may be missing.
- LocalWP gives you a safe place to preview, debug, and repair the theme before using it on a live website.
- KiloCode makes the workflow easier because you can send repair prompts and ask the model to update specific files.
- The best results come from short testing cycles: generate, install, inspect, copy the error, prompt again, and retest.
At a Glance
| Time Required | About 1 to 3 hours for a first working test, depending on errors and theme complexity. |
| Difficulty | Beginner to intermediate. You do not need to write every file yourself, but you should know how to copy files, read errors, and test a WordPress theme. |
| Tools Needed | OpenRouter, MiniMax M2, KiloCode, LocalWP, VS Code, WordPress sample posts, and a few test images. |
| Cost | The AI model test can be free when using the MiniMax M2 free option through OpenRouter, although platform limits and availability can change. |
Required Tools for WordPress Theme Development
Before you generate the theme, set up a local WordPress site and prepare the tools that connect your prompt to the AI model. This keeps the workflow safer because you can test the theme before it reaches a live server.
- OpenRouter — MiniMax M2 (free)
- KiloCode — connects your prompts to the OpenRouter API.
- Local WordPress (LocalWP) — hosts and previews the theme on your machine.
- VS Code — manages and edits the generated theme files.
- Sample content — provides test posts, text, and images to check your layout.

Before You Generate the Theme
A good AI theme build starts with a clean setup. Create a fresh local WordPress site first, then confirm that you can open the theme folder from your computer. This makes it easier to move files, rename assets, and review generated PHP, CSS, and JavaScript.
You should also decide what kind of theme you want before sending the first prompt. A vague request like “make a WordPress theme” may create generic files. A better request gives the model a niche, folder name, color palette, page structure, template list, and exact features.
Note: Treat the first AI output as a draft, not a finished production theme. Always review the generated files before using them on a public website.
Structuring Your Prompt and Theme Niche
A coherent theme needs a specific focus. For this test, I chose the niche of simple tofu recipes. The prompt included instructions for the folder name, theme title, color palette, asset directory, and required templates such as index.php, header.php, footer.php, style.css, functions.php, and single.php.
The prompt also asked the model to keep the design simple, responsive, and suitable for recipe content. This helped the model understand the site structure instead of creating a random blog layout.

Example Prompt Structure
Use a prompt that gives the model clear boundaries. You can adapt this structure for your own theme:
- Theme purpose: Explain the niche and audience.
- Folder name: Tell the model the exact theme folder name.
- Required files: Request index.php, header.php, footer.php, functions.php, style.css, single.php, archive.php, and screenshot support if needed.
- Design rules: Include colors, typography style, spacing, and mobile behavior.
- WordPress features: Ask for menus, featured images, post thumbnails, excerpts, and widget areas only when you need them.
- Testing goal: Tell the model the theme must activate in WordPress without fatal errors.
Pro Tip: Ask for the file tree first, then ask the model to generate or repair files one at a time. This makes debugging easier than pasting a huge mixed output.
Generating the Theme Through KiloCode
After connecting KiloCode to OpenRouter and selecting the free MiniMax M2 provider, the model generated the core theme files. The initial output included a hero illustration, an FAQ section, and a list of recipe posts. That gave the theme enough structure to activate and preview locally.
The first result was not perfect, but it was useful. It created a strong starting point and made it clear which parts needed follow-up prompts.

Tip: Ensure your theme declares support for featured images in your functions.php file so your posts display correctly. WordPress calls this feature featured images or post thumbnails.
Installing the AI-Generated Theme in LocalWP
Once the files are generated, place the theme folder inside your local WordPress installation. In most local setups, the theme goes inside the wp-content/themes/ directory. After that, open your WordPress dashboard, go to Appearance, and activate the new theme.
If WordPress shows a fatal error during activation, do not panic. Copy the exact error message and send it back to KiloCode. Ask the model to identify the problem and return the corrected file only. This keeps each repair focused.
Warning: Do not test an unreviewed AI-generated theme on a live site first. A broken PHP file can take the site down until the file is repaired or removed.
Debugging Common AI Theme Issues
AI models rarely produce perfect code on the first attempt. During this build, I encountered two main problems:
- Missing hero image path: The theme expected an image file at
assets/images/hero. I generated the image and placed it into the required folder. - Missing single post template: The
single.phpfile was absent after the first pass. I requested this file from KiloCode, and the model provided a functional template with related posts and navigation links.
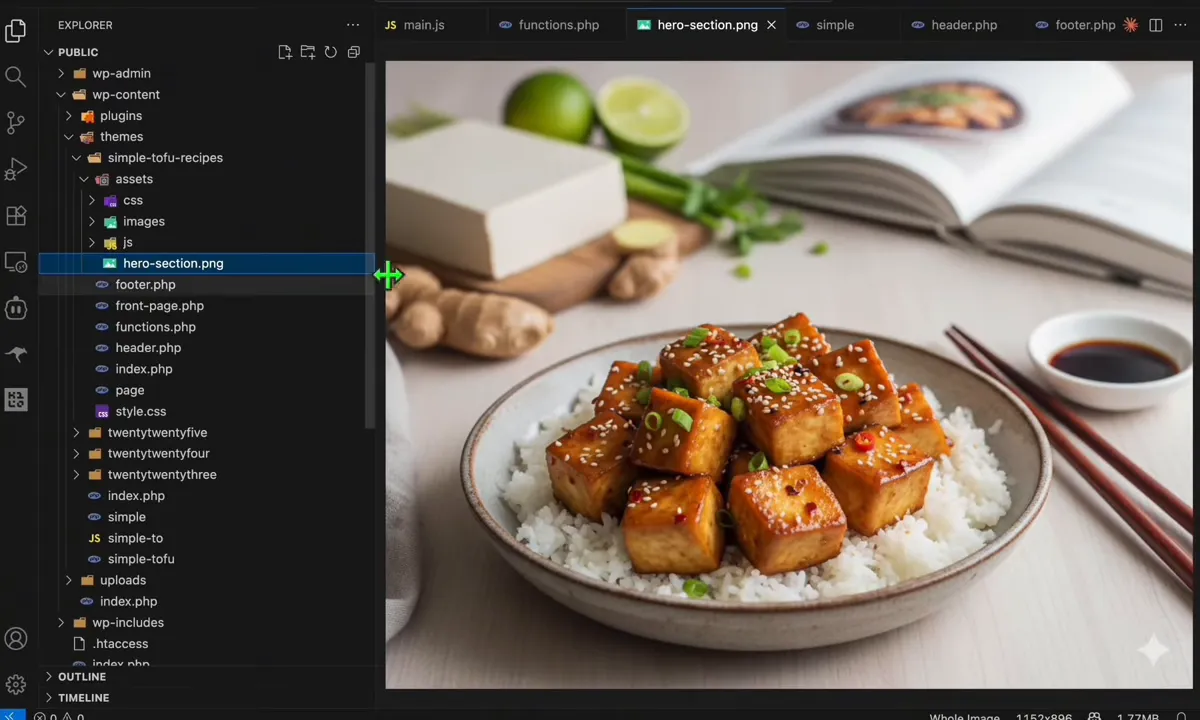
When errors appeared, I copied the error message into KiloCode and asked MiniMax to debug the specific file. Because the model was available as a free option for this test, I could iterate multiple times without adding cost. Always consult a qualified developer if you encounter complex server-side errors, security warnings, or database-related issues.
Common Problems to Check
- Theme does not activate: Check for PHP syntax errors, missing files, or broken function names.
- Images do not load: Confirm that image files exist in the path used by the theme.
- Featured images are missing: Confirm that
add_theme_support('post-thumbnails')exists in functions.php. - Posts look broken: Check single.php, archive.php, index.php, and template loop markup.
- Menu does not appear: Confirm that the theme registers a menu location and that you assigned a menu in WordPress.
- Mobile layout breaks: Review CSS media queries and test several viewport widths.
Verifying the Theme With Sample Content
After the theme activates, test it with real-looking content. Empty WordPress sites can hide layout problems because there are no long titles, featured images, categories, or post pages to inspect.
Follow these steps to make sure your templates render accurately:
- Create two SEO-friendly posts with unique titles, body text, and featured images.
- Paste the content into new WordPress posts and set your images.
- Publish the posts to verify that the archive and single templates look correct.
- Open the home page, category pages, and single post pages.
- Check the layout on desktop, tablet, and mobile screen widths.


Why Check Your Theme Against Mobile Devices?
AI-generated code often starts with desktop-first styling. You must verify that your new theme remains readable on smartphones. Check your local site using browser developer tools to confirm that text wraps correctly, images scale down, menus collapse properly, and buttons remain easy to tap.
Pay close attention to the header, navigation menu, hero section, recipe cards, image captions, and footer. These areas often break first on small screens because they use wider layouts, large images, or multiple columns.
Clean Up the Code Before Using the Theme
Before moving the theme to a live website, review the generated code. AI may create files that work visually but still need cleanup. Look for unused scripts, broken image paths, hardcoded demo text, missing escaping functions, and repeated CSS rules.
For WordPress themes, it is also smart to compare your generated files with official WordPress theme development guidance. At minimum, check the template structure, post loop, enqueue method, featured image support, and menu registration.
Note: A theme can look good in the browser and still contain weak code. Visual testing and code review should both be part of the workflow.
The Best Workflow for AI WordPress Theme Building
The smoothest workflow is simple: start small, test often, and repair one issue at a time. Instead of asking the model to create an advanced theme with every feature in one pass, begin with the basic file structure and expand from there.
- Write a specific theme prompt. Include the niche, file list, layout needs, and design style.
- Generate the first scaffold. Save the files in a clean theme folder.
- Activate the theme locally. Use LocalWP or another local WordPress setup.
- Record every issue. Copy exact errors, missing file names, and broken paths.
- Repair in short cycles. Ask the model to fix one file or one issue at a time.
- Test with sample posts. Use featured images, categories, long titles, and real body text.
- Review mobile layout. Check menus, images, spacing, and text size.
- Clean the final files. Remove demo content and check the theme before production use.
Final Verdict
The MiniMax M2 free model, when used through KiloCode, can create a professional-looking WordPress theme with functional templates. The main benefit is speed. You can move from a blank idea to a working local preview without writing every file from scratch.
Success still depends on your ability to test, spot issues, and use trial-and-error prompts to repair paths, templates, and missing logic. This workflow is best for prototypes, learning projects, niche test sites, and early design drafts. For client work, high-traffic sites, ecommerce, or production projects, the final code should be reviewed carefully before launch.
- Strengths: It provides a complete scaffold and responds well to specific debugging prompts.
- Limitations: You must handle manual uploads, file placement, local testing, and code review yourself.
Frequently Asked Questions
What files does MiniMax M2 generate for a WordPress theme?
The model can generate a theme folder containing common WordPress files such as index.php, header.php, footer.php, style.css, and functions.php. If a template is missing, ask the model to generate that specific file and then test it again in your local WordPress setup.
Is there a cost to generate a theme this way?
In this workflow, the theme was generated with the free MiniMax M2 option through OpenRouter. Availability, rate limits, and platform terms can change, so always check the current model page before starting a new build.
Which tools are necessary for this workflow?
You need access to OpenRouter, a coding interface like KiloCode, a local WordPress setup such as LocalWP, and a code editor such as VS Code. Sample posts and images also help you test the layout properly.
How do I address missing files or code errors?
Copy the exact error message into your prompt window. Ask the model to correct the logic, repair the file, or add the missing template. Then replace the file locally and test the theme again.
Does this workflow support automated publishing?
It can support more automated workflows if you connect live credentials, but manual local testing gives you better control at the beginning. For a first build, generate and repair the theme locally before uploading anything to a live server.
Can a beginner use this workflow?
Yes, a beginner can use it for learning and prototyping. However, you should still understand basic WordPress folders, theme activation, file editing, and local testing so you can fix simple problems when they appear.
Should I use an AI-generated theme on a live website?
You can use one after proper testing and review, but you should not upload it blindly. Check the code, confirm mobile behavior, test posts and images, and ask a developer to review the theme if the site is important, commercial, or client-facing.
Related Articles
Sources
- OpenRouter MiniMax M2 model page — supports the model and provider workflow discussed in this article.
- MiniMax M2 GitHub repository — provides project information for the MiniMax M2 model.
- WordPress Theme Handbook — supports general WordPress theme development structure and best practices.
- WordPress Featured Images Documentation — supports the featured image and post thumbnail guidance.
Generating a WordPress theme with a free AI model can save time and lower the barrier to custom site design. Start with a focused prompt, build the scaffold in a local environment, debug with short follow-up prompts, and test the layout thoroughly before going live. The result is not a replacement for careful review, but it is a practical way to create and improve a custom WordPress theme without starting from an empty folder.
Last Updated on June 28, 2026 by Logan Carter

