


Creating a professional directory website might seem difficult, but with the right tools and a clear step-by-step method, you can launch one quickly—even if you’re a beginner. In this detailed 2025 guide, inspired by a tutorial from Earnings Circuit AI, you’ll learn how to build a directory website in WordPress using WP Sandbox, Local WP, AI-generated themes, and business data scrapers. Whether you’re building a local service directory or a niche listing platform, this walkthrough will help you go from setup to live deployment—without needing to write any code.
Let’s dive into the full process to build your directory website, leveraging powerful tools like WP Sandbox, Local WP, custom WordPress themes, and data scraping from business listings.
Step 1: Set Up a Temporary WordPress Environment 🖥️
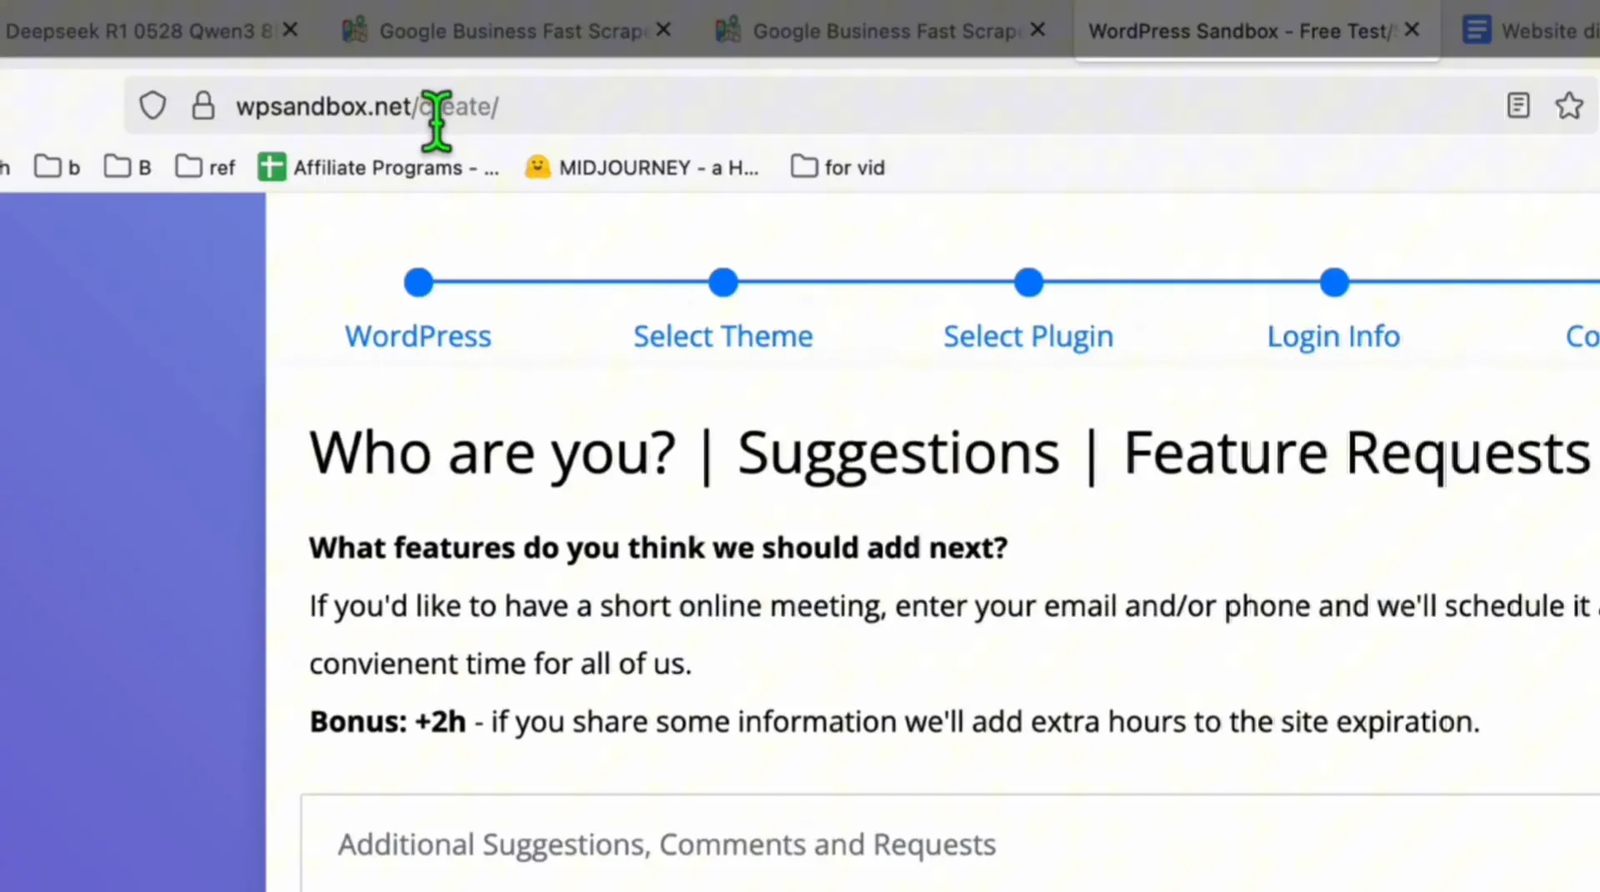
The first step in launching your directory website is to create a temporary WordPress installation that will serve as your staging environment. This allows you to build and test your directory without impacting any live sites.
For this, I recommend using WP Sandbox, a free online platform that lets you spin up a WordPress site instantly. Head over to wpsandbox.net and create a new WordPress instance by clicking through the setup wizard.
Once the sandbox is ready, you’ll receive login credentials to access your WordPress admin dashboard. This temporary site will be the foundation where we will build the directory.
Using a sandbox environment is essential for experimentation and development. It keeps your main website safe while allowing you to customize the directory theme and import data freely.
Step 2: Prepare Your Local Development Environment with Local WP 💻
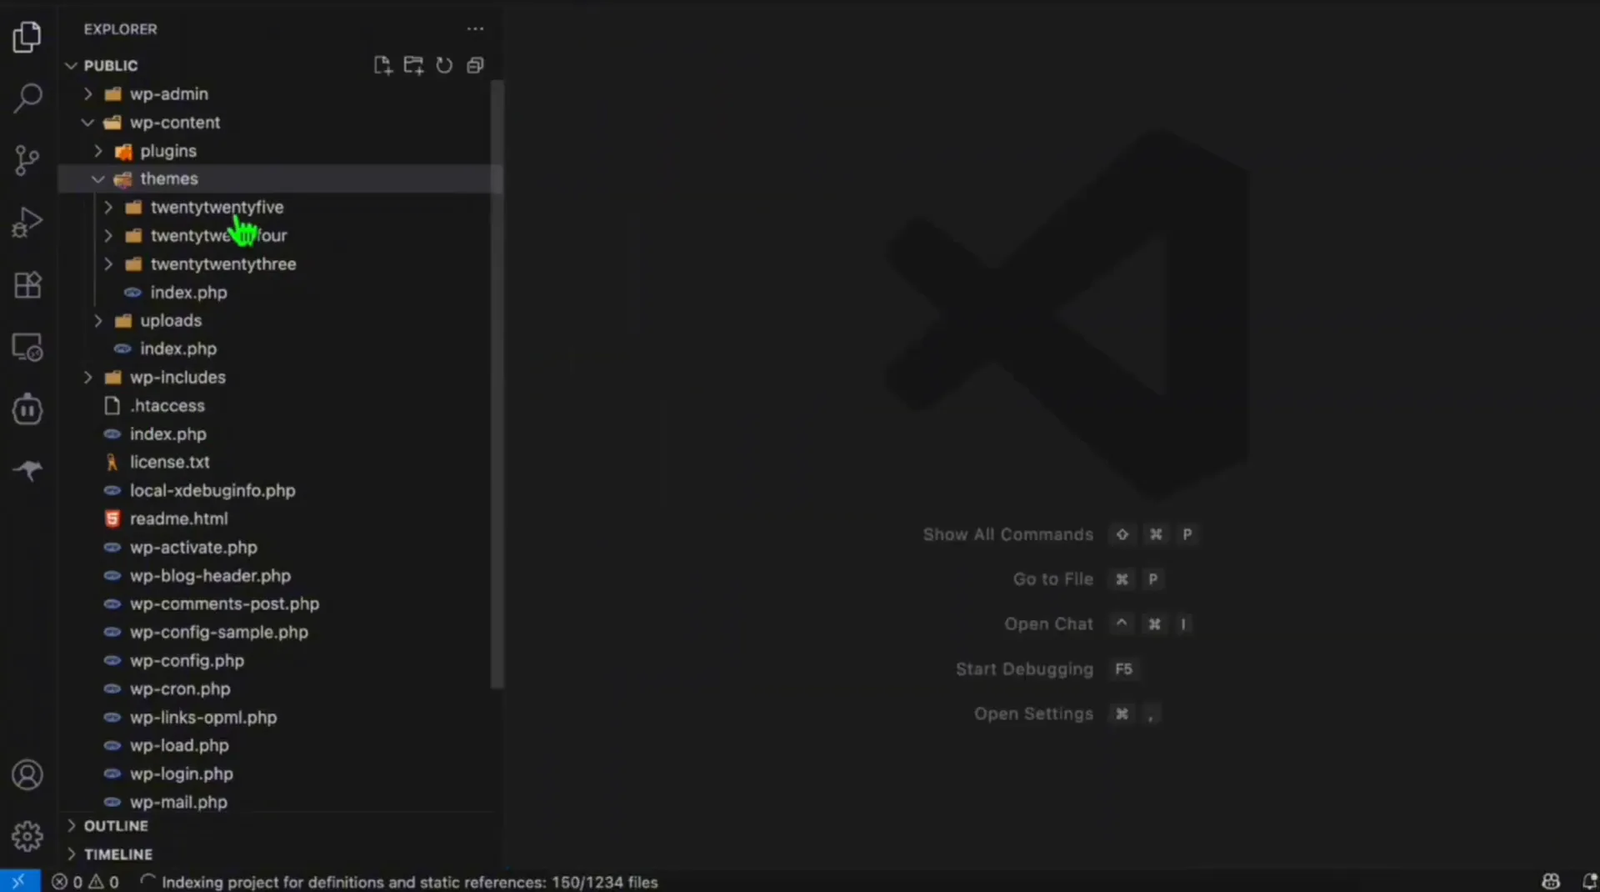
To customize the directory theme efficiently, I suggest working on your local machine. The Local WP software by Flywheel is an excellent choice for this purpose. It lets you run a WordPress site locally on your computer with minimal setup.
Download and install Local WP from localwp.com. After installation, import your temporary WordPress sandbox site or create a fresh local WordPress instance.
Next, open your local WordPress files in your preferred code editor, such as Visual Studio Code. This setup will allow you to edit theme files, plugins, and configurations directly.
Working locally speeds up development and debugging. You can preview changes immediately before deploying them to the live site.
📹 Watch the Full Video Tutorial
Prefer video? Here’s a complete walkthrough showing how to build your directory website from start to finish:
Step 3: Gather Directory Listings Using a Business Data Scraper 🔍
A directory website thrives on the quality and relevance of its listings. The next step is to gather accurate, niche-specific business data to populate your directory. For this example, we’ll focus on building a directory for Notary Public services in the United States.
To collect the data, use a reliable business listing scraper like GFASTSCRAPER. This cloud-based tool allows you to extract detailed business information directly from Google Maps and other public sources.
After signing in, navigate to the “Scrape Business Listings” section. Choose your category (e.g., “Notary Public”), set the country to United States, and limit the number of results to 1,000 for a sample directory. To capture listings from across the country, avoid narrowing it down by specific state or city.
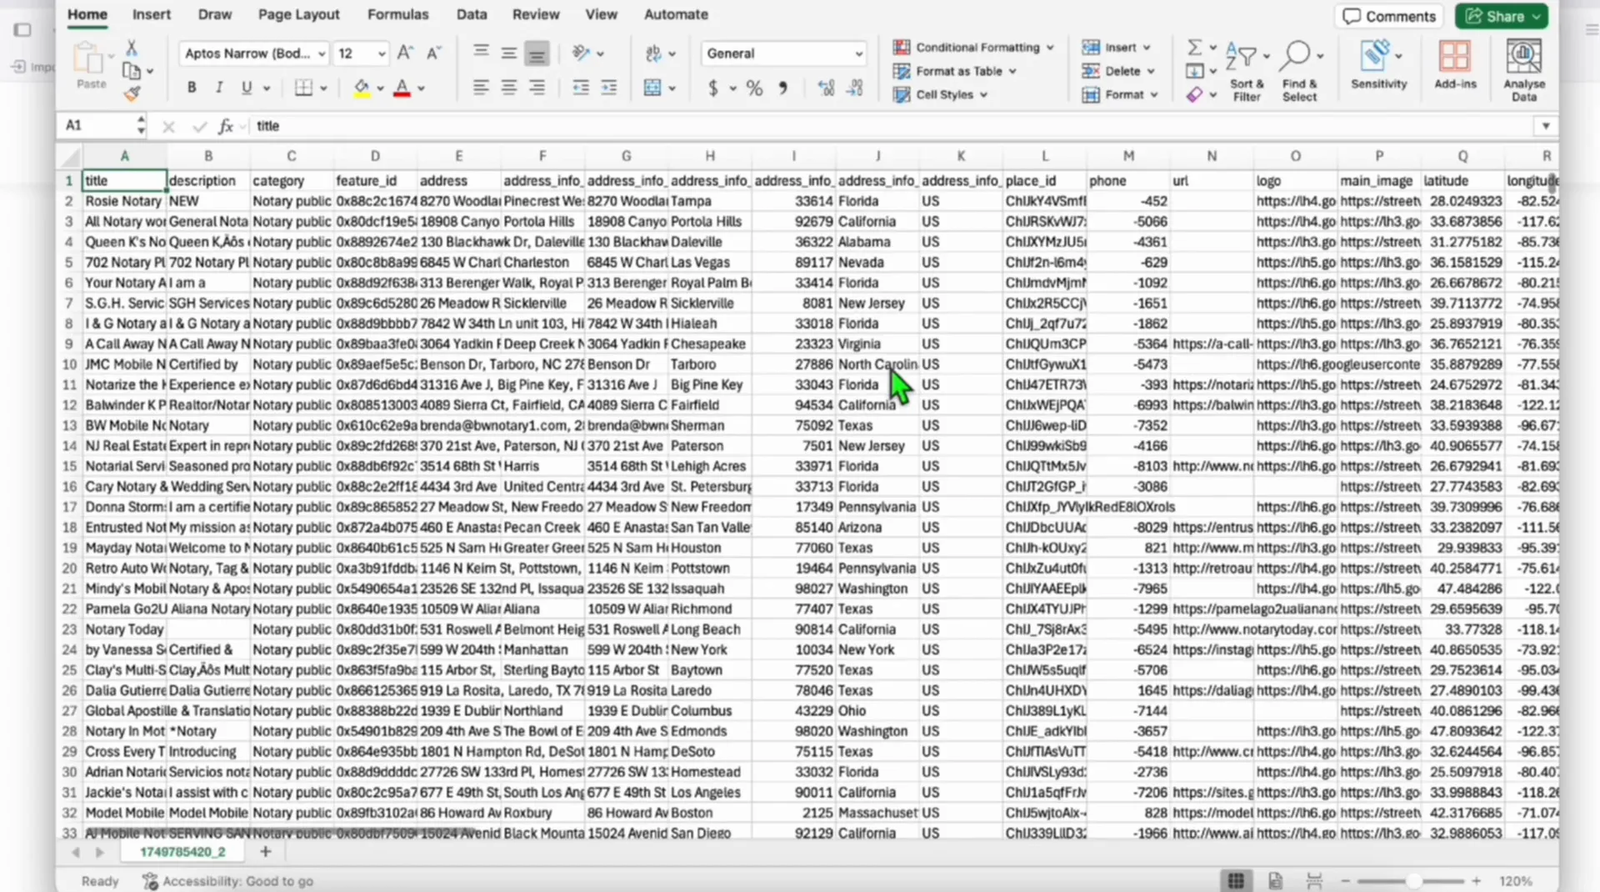
Once configured, start the scraping process. The tool will gather business names, addresses, phone numbers, websites, and even images—providing you with a rich dataset to power your directory site.
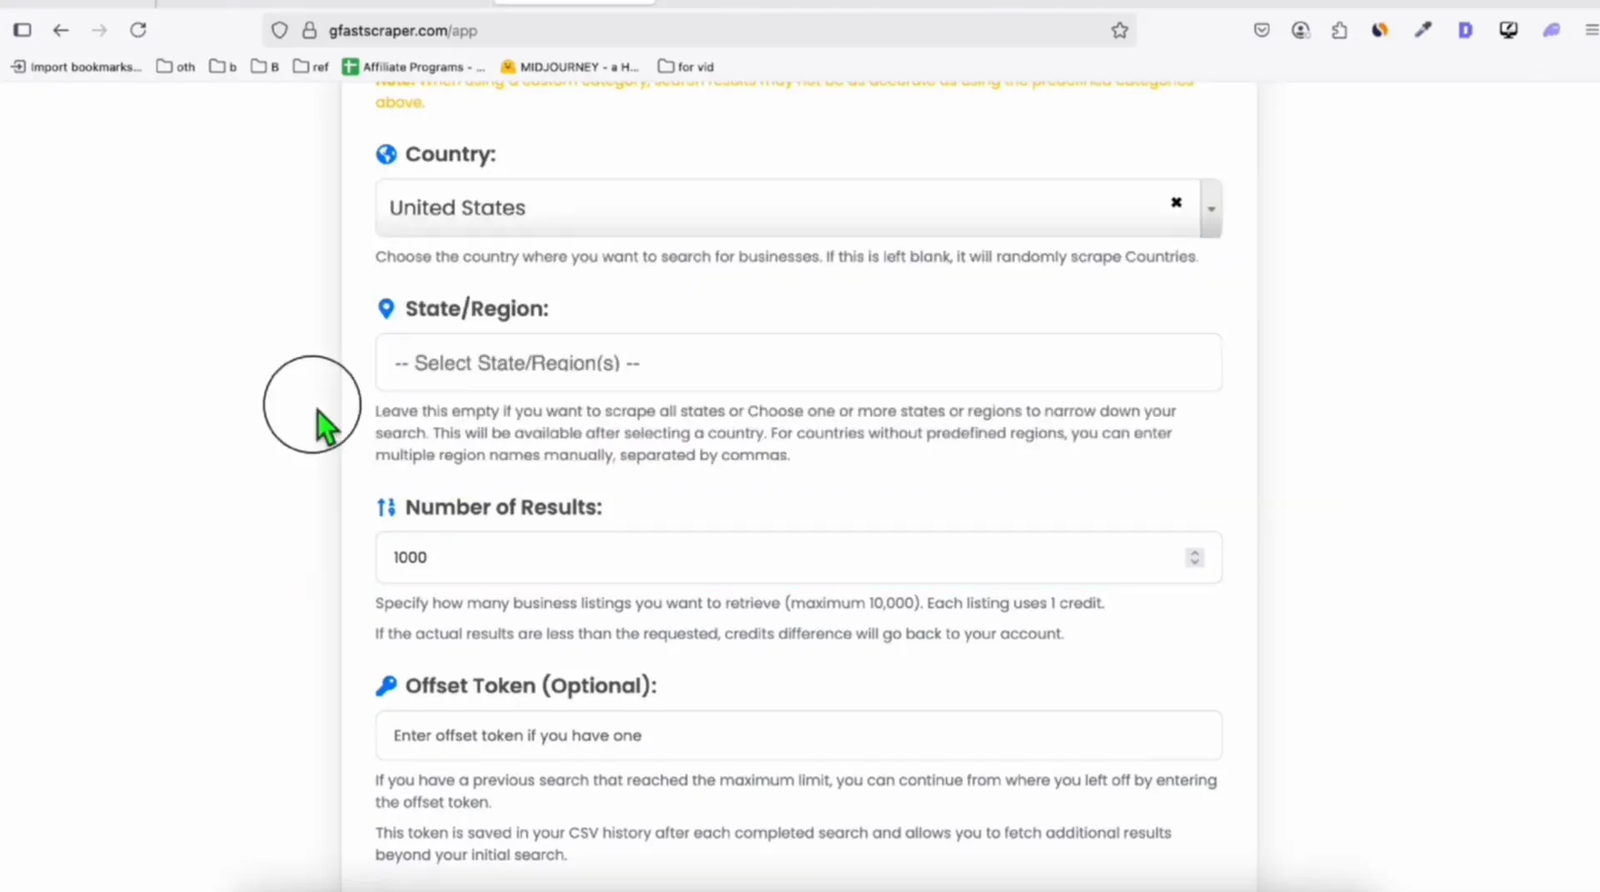
If you want to build a larger directory, you can increase the maximum results to 10,000. The scraper will give you a token that helps avoid duplicate listings in subsequent scrapes.
Once you start the scraping process, the tool will fetch business data including names, addresses, phone numbers, images, and more.
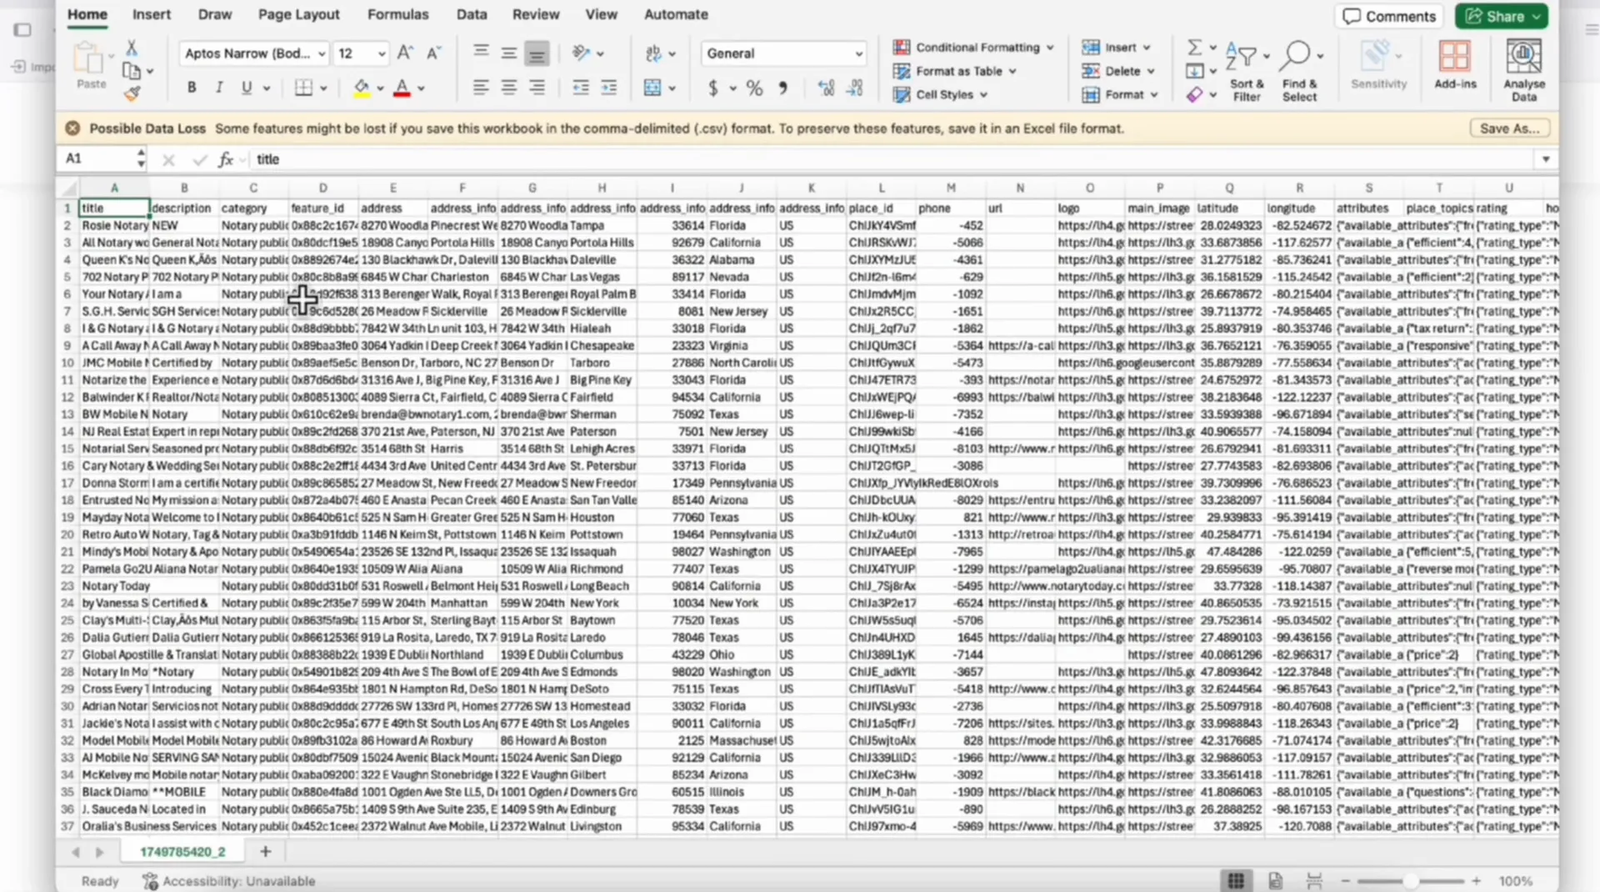
After scraping, download the data as a CSV file. This raw data forms the core content of your directory.
Step 4: Clean and Format Your Listing Data for Upload 🧹
Before importing the scraped data into WordPress, it’s crucial to clean and format it properly. Open the CSV file in Microsoft Excel or a similar spreadsheet application.
Save the file as an .xlsx Excel file to reduce file size and improve compatibility with import plugins.
One important step is to standardize the region or state names. Often, scraped data contains inconsistent state abbreviations (like “AZ” for Arizona) mixed with full state names (like “California”).
Sort the “Region” column alphabetically and carefully replace all abbreviations with their full state names. This ensures your directory taxonomy is consistent and user-friendly.
While this step can be time-consuming, it is essential for a professional directory. For demonstration purposes, you can skip this, but for a live site, always clean your data thoroughly.
Step 5: Generate a Custom Directory Theme Using AI 🖌️
To make your directory visually appealing and functional, you need a custom WordPress theme tailored to your niche. I use an AI-powered prompt to generate a complete theme structure based on my directory requirements.
Copy the custom prompt provided below into a text editor like Notepad. This prompt specifies the folder name, site title, custom post type, taxonomy, and other configurations. For example, the folder name is notarypublicteam, site title is “Notary Public USA,” and the custom post type is “notarypublic”.
Example Prompt Snippet:
Generate a full custom WordPress theme with the following specifications:
Folder Name: notarypublicteam
Site Title: Notary Public USACustom Post Type:
– Post Key: notarypublic
– Singular Label: Notary Public
– Plural Label: Notary Public Listings
– Supports: title, editor, thumbnail, custom fieldsCustom Taxonomy:
– Key: state
– Label: State
– Hierarchical: true
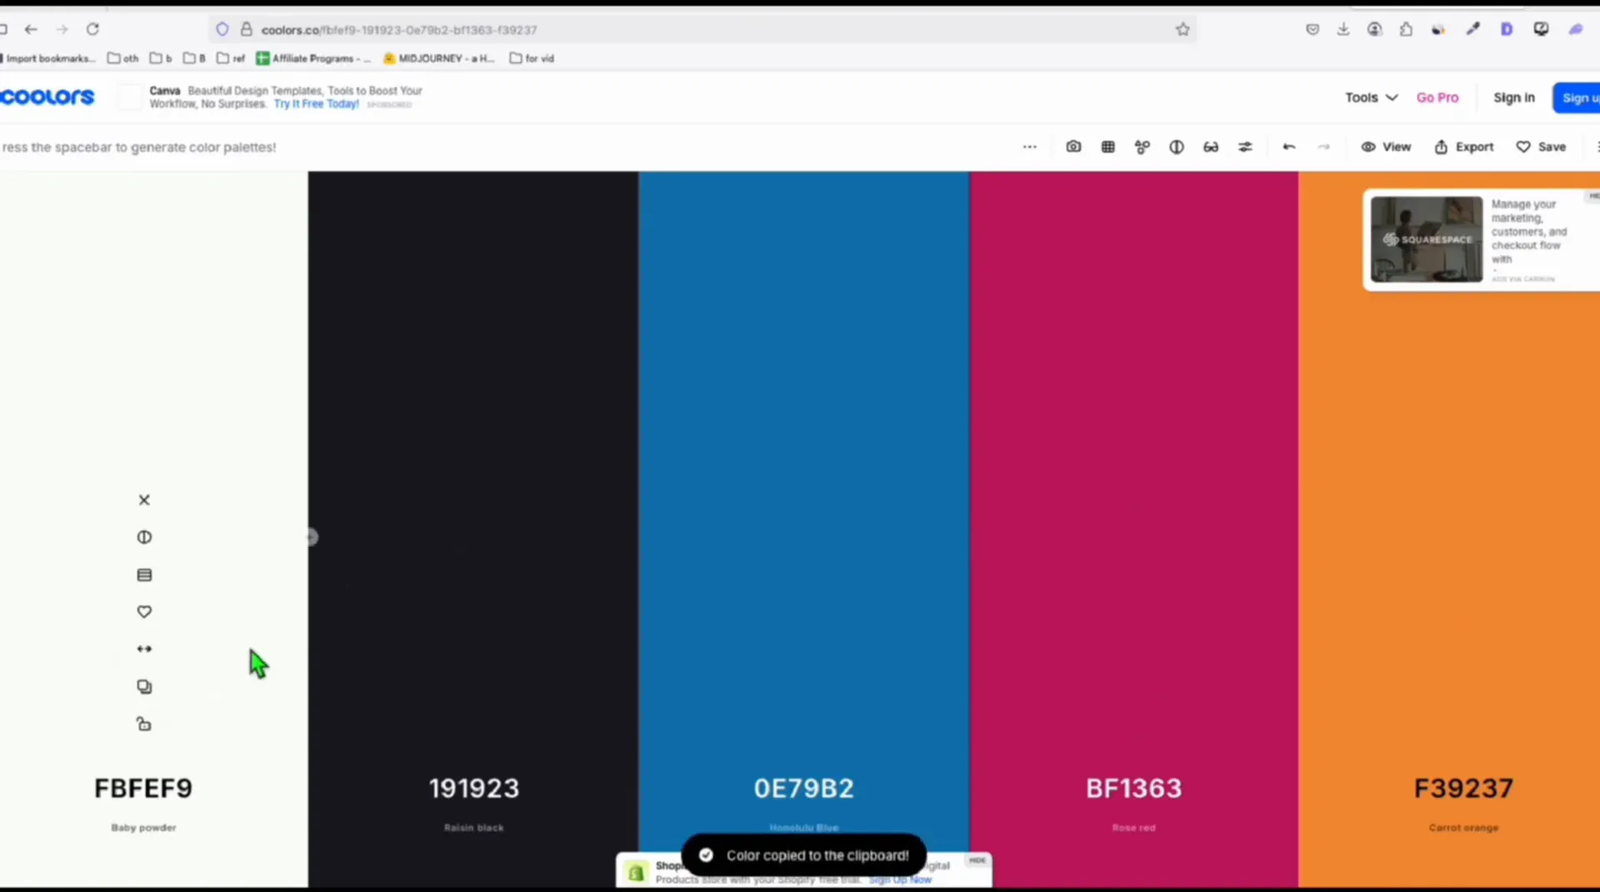
– Linked to: notarypublic post typeColor Palette:
– Primary: #1E88E5
– Secondary: #43A047
– Accent: #FDD835Theme Requirements:
– The theme must be mobile responsive
– Use plain CSS (no frameworks like Bootstrap)
– Store all images in the /assets/ folder
– Use hero-section.jpg and logo.png for visual brandingOutput the following files:
– style.css (with theme metadata and styles using the color palette)
– functions.php (register CPT and taxonomy, enqueue scripts/styles)
– header.php (include logo and site title)
– footer.php (simple footer with contact info or copyright)
– index.php (basic layout or fallback)
– archive-notarypublic.php (listing grid with filters)
– single-notarypublic.php (listing detail view)
– taxonomy-state.php (directory listings by state)Listing Layout:
– Display business name, featured image, phone number, address, and state
– Grid layout with cards (2 or 3 columns depending on screen size)
✅ How to Use:
-
Copy-paste this prompt into Claude Sonnet, GPT-4o, or other code-focused AI.
-
Ask: “Generate the full theme based on this prompt.”
-
You can also break it into files one at a time:
“Now generate functions.php” → “Now generate header.php” → etc.
This prompt is then input into an AI model such as Anthropic Claude Sonnet Four to generate the full theme code files, including templates, CSS, JavaScript, and assets.
Step 6: Add Visual Assets to Your Theme 🎨
Once the theme files are generated, add visual assets like the hero section image and logo into the theme’s assets folder. Make sure to name these files clearly, for example, hero-section.jpg and logo.png.
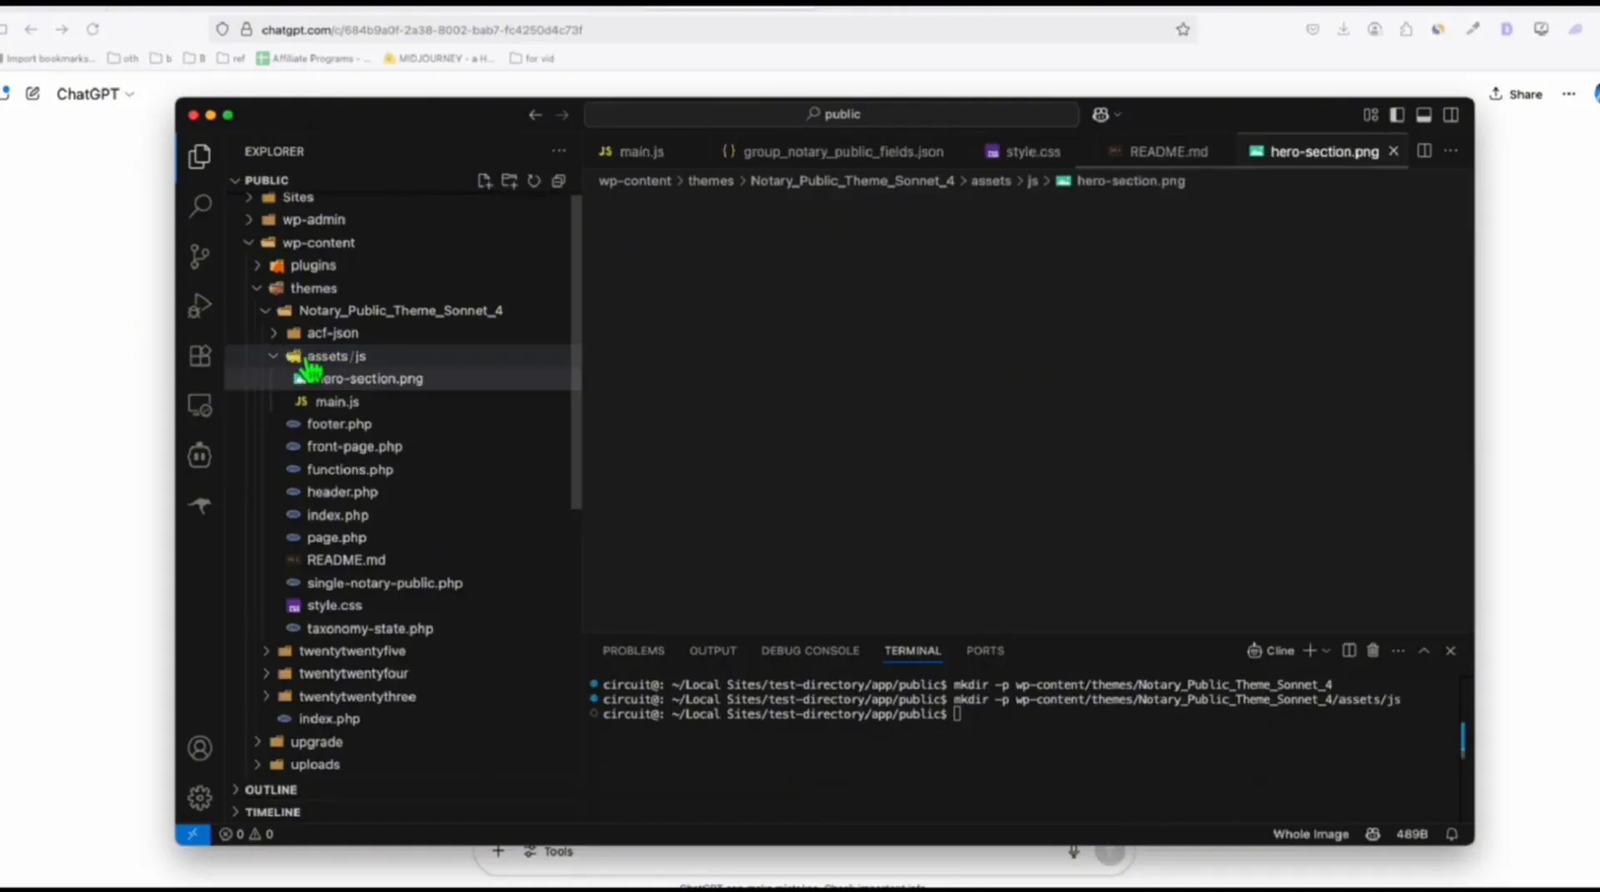
Adjust images as needed using an image editor to crop unnecessary blank spaces and optimize the file size for fast loading.
Step 7: Activate Your Custom Theme and Install Required Plugins ⚙️
Upload your custom theme to your WordPress installation and activate it via the Appearance > Themes menu. You should see your new directory theme listed there with the name you assigned (e.g., “Notary Public Theme Sonnet Four”).
Next, install and activate the Advanced Custom Fields (ACF) plugin. This plugin is crucial for managing custom fields in your directory listings, such as business hours, services, and images.
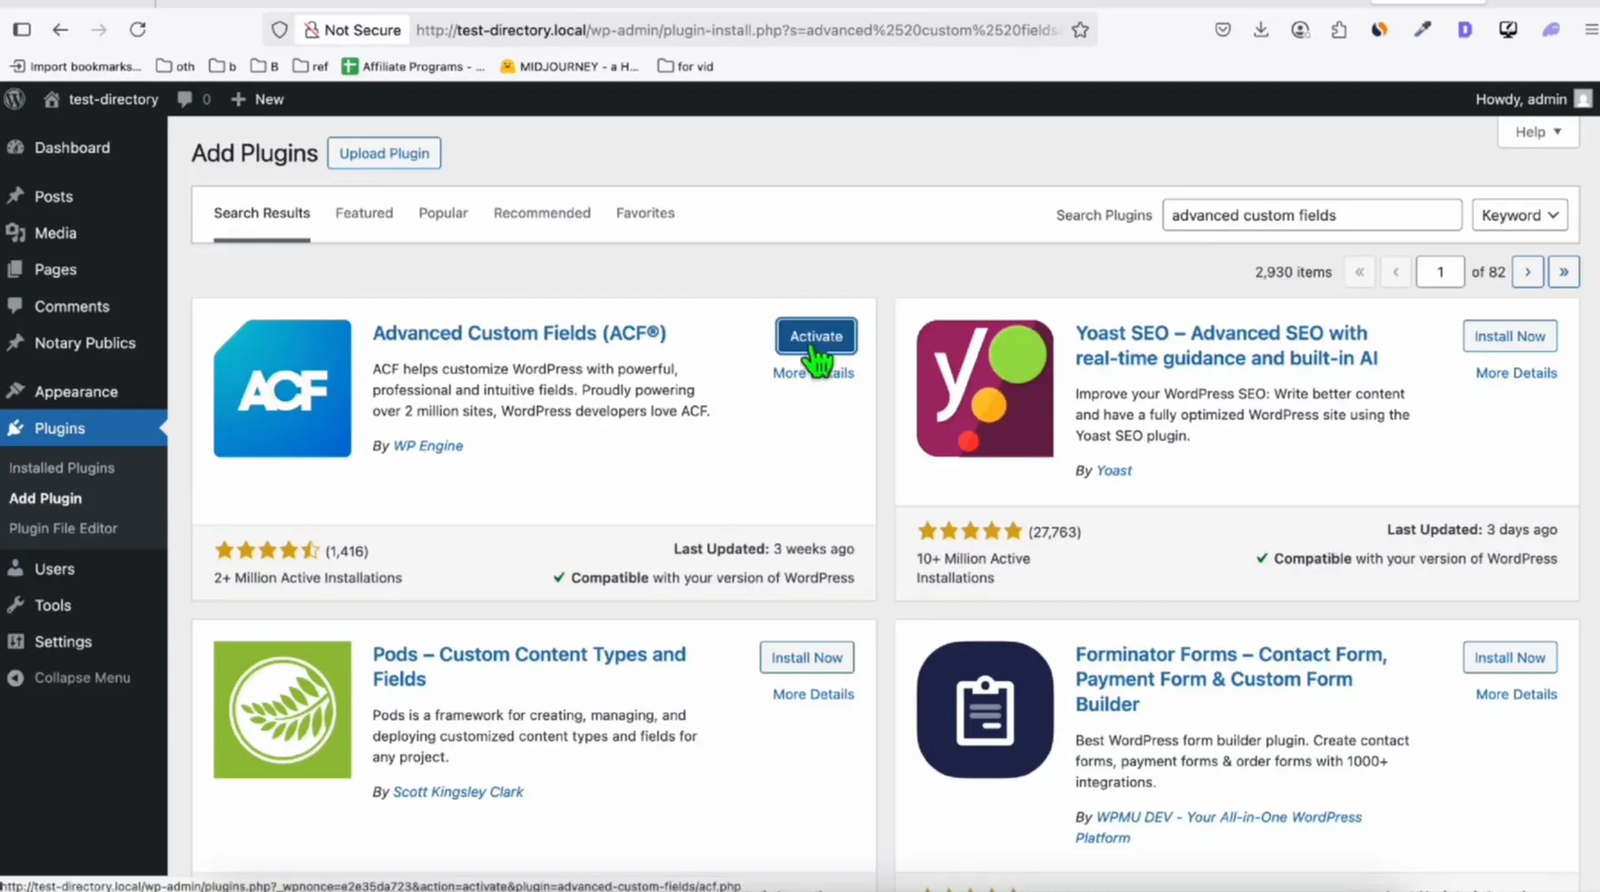
After activating ACF, import the custom field groups generated by your AI theme prompt. You can find the import option under Custom Fields > Field Groups > Sync. This step ensures your directory listings can store and display all relevant business data correctly.
Step 8: Upload Your Business Listings Using a Custom Import Plugin 📂
To import your cleaned Excel listings into WordPress, use a custom-built plugin designed for this purpose. While several CSV and Excel import plugins exist, many require premium upgrades or don’t handle custom taxonomies properly.
I created a simple plugin that allows you to upload an Excel (.xlsx) file and map the columns automatically to your custom post type fields and taxonomies.
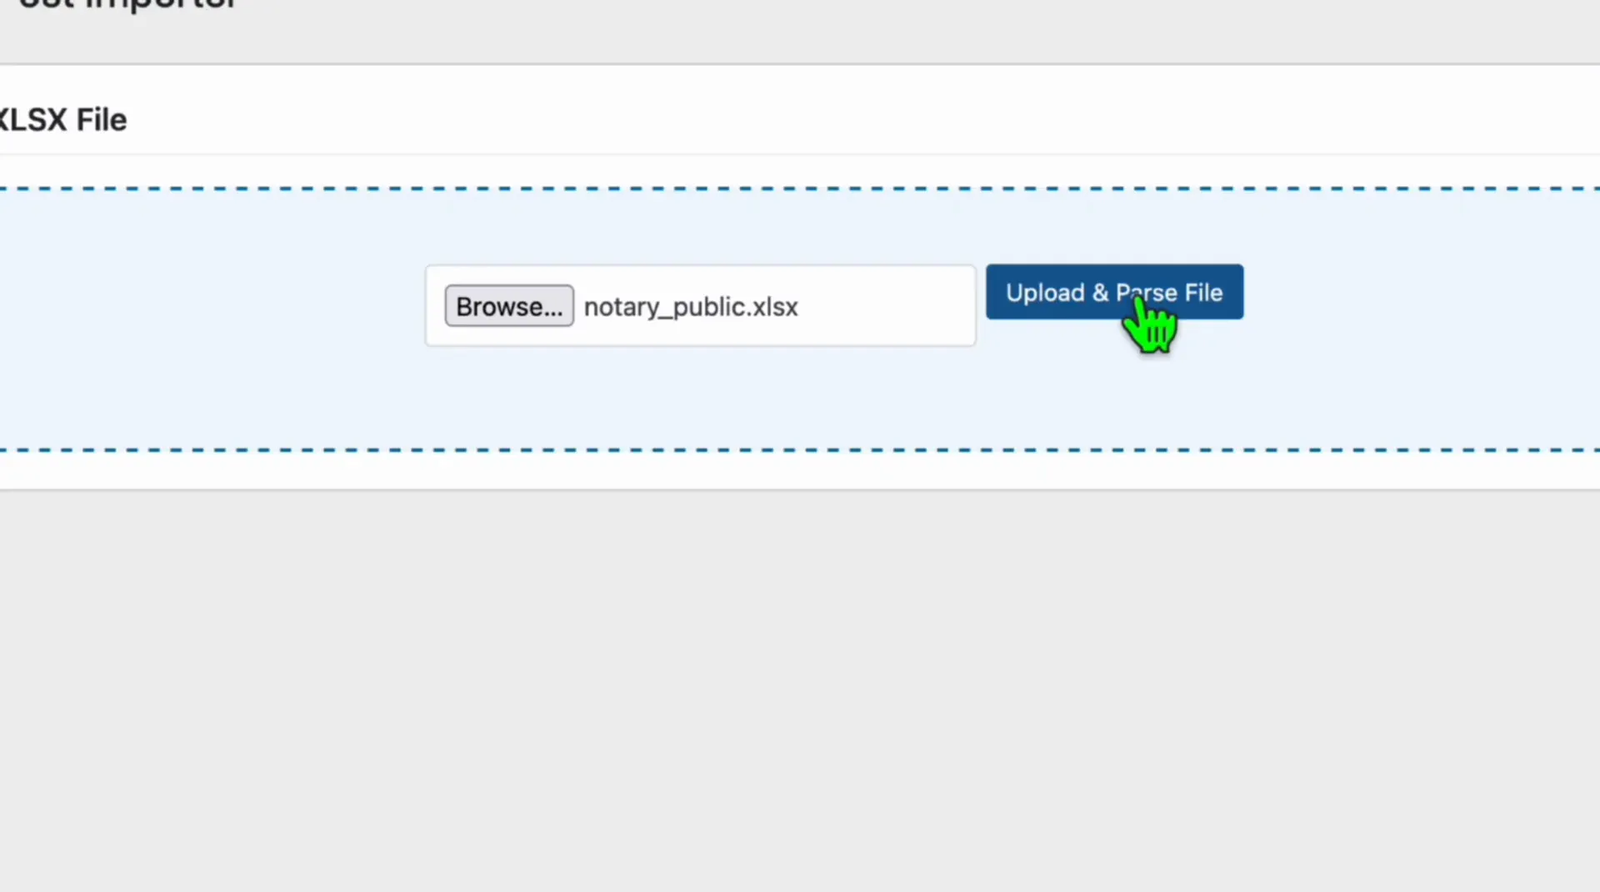
Navigate to Tools > XLS Importer in your WordPress dashboard. Select the Excel file you prepared earlier and choose the custom post type (e.g., “notarypublic”).
The plugin automatically maps your spreadsheet columns to WordPress core fields and ACF custom fields. For example, the “Main Image” URL column is mapped as the featured image for each listing.
Don’t forget to add taxonomies for your listings. Add “Region” as the main taxonomy (mapped to states) and “State” as a child taxonomy. This structure helps users filter listings by location easily.
Click “Start Import” and wait for the plugin to process all rows. Even if you import thousands of listings, the plugin handles this efficiently and you can leave the page while it runs.
Step 9: Preview Your Directory Website and Listings 👀
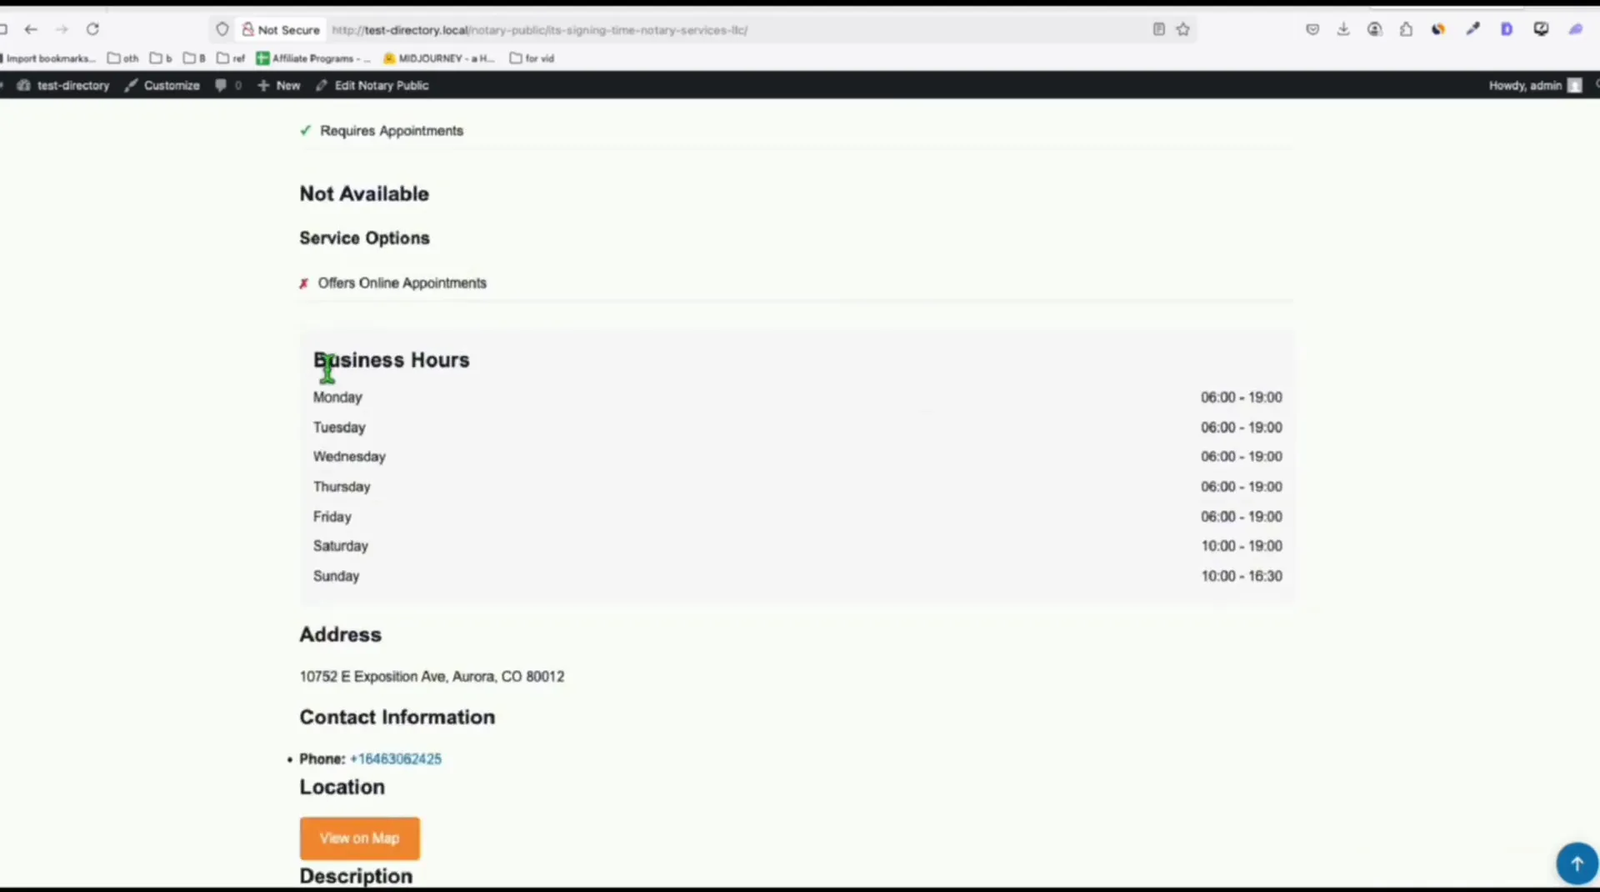
Once the import is complete, open your directory website in a new browser tab to see the results. The custom theme generated by the AI model will display listings with images, addresses, business hours, services, and reviews.
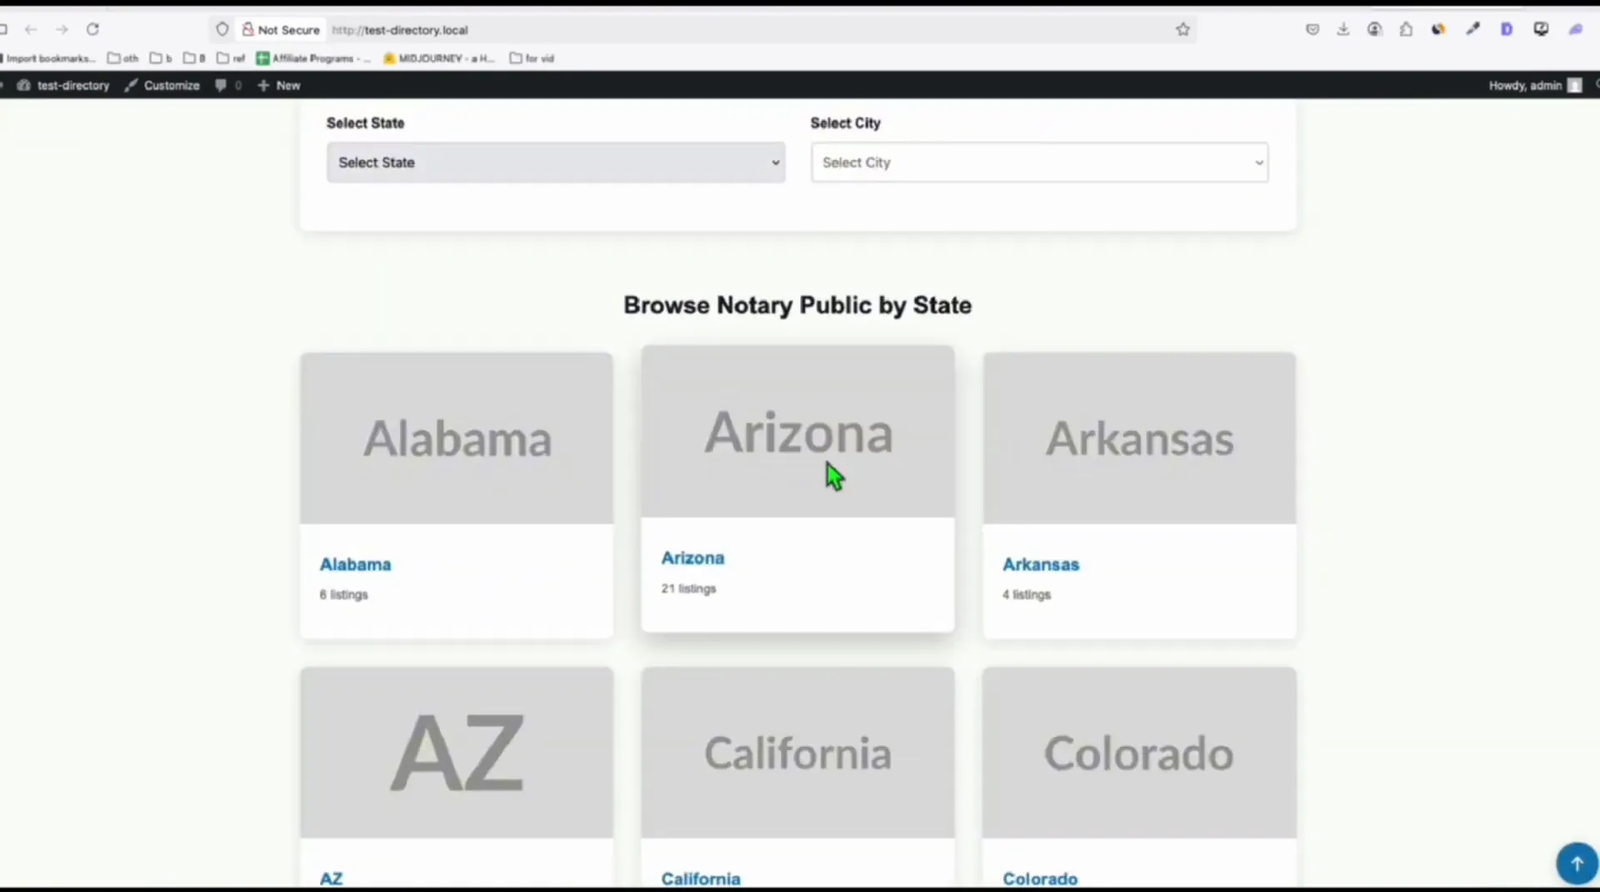
Explore the state and city views to confirm that listings are organized correctly by taxonomy. Click individual listings to view detailed pages with all business information presented cleanly.
If you notice any issues, such as missing images in the hero section, you can fix these by updating your theme assets or adjusting your WordPress media settings.
Step 10: Deploy Your Directory Website Live 🌐
After finalizing your directory on the local or sandbox environment, it’s time to deploy it live. Purchase a domain and hosting plan if you haven’t already.
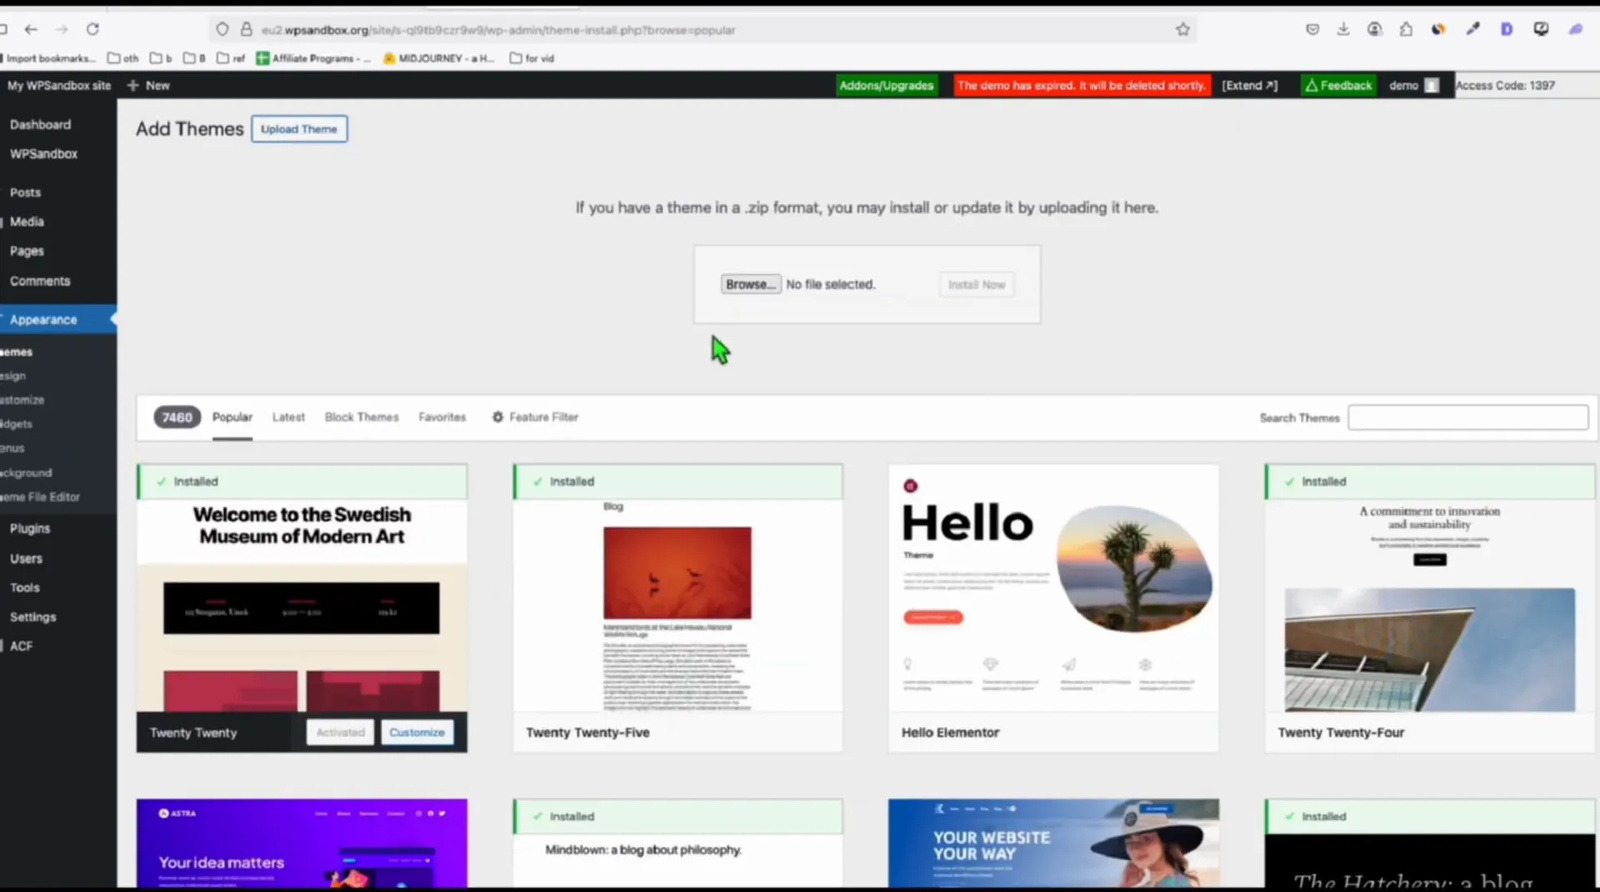
Upload your custom theme as a ZIP file through the WordPress admin under Appearance > Themes > Add New > Upload Theme. Activate the theme once uploaded.
Repeat the steps of installing the Advanced Custom Fields plugin and importing your custom field groups on the live site.
Upload the Excel listings again using the XLS importer plugin to populate your live directory with content.
Connect your domain to your hosting and ensure your site is publicly accessible.
Step 11: Optimize Your Directory for SEO and Traffic 🚀
To drive targeted traffic to your directory website, begin by submitting your site to Google Search Console and Bing Webmaster Tools. These free webmaster tools allow search engines to efficiently crawl and index your pages, helping your listings appear faster in search results.
For on-page SEO, install a powerful plugin like Rank Math SEO. It provides features such as:
-
Focus keyword optimization
-
Sitemap generation
-
Schema markup for local businesses
-
404 monitor and redirection manager
-
Integration with Google Search Console
Make sure your directory listings use structured data (schema) for local businesses, which helps search engines understand the content. Rank Math or Schema Pro can automate this.
Additionally, optimize your listing titles, descriptions, and image alt texts using relevant long-tail keywords for your niche (e.g., “mobile notary in Phoenix” or “licensed plumber in Miami”).
To generate high-quality backlinks and boost domain authority, consider distributing a press release announcing your directory launch via platforms like PRWeb or Newswire. This can attract media mentions, drive referral traffic, and enhance trust signals for SEO.
Over time, with consistent publishing of high-quality, keyword-rich listings, and by building backlinks through outreach, guest blogging, or directory citations, your directory website can achieve strong organic visibility and become an authoritative resource in your niche.
🙋 Frequently Asked Questions (FAQ)
Q1: Do I need coding skills to build this directory?
No. You don’t need to know any coding. This guide uses easy tools like WordPress, Excel, and AI to help you build the site without programming. If you can use WordPress and copy-paste, you’re ready.
Q2: Can I use this method for other directories?
Yes. This method works for any type of directory—like doctors, restaurants, real estate agents, or plumbers. Just change the category when scraping data and adjust the theme for your topic.
Q3: Is it important to clean the data?
Yes. Cleaning the data makes your site look more professional. For example, fixing state names or removing empty fields will help visitors use your filters better. It’s an extra step that improves your site.
Q4: How do I update the listings later?
You can upload a new Excel file anytime. The plugin allows you to re-import data, so you can add more listings or fix anything without starting over.
Q5: Can I make money from my directory website?
Yes, you can. Many people earn money by:
-
Charging businesses for premium listings
-
Adding ads like Google AdSense
-
Placing affiliate links
-
Promoting sponsored listings
Q6: Can I add more features like maps or user reviews?
Yes. WordPress has many plugins for:
-
Google Maps
-
Star ratings or reviews
-
User-submitted listings
-
Login areas for members
You can add these features step by step as your site grows.
Q7: Can I build more directories later?
Yes. You can use this same method to create more directories for other niches or cities. Just copy the process and change the content to match your new idea.
Conclusion
Building a directory website in WordPress is straightforward when you follow a clear, step-by-step process. From setting up your WordPress environment and scraping business data to generating a custom theme and importing listings, each step builds on the last to create a powerful directory platform.
Thanks to AI tools and smart plugins, you can automate much of the work and focus on curating valuable listings for your users. Remember to optimize your directory for search engines and promote it well to attract visitors.
If you follow this comprehensive guide, you’ll have a fully functional directory website ready to launch in no time. Don’t hesitate to experiment, customize, and expand your directory as your project grows.
Good luck with your directory site, and feel free to leave comments or questions to get help along the way!
