

Building an Airbnb-style booking website with WordPress is now easier than ever. Whether you’re renting out properties, vacation homes, or equipment, this guide will show you how to launch a powerful direct booking site without any coding.
In this tutorial, I’ll show you how to get started with domain and hosting, set up your WordPress site, install the right theme, configure listings and categories, design your website using a drag-and-drop page builder, and finally, monetize your site with payment gateways like PayPal and Stripe. Let’s dive in!
Step 1: Choose Your Rental Website Type and Purpose 🏢
Before diving into the technical steps, it’s important to define the type of rental website you want to create. The term “rental website” can mean many things, so here are some common types you can build using WordPress and the WP Rentals theme:
- Airbnb-style Booking Website: Visitors can list their own properties, such as apartments or houses, with categories, amenities, and custom fields. You can monetize by charging per listing or offering memberships.
- Equipment Booking Website: Rent out equipment or items by the hour or day. This is ideal if you have gear, tools, or vehicles available for rent.
- Vacation Rentals: Perfect for villas, cabins, or holiday homes that you want to rent out to travelers.
- Single Property Rental: If you only have one or two properties, you can manage bookings directly without paying commissions to third parties.
The WP Rentals theme offers over 30 demos catering to these different rental types, allowing you to customize the look and functionality to your needs. Plus, it supports multiple languages, including RTL (right-to-left) languages, and uses a free drag-and-drop page builder so you don’t need coding experience.
Why WP Rentals Is Perfect for Your Airbnb-Style Booking Website
If you’re planning to create an Airbnb-style booking website, WP Rentals offers all the features you need for listings, calendars, payments, and customization. It’s a powerful all-in-one solution for building your own direct booking platform without relying on third-party sites like Airbnb.

Step 2: Get Domain and Hosting with Hostinger 🌐
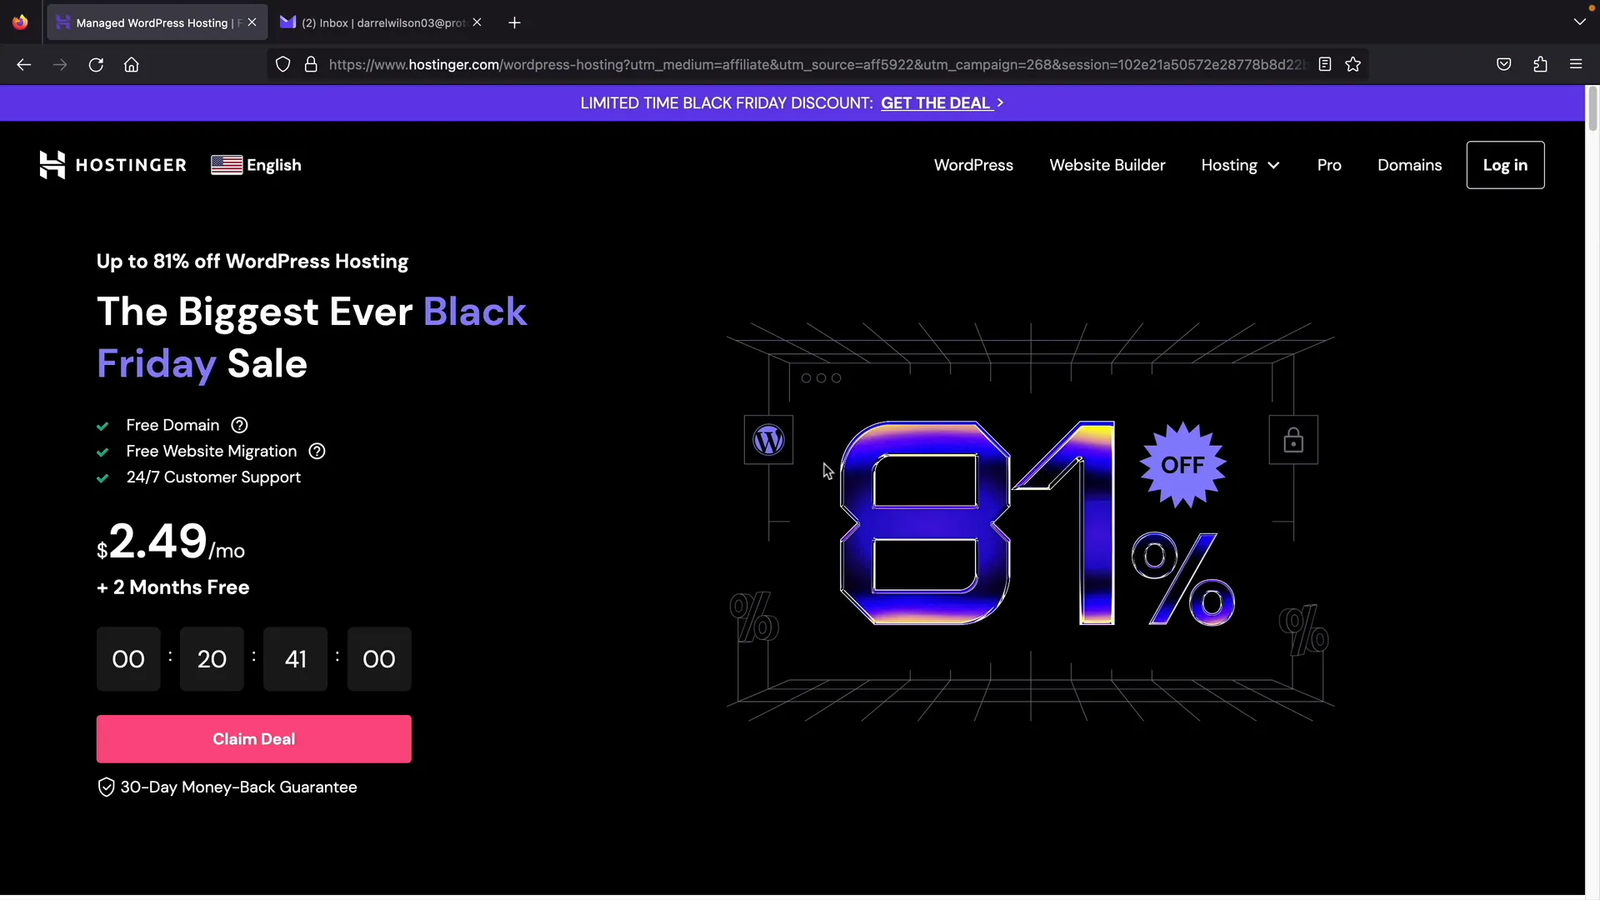
To get your rental website online, you first need a domain name (your website’s address) and hosting (a server where your site lives). I recommend using Hostinger for fast, affordable hosting with a free domain included.
Here’s how to get started:
- Visit Hostinger and select the WordPress hosting plan. I recommend the Business plan for better performance with NVMe storage.
- Choose a billing period (12 months is a good start) and create your account.
- Enter payment details.
- Complete your order and verify your email address to activate your domain and hosting.
Once your hosting is active, you can manage your website from the Hostinger control panel, where you can check performance, security, and even set up free emails.
Step 3: Install WordPress and Initial Setup ⚙️
With hosting ready, it’s time to install WordPress, the platform that powers your rental website.
- In Hostinger’s control panel, use the auto-installer to install WordPress.
- Choose your website name, admin username, and password. Save these credentials safely.
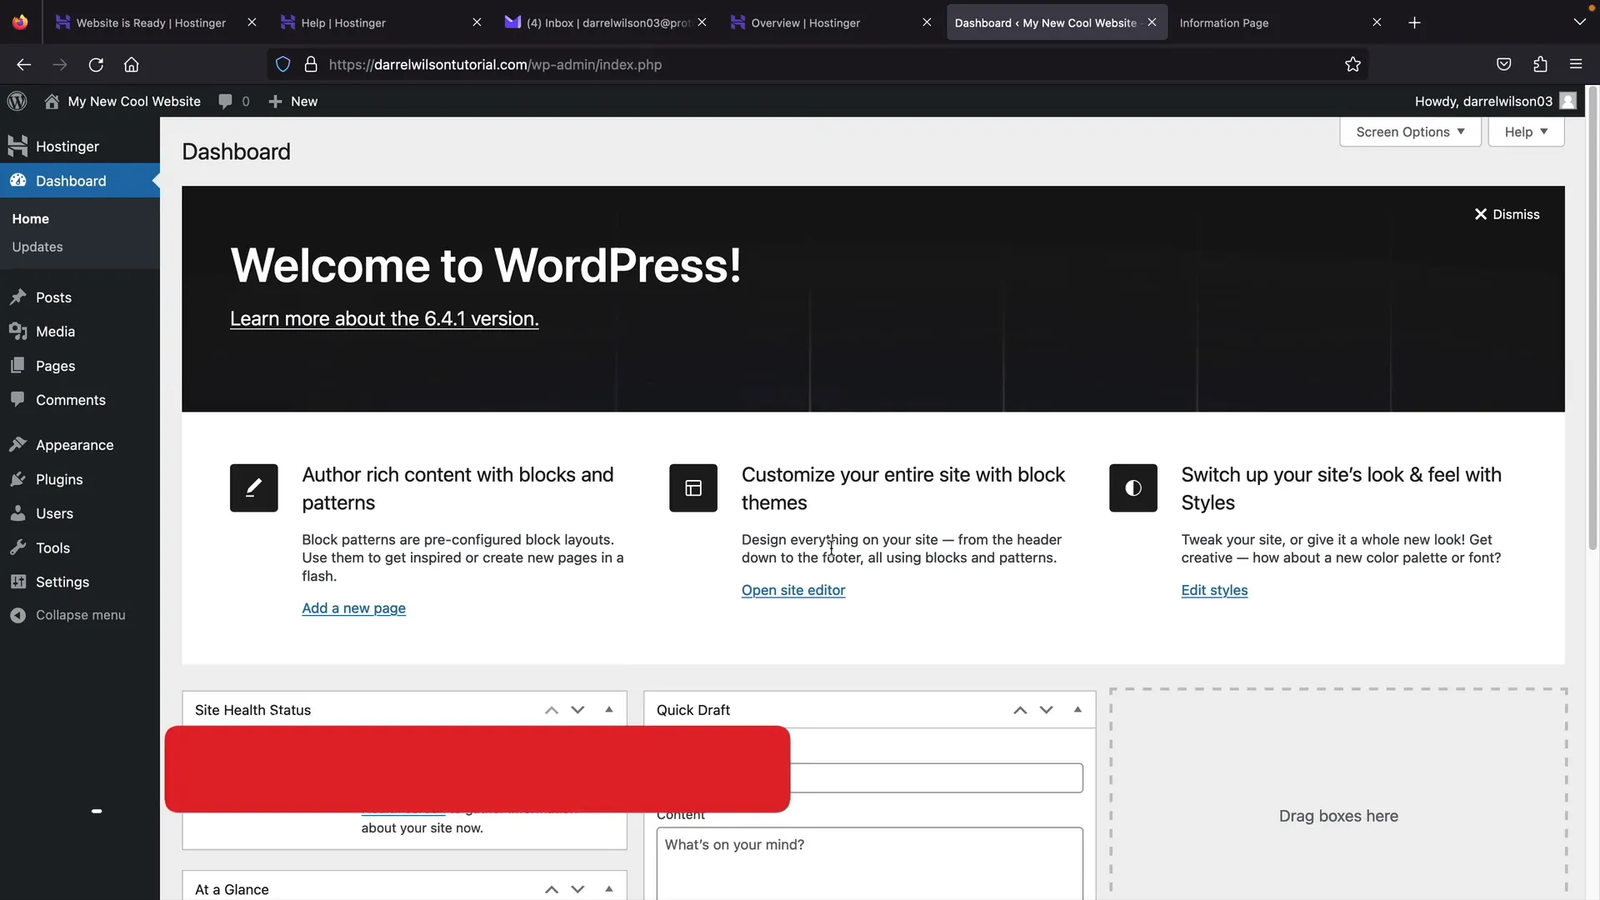
- Once WordPress is installed, log in to your WordPress dashboard via the admin panel link.
- Adjust general settings like your email address and site language.
- Set permalinks to post name for SEO-friendly URLs.
- Learn how to log in and out by accessing
yourdomain.com/wp-admin.
WordPress comes with some default content, but we will replace that with our rental theme demo content soon.
Step 4: Purchase and Install WP Rentals Theme 🎨
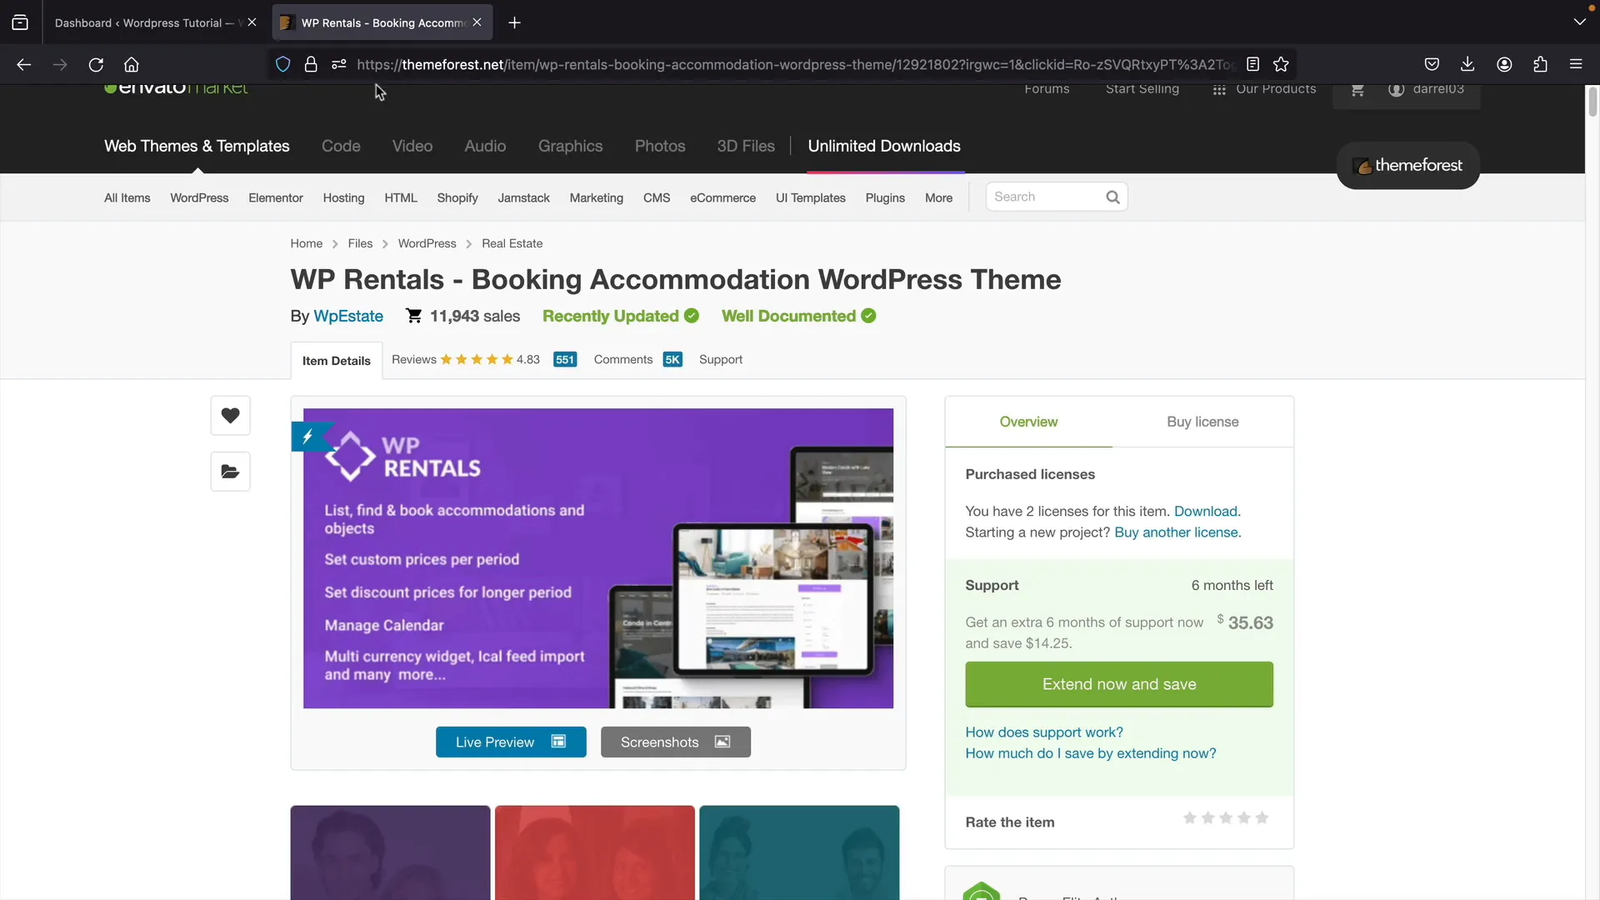
The WP Rentals theme is the best-selling booking and accommodation theme for WordPress. It’s flexible enough for various rental types and offers all the features you need.
To install WP Rentals:
- Buy the WP Rentals theme for $79.
- Download the WordPress file only (ZIP) and your purchase code.
- In your WordPress dashboard, go to Appearance > Themes > Add New > Upload Theme.
- Upload the ZIP file and activate the theme.
- Install required plugins. Make sure to install the core plugins like Envato Market and One-Click Demo Import but skip page builders like Visual Composer if you prefer Elementor.
- Enter your purchase code and ThemeForest username to register the license.
- Import the main demo content to get a ready-made rental website.
Once imported, your website will have demo properties, categories, owners, testimonials, and more, all set up and ready to customize.
Step 5: Configure Owners, Categories, Amenities, and Listings 🏘️
Before you or your users start listing properties, you need to set up the categories, amenities, and owners. This will guide users when submitting listings and organizing your site.
Owners
Owners are users who can list properties. While you can create owners manually, it’s best to let users register themselves, which creates both a user and owner profile linked together.
To add an owner manually:
- Go to Listings > Owners > Add New.
- Enter owner details such as name, email, phone, profile image, and social profiles.
- Publish the owner profile.
However, manual owners do not have user accounts, so self-registration is recommended.
Categories and Subcategories
Categories define what types of rentals you offer (e.g., apartments, cabins, rooms for rent). Subcategories can specify details like what part of the property is rented (entire home, private room).
To create categories:
- Go to Listings > Categories and add categories like “Room for Rent,” “Apartment,” “Cabin,” etc.
- Remove any irrelevant categories to keep your site clean.
Subcategories go under “What do you rent?” and help users specify their listings further.
Cities and Neighborhoods
Define the locations where you offer rentals by adding cities and neighborhoods. You can create hierarchical relationships, e.g., Santa Clarita as a sub-area of Los Angeles.
- Go to Listings > City and add cities and subcities.
- Similarly, add neighborhoods under Listings > Neighborhood Area.
Amenities and Features
Amenities define the features available at the rental properties, such as swimming pool, fireplace, internet, pets allowed, etc. These are selectable options users can choose when creating listings.
- Go to Listings > Amenities and add all the features you want to offer.
Property Status
If you want to allow properties for sale, rent, auction, etc., you can define these statuses under Listings > Property Status.
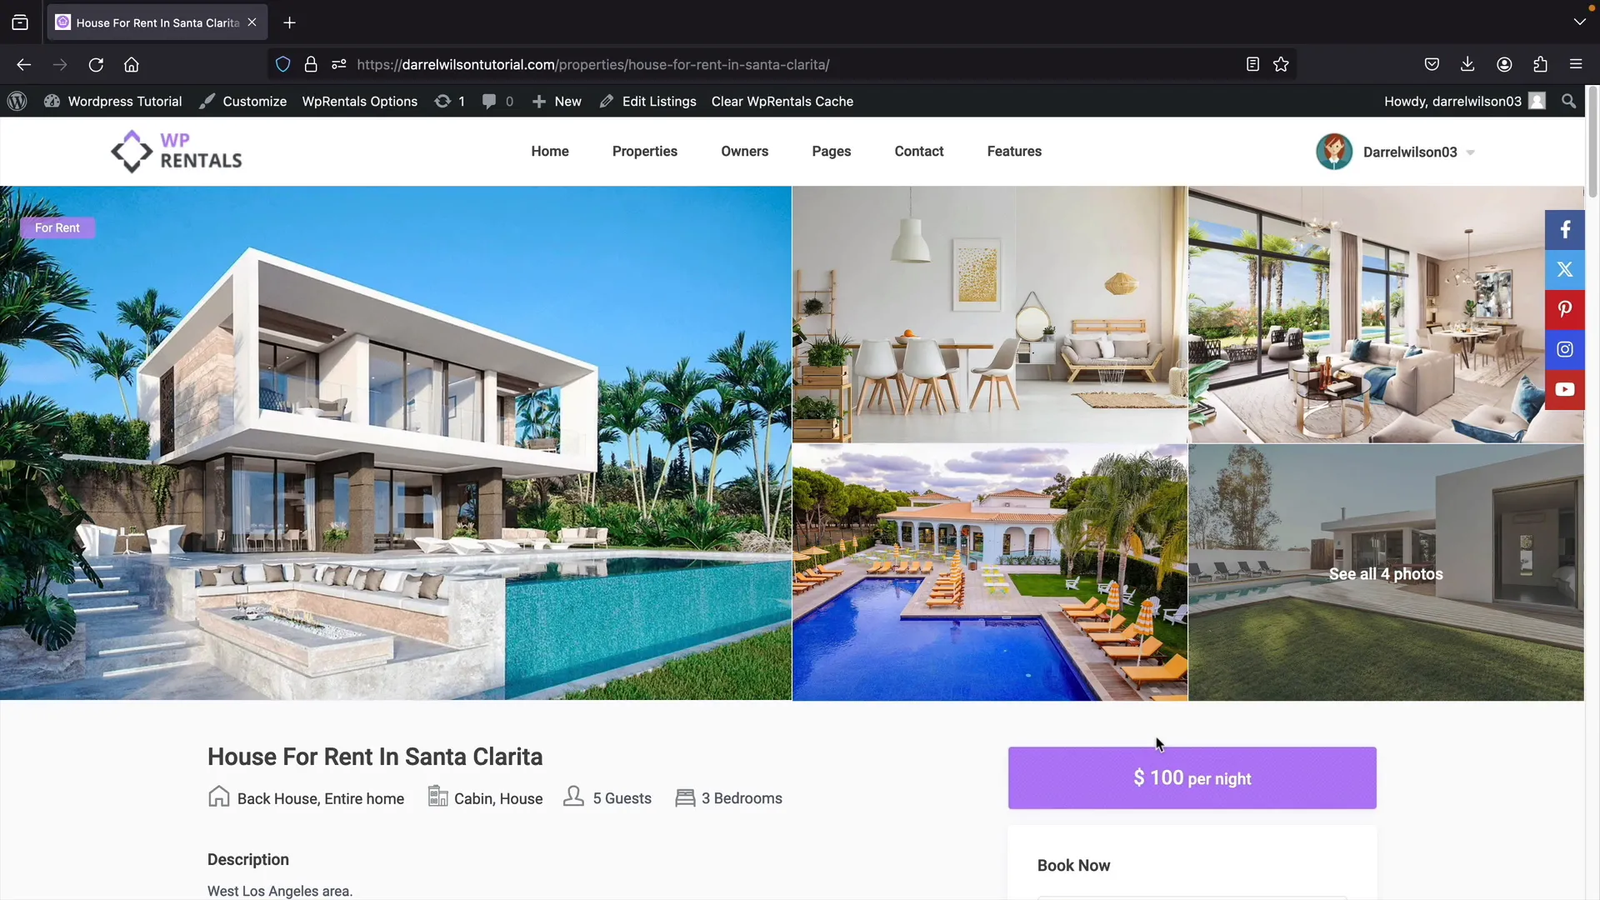
Creating a Listing Manually
To create a listing yourself:
- Go to Listings > Add New.
- Enter the property title and description, emphasizing key details and selling points.
- Select appropriate categories, rental type, city, and neighborhood.
- Fill in property details: guest capacity, address, country, and make it featured if desired.
- Set pricing details including price per night/day, discounts for long stays, weekend pricing, cleaning and city fees, security deposit, and extra guest fees.
- Upload featured image and gallery photos of the property.
- Add video links or virtual tours if available.
- Define property specifics: size, bedrooms, bathrooms, cancellation policy, rules (e.g., no drugs), check-in/out times, and allowed activities.
- Assign owners and set paid submission if applicable.
- Publish the listing.
Allowing Users to Submit Listings
To enable visitors to list their own properties, you need to allow user registration:
- Go to WordPress Settings > General and enable “Anyone can register.”
- Set the map provider to OpenStreet or Google Maps if you have API.
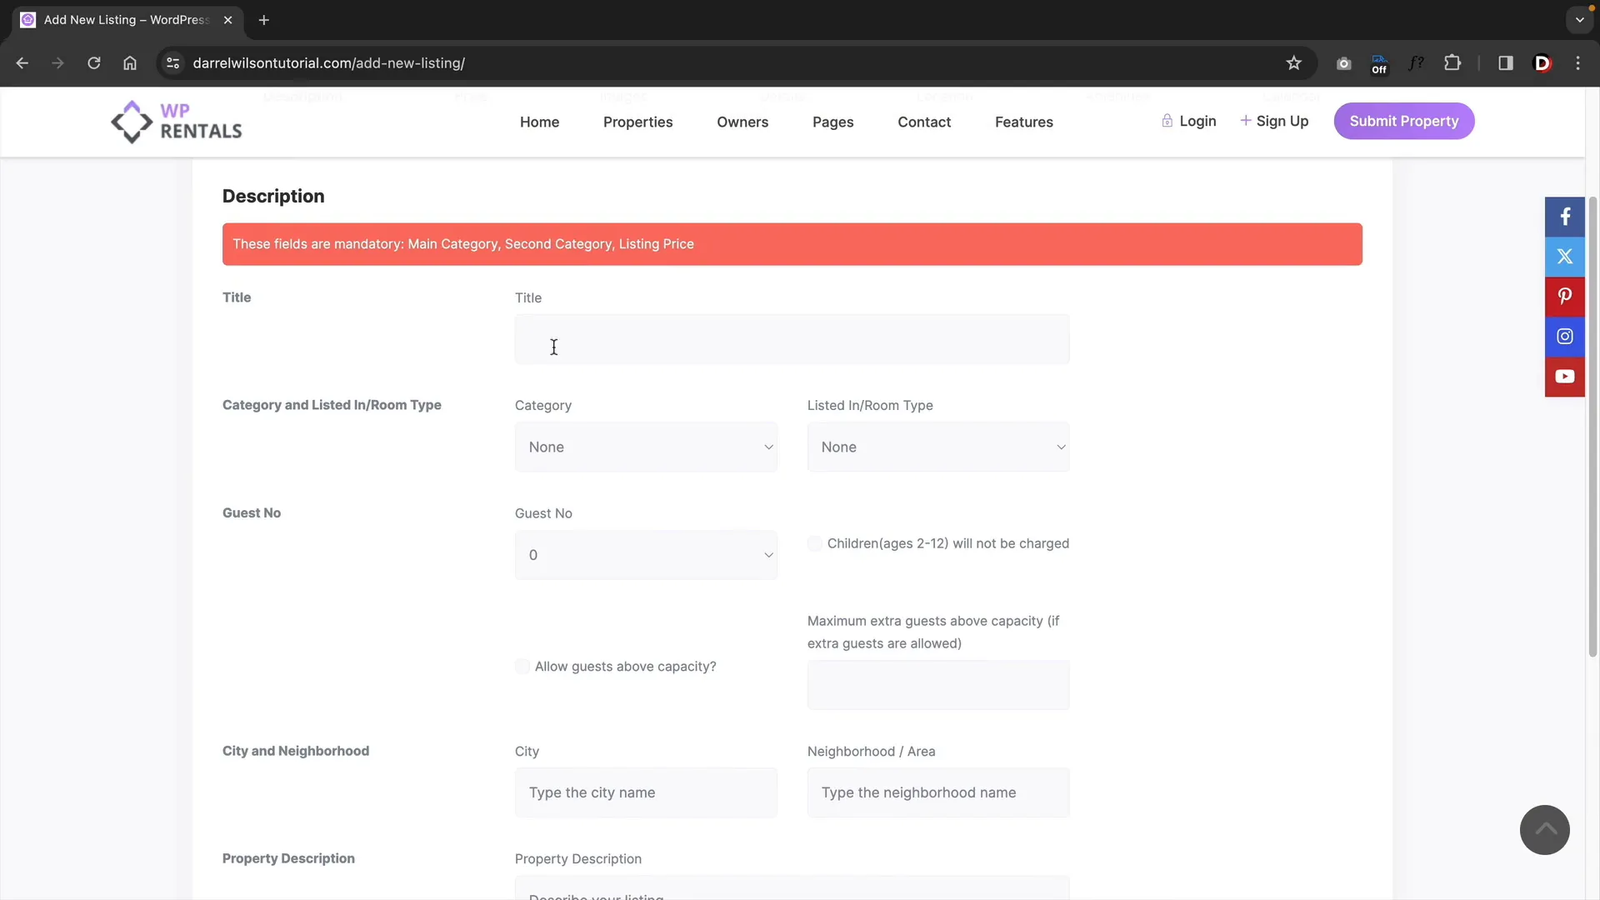
- Users can submit properties via the “Submit Property” button on your site.
- The submission process guides them through entering description, price, images, location, amenities, and availability.
- After submission, listings are pending approval by default, which you can review and publish.
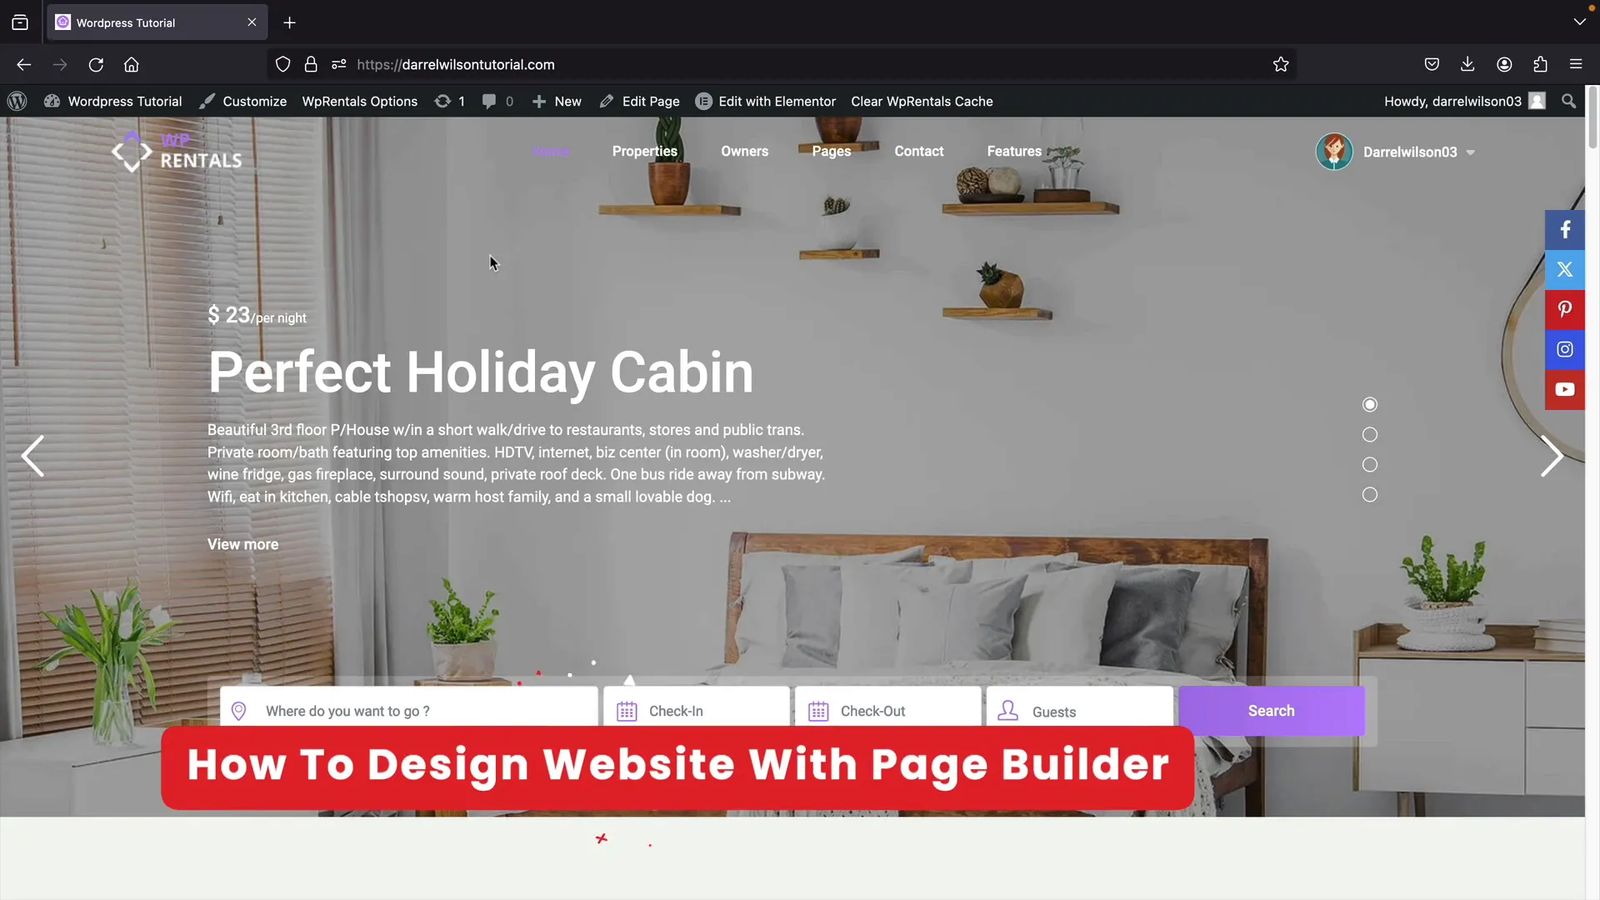
Step 6: Design Your Website with Elementor Drag and Drop Builder 🎨
Now that you have content and structure, it’s time to design your website. WP Rentals integrates well with Elementor, a free drag-and-drop page builder that requires no coding.
Here’s how to start:
- Edit pages with Elementor to customize layouts, add sliders, search filters, and content blocks.
- Use WP Rentals widgets in Elementor to display listings, featured properties, owners, and more.
- Adjust header types on pages (video header, image header, Google Maps header, or none) from the page settings.
- Create custom landing pages with search filters, background images, buttons, and overlays.
- Use the Navigator tool in Elementor to easily move sections around your page.
- Customize fonts, colors, and styles to match your brand.
Elementor offers three tabs for every element: Content (what the element shows), Style (appearance), and Advanced (spacing, motion effects, borders). You can also undo changes via the History panel.
Step 7: Create and Manage Pages and Menus 🗂️
WordPress lets you create pages for your site, such as About Us, Contact, Blog, and custom pages for your rental business.
To add pages:
- Go to Pages > Add New, enter a title, and publish.
- Edit pages with Elementor to design them.
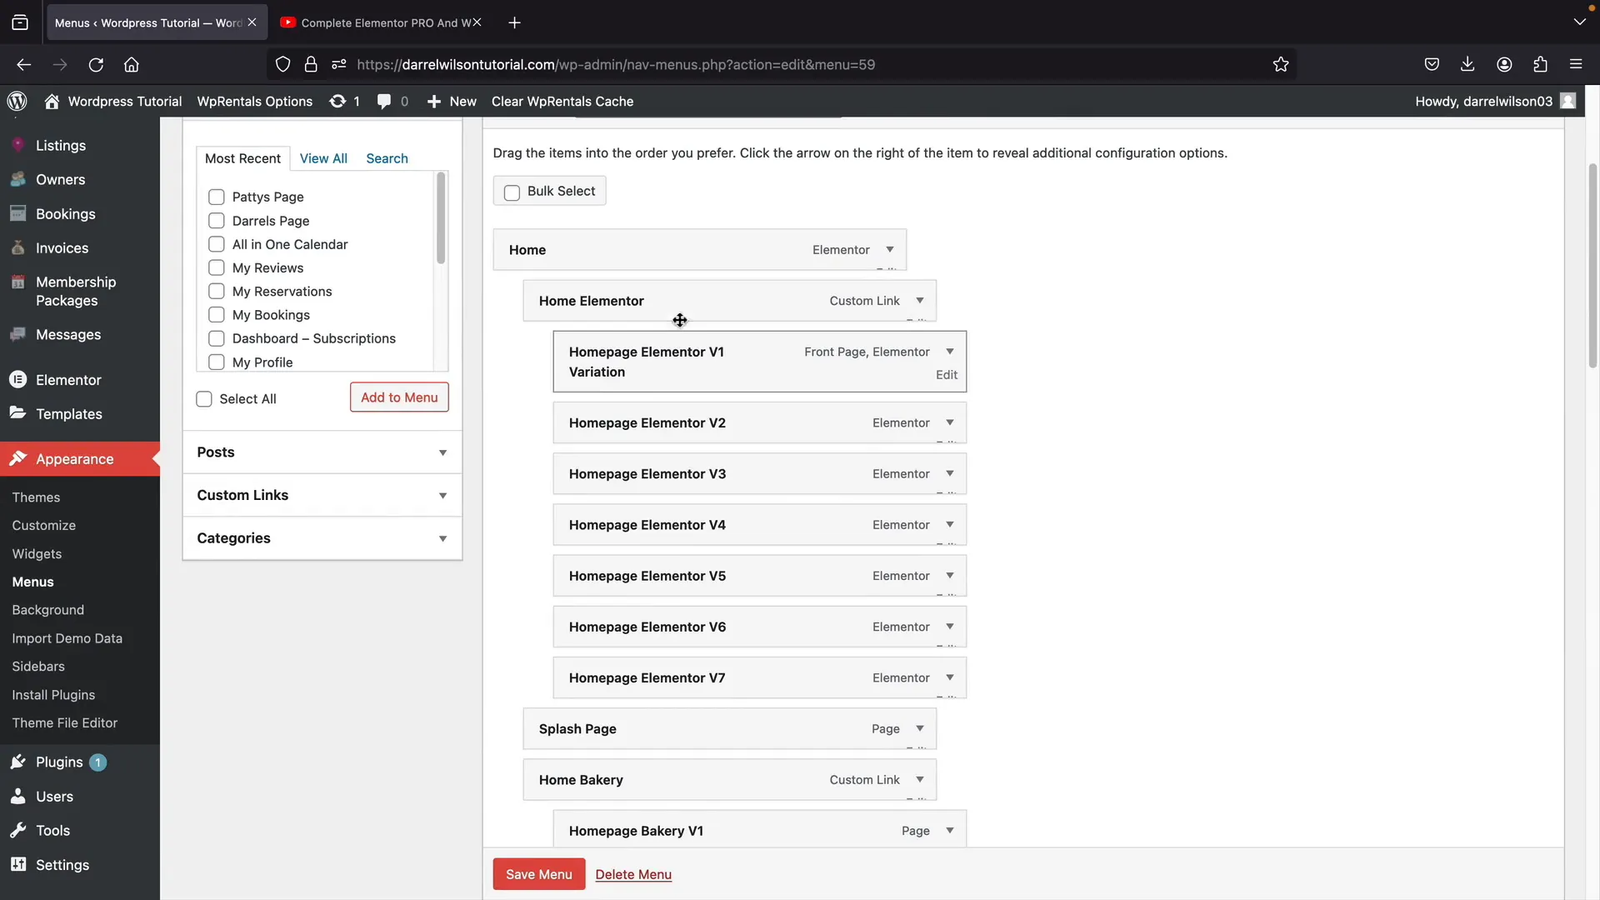
- Assign pages to your site menu via Appearance > Menus.
- Create a new menu or edit the primary menu to add your pages.
- Arrange menu items and create dropdowns for better navigation.
Custom templates are available for pages like Contact and Search Results, but you can also build these from scratch with Elementor.
Step 8: Set Up Contact Forms with WP Forms Plugin 📩
The default contact form provided by the theme sometimes sends emails to spam or fails to deliver. It’s better to use the free WP Forms plugin.
To install and use WP Forms:
- Go to Plugins > Add New and search for “WP Forms.”
- Install and activate the plugin.
- Create a new contact form or use the default template.
- Edit your Contact page with Elementor and insert the WP Forms widget.
- Customize the form fields and style as needed.
If you experience email delivery issues, install an SMTP plugin and follow tutorials to route emails reliably.
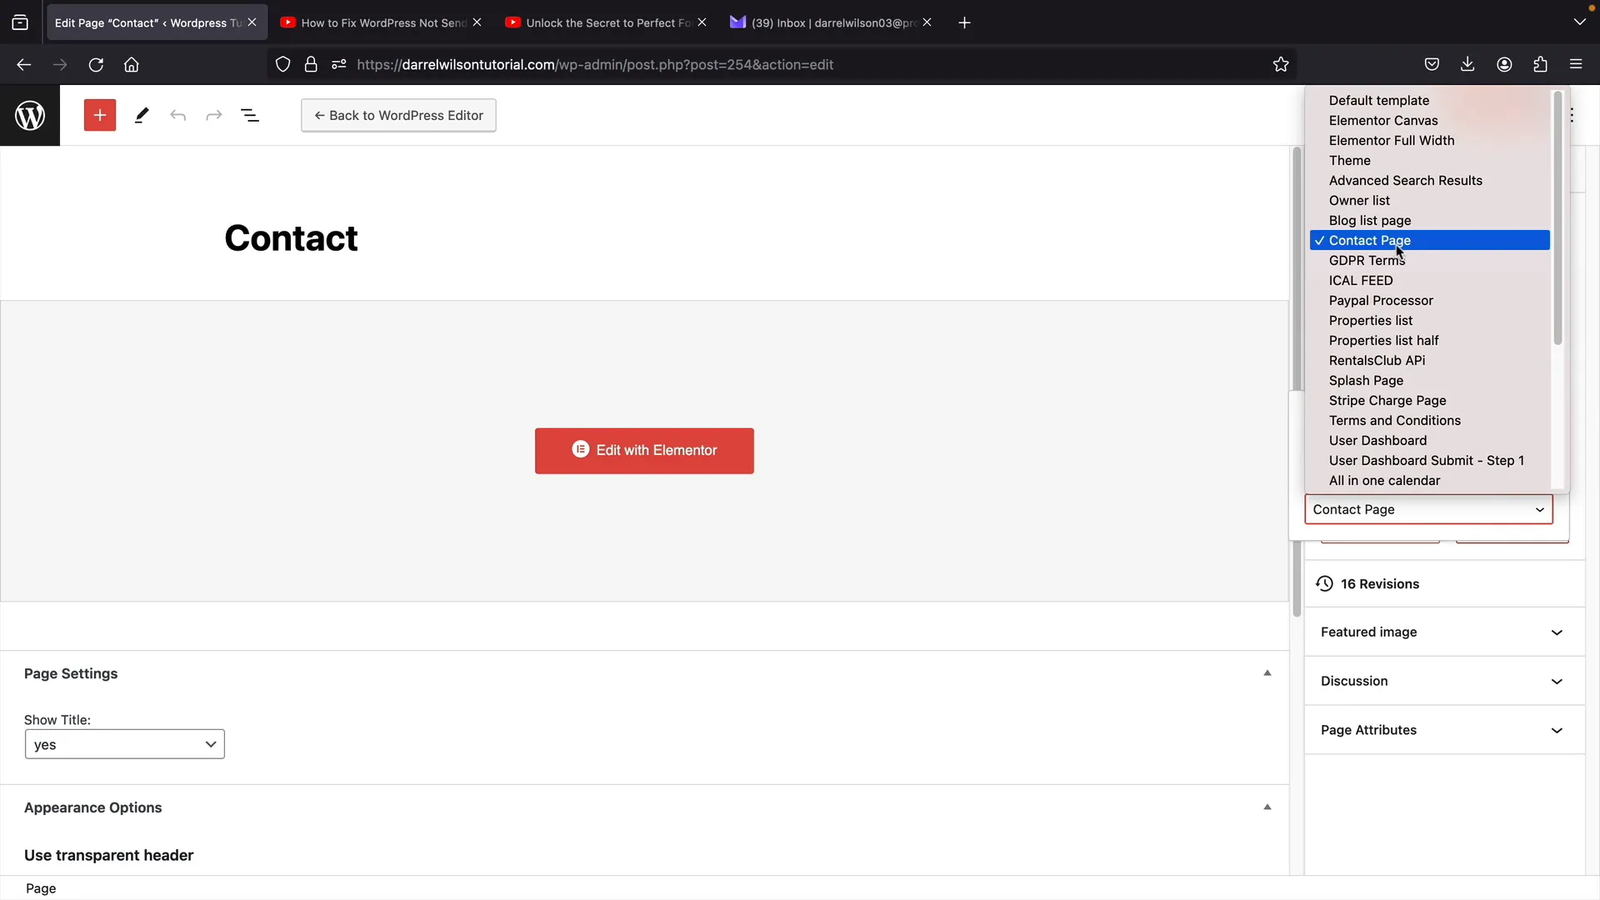
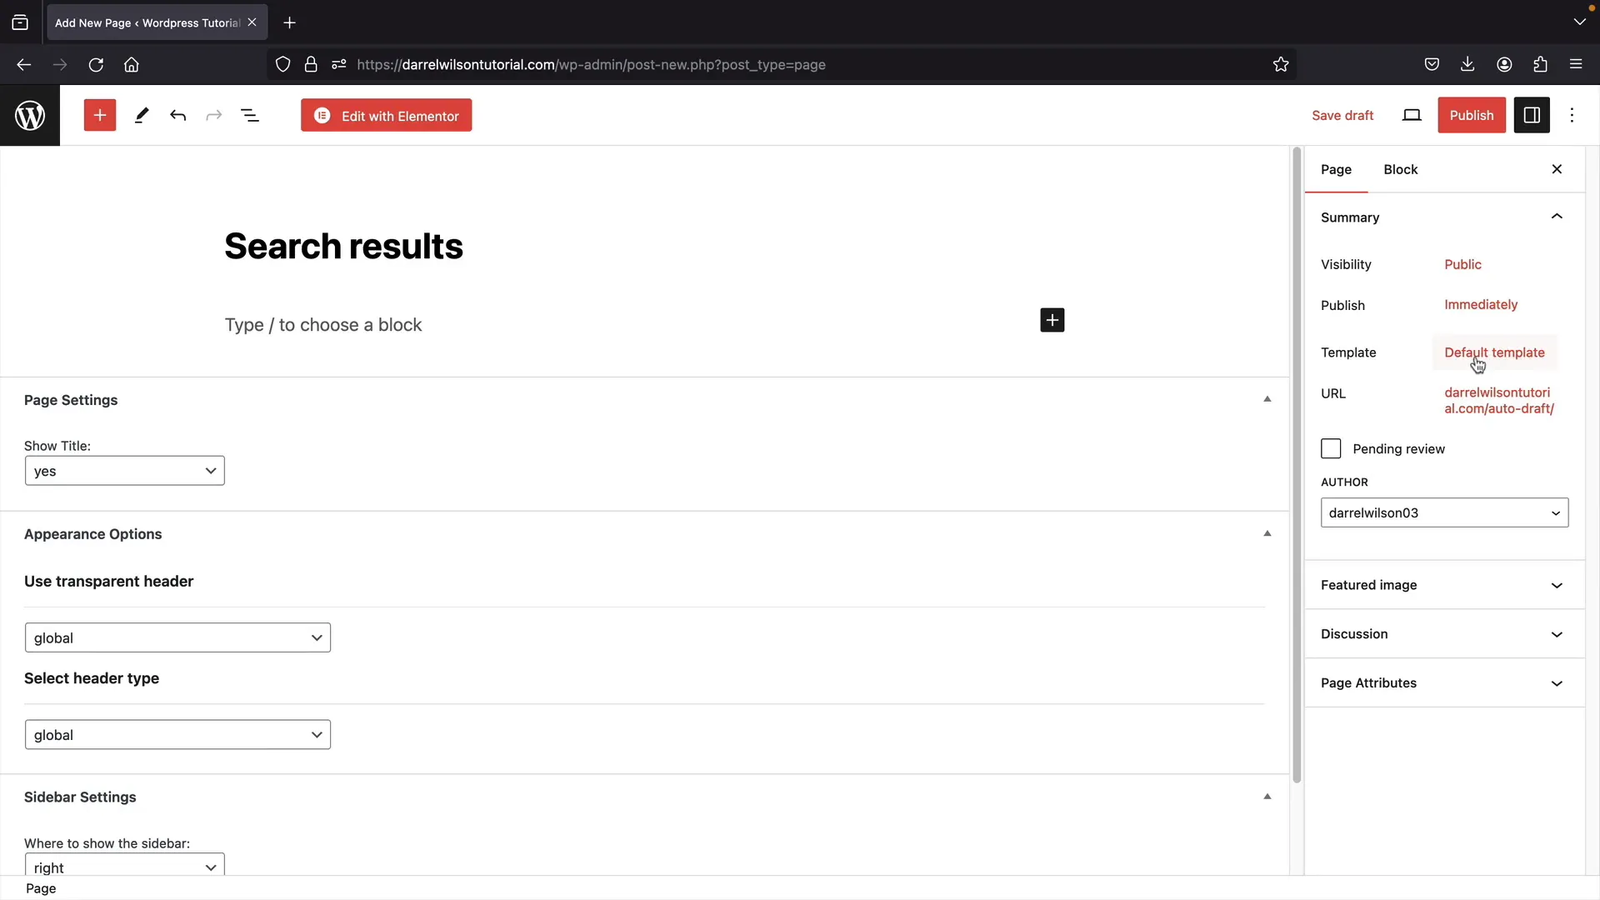
Step 9: Understand and Use Page Templates for Theme Features 🧩
Some pages, like Search Results, Dashboard, and Favorites, use special page templates provided by the theme. These templates control how pages display and function.
If you delete these pages, features like search results will stop working. To fix this:
- Create new pages and assign the appropriate templates (e.g., Advanced Search Results, User Dashboard Favorite).
- Publish the pages to restore the features.
This system allows the theme to dynamically manage complex pages and user dashboards.
Step 10: Explore Theme Options for Customization ⚙️
The WP Rentals theme offers a powerful Theme Options panel to configure site-wide settings beyond what Elementor controls.
Key options include:
- Country and Measurement Units: Set default country and choose feet or meters for property sizes.
- Appearance: Control layout width, sidebars on listing and blog pages.
- Blog Settings: Customize blog card designs and categories.
- Listing Pages: Choose listing page layouts, enable/disable map, contact forms, and minimum nights.
- Headers and Footers: Upload logos, favicons, and set header styles.
- Currency and Pricing: Set currency symbols and booking settings (per day or per hour).
- Custom Fields: Add extra fields like “Dogs” to listings.
- Email Management: Customize email subjects and content sent to users and admins.
- Recaptcha: Enable Google Recaptcha for spam protection.
- Social Login: Enable login via Facebook, Google, or Twitter (recommended to get professional help for setup).
Spend some time exploring these options to tailor your site exactly how you want it.
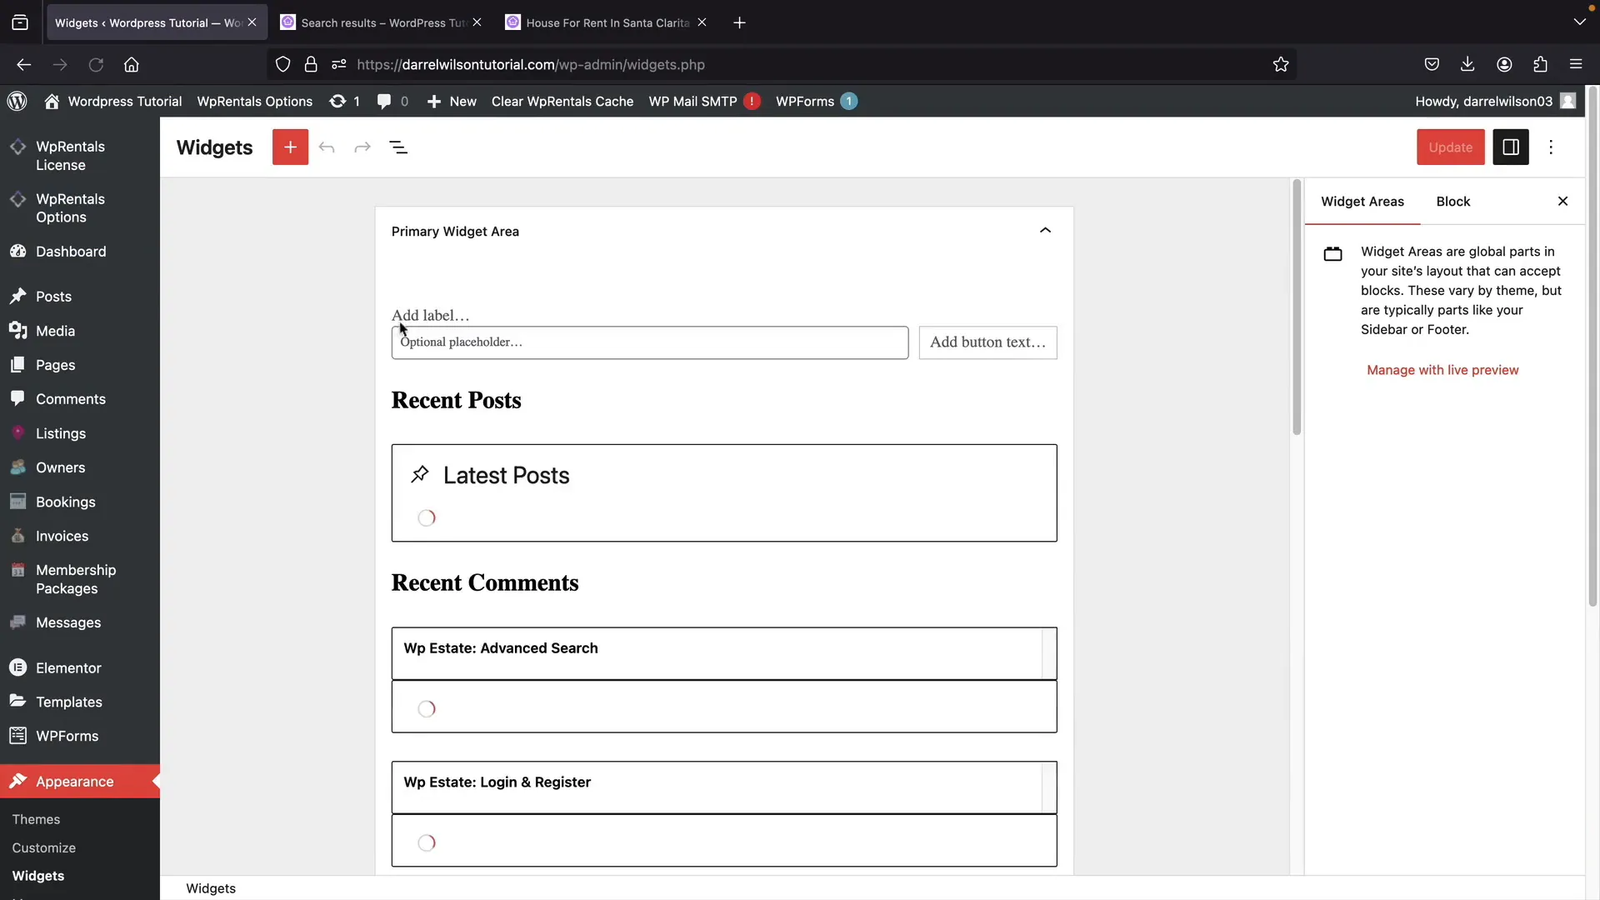
Step 11: Add Widgets to Enhance Your Website 🧩
Widgets are small blocks that appear on sidebars, footers, or other widget areas on your site. They can display search filters, recent listings, social icons, calendars, and more.
To manage widgets:
- Go to Appearance > Widgets.
- Delete default irrelevant widgets from the primary widget area (usually sidebar on listing pages).
- Add useful widgets like Latest Listings, Featured Listings, Facebook Like Box, or Calendar.
- Assign widgets to footer columns as per your design.
Widgets make your site more interactive and user-friendly.
Step 12: Monetize Your Rental Website for Revenue 💰
Monetizing your rental website is crucial if you want to generate income. WP Rentals supports multiple monetization models and integrates with popular payment gateways like Stripe and PayPal.
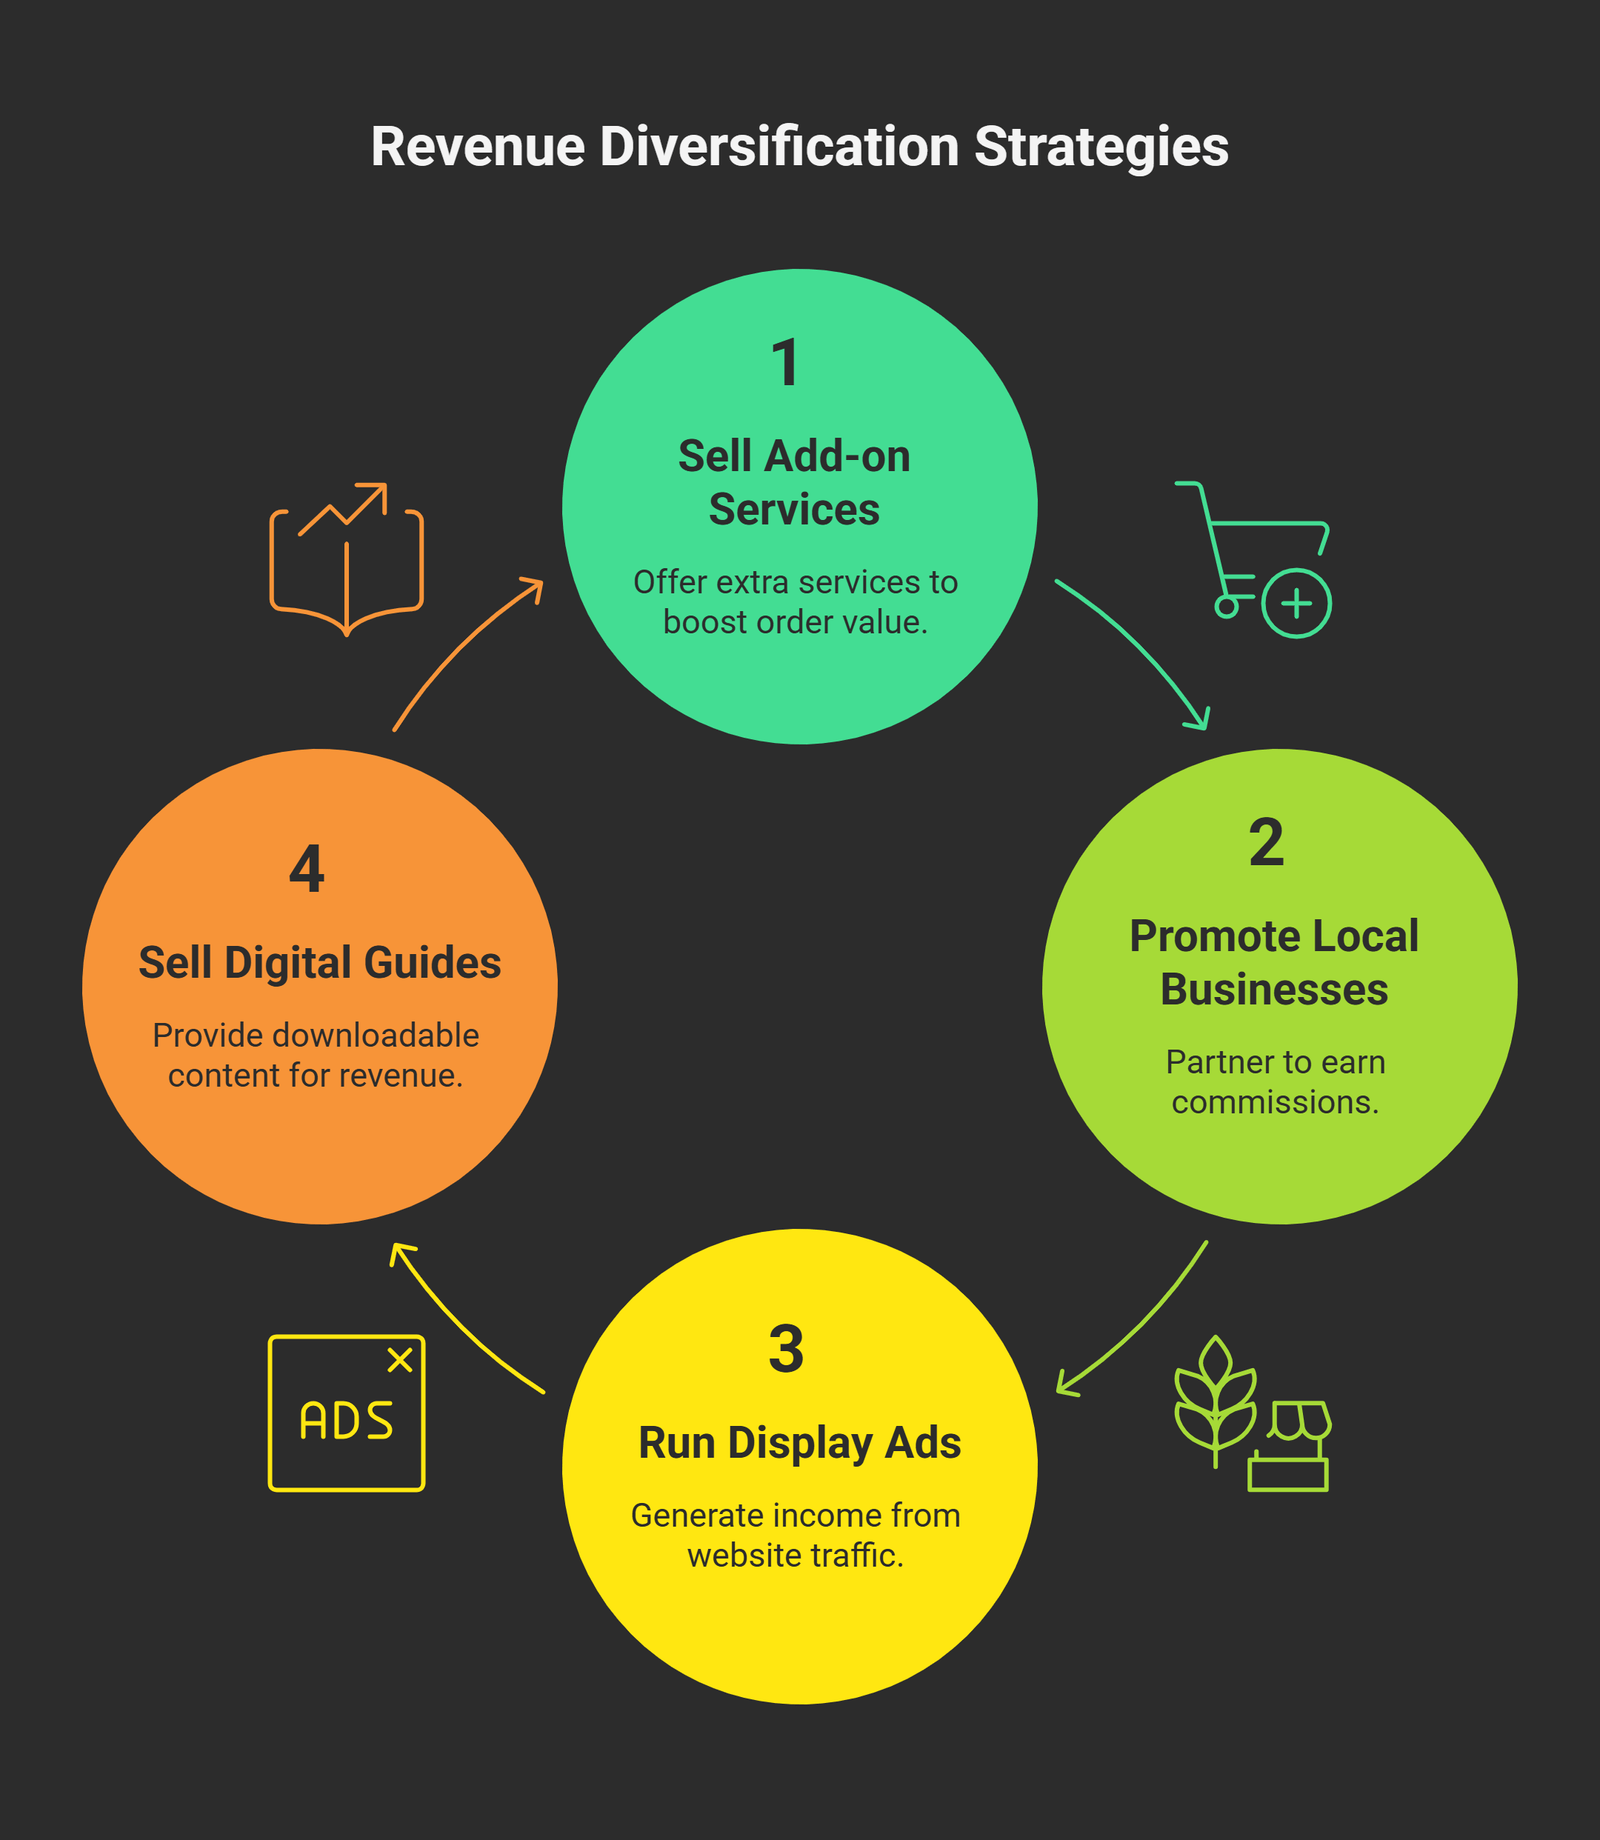
💡 Bonus Monetization Ideas
-
Sell add-on services such as cleaning, airport pickup, or equipment rentals to increase order value.
-
Promote local businesses by partnering with restaurants, tour companies, or transport services and earning commissions.
-
Run display ads using platforms like Google AdSense or Ezoic if your website receives good traffic.
-
Sell digital guides like travel itineraries, welcome booklets, or setup instructions as downloadable content.
Payment Pages
Ensure you have pages created for payment processing, such as Stripe Charge and PayPal Processor pages. These are essential for handling transactions.
Monetization Models
- Pay Per Listing: Charge users a fee for each property they list on your website.
- Memberships: Offer subscription packages allowing users to post a limited or unlimited number of listings for a recurring fee.
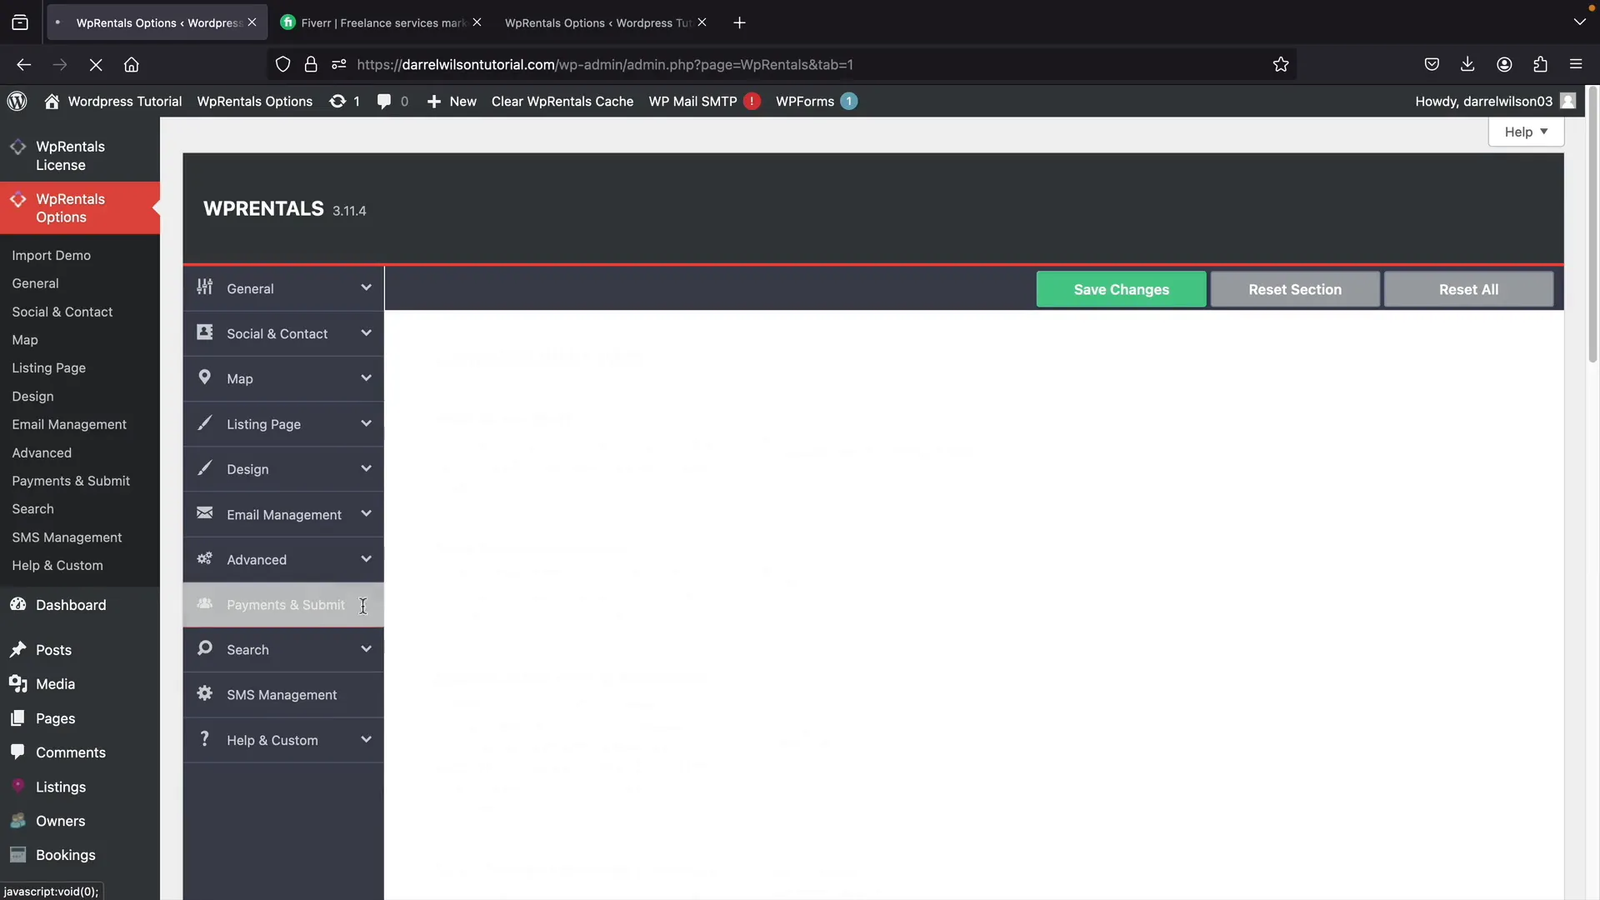
Setting Up Payments
- Go to WP Rentals > Options > Submit and Payments.
- Configure price per listing and price for featured listings.
- Enable listing approval to review before publishing.
- Set currency and disable outdated direct wire payment if desired.
- Save changes.
Integrate PayPal
- Enable PayPal in payment settings.
- Create a PayPal Business account.
- Go to developer.paypal.com and create an app to obtain Client ID and Secret Key.
- Enter these credentials into your WordPress payment settings and save.
Integrate Stripe
- Create a Stripe account and verify it.
- In the Stripe dashboard, go to Developers > API Keys and copy your Publishable and Secret keys.
- Paste these keys in your WordPress Stripe payment settings.
- Set up Webhooks in Stripe by copying your Stripe endpoint URL from WordPress and adding it in Stripe’s webhook settings.
- Copy the webhook secret key back into WordPress and save.
Test Payments
Submit a property as a user and click “Publisher Upgrade” to pay via Stripe or PayPal. The transaction should process smoothly and reflect in your Stripe/PayPal dashboard.
Membership Packages
Create subscription packages by going to WP Rentals > Membership Packages. Define billing intervals, number of listings, featured listings, and price.
In Stripe, create corresponding subscription products and copy the product ID to link with your membership package in WordPress.
Users can then subscribe via Stripe or PayPal and manage their subscription from their dashboard.
WooCommerce Integration (Optional)
If you want access to more payment gateways, WooCommerce can be integrated:
- Enable WooCommerce in WP Rentals settings.
- Install and activate the WooCommerce plugin and payment gateway extensions (Stripe, PayPal, Paystack, Mercado Pago, etc.).
- Configure WooCommerce payment methods and webhooks.
- Note: WooCommerce does not support recurring payments for WP Rentals memberships.
Step 13: Integrate Google Maps API for Enhanced Search 🗺️
Google Maps integration improves user experience by providing address autocomplete, accurate map display, and location-based search results.
To integrate Google Maps API:
- Go to WP Rentals > Map settings and select Google Maps and Google Places.
- Click the provided link to Google Cloud Platform and create a project.
- Enable the Maps JavaScript API.
- Create API credentials (API key) and restrict it to your website domain.
- Copy the API key and paste it into your WordPress map settings.
- Save changes and test by entering a city or neighborhood in the search bar.
Note that Google Maps API is a paid service but charges minimal fees per call, making it affordable and worthwhile.
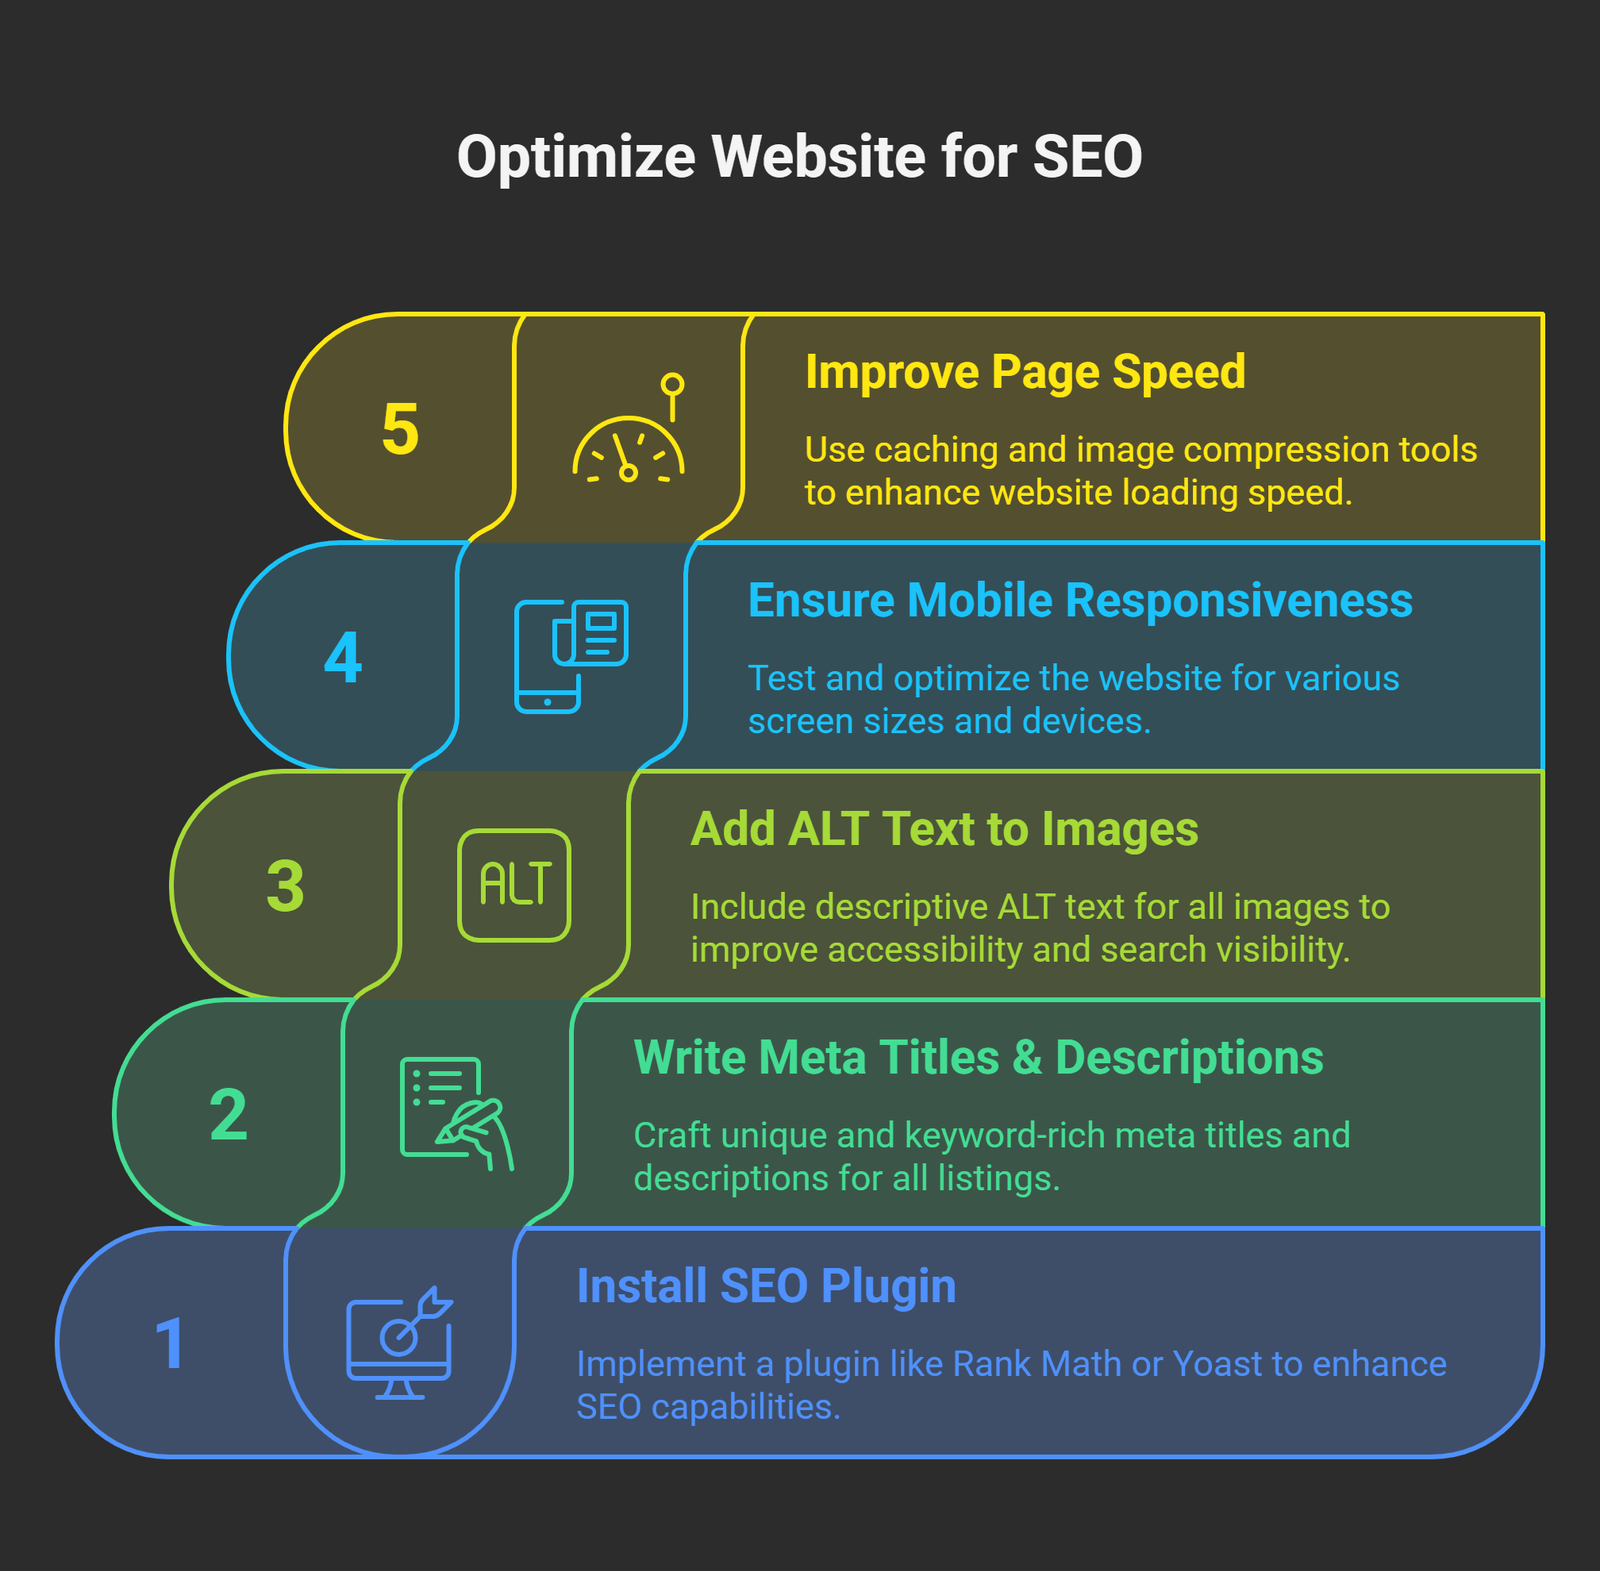
Step 14: Optimize for SEO and Mobile Users 🔍📱
To attract organic traffic and deliver the best user experience, make sure your site is optimized for both search engines and mobile devices:
-
Install an SEO plugin like Rank Math or Yoast to optimize each property page and blog post.
-
Write unique, keyword-rich meta titles and descriptions for all listings.
-
Add ALT text to every image to improve accessibility and image search visibility.
-
Ensure mobile responsiveness by testing your site on different screen sizes and devices.
-
Improve page speed using caching plugins (e.g., WP Rocket) and image compression tools (e.g., ShortPixel).
📝 Property Listing SEO Checklist
Use this quick checklist to make sure each listing is optimized for search:
-
✅ Unique title with relevant keywords
-
✅ Compelling meta description (120–160 characters)
-
✅ ALT text added to all images
-
✅ H2 and H3 tags used correctly for structure
-
✅ Internal links to related listings or blog content
Step 15: Build an Email List and Capture Leads 📢
To generate recurring traffic and future bookings:
Use trusted tools like Mailchimp, Brevo (formerly Sendinblue), or ConvertKit to set up email marketing automation.
-
-
Offer a free lead magnet such as a local rental guide, discount coupon, or free checklist to grow your subscriber list.
-
Place opt-in forms on key areas of your website:
-
Homepage header or hero section
-
Blog sidebar or within posts
-
Checkout or booking confirmation page
-
-
Frequently Asked Questions (FAQ)
Q1: Do I need a business license to start a rental website? A: It depends on your local laws and the rental types offered. Check with local authorities before launching.
Q2: Can WP Rentals be used for multi-language websites? A: Yes, WP Rentals supports WPML and other translation plugins, including RTL languages.
Q3: Is there a limit to how many listings I can host? A: No. There is no hard limit set by the theme. Your web host resources may determine performance.
Q4: Can I connect my site to Airbnb or Booking.com? A: WP Rentals offers iCal sync functionality, allowing calendar synchronization with platforms like Airbnb.
Q5: How do I prevent spam or fake listings? A: Enable manual approval for new listings and use Google reCAPTCHA for forms.
Q6: Can I use my own payment gateway? A: Yes, WP Rentals supports custom gateways through WooCommerce if you need more than Stripe or PayPal.
Q7: How often do I need to update the theme and plugins? A: Check monthly for updates and perform backups before updating to avoid conflicts.
Q8: Does this setup work for mobile users? A: Yes. The theme is mobile-friendly and fully responsive. You can test it using Google’s Mobile-Friendly Test tool.
Q9: How do I boost visibility in Google? A: Use an SEO plugin, write unique descriptions for each listing, build backlinks from local sites, and keep your blog active.
Q10: Is it possible to offer coupons or discounts? A: Yes, the theme supports seasonal pricing and discounts for longer stays. WooCommerce can also add coupon codes.
Conclusion 🎉
Building a direct booking website like Airbnb on WordPress is achievable with the right tools and guidance. With WP Rentals, Hostinger hosting, and Elementor page builder, you can create a professional rental platform tailored to your business needs. From setting up listings and categories to designing your site and integrating payment gateways, each step is manageable even for beginners.
Explore SEO, email marketing, and social media strategies to grow traffic. Optimize mobile performance, integrate secure payments, and maintain regular backups to ensure a successful long-term rental website.
If you follow this step-by-step tutorial, you’ll have a fully functional rental website ready to attract users and generate revenue. Happy building!
