


Building a professional website used to feel like a daunting task reserved only for those with coding skills or a hefty budget to hire developers. But what if I told you that you can create a stunning, fully functional website for your business, blog, or portfolio without writing a single line of code? That’s right—no programming, no technical headaches, and no complicated tools. Thanks to advancements in AI-powered website builders and intuitive platforms like WordPress, building your own website has never been easier or faster.
In this comprehensive guide, I’ll walk you through the entire process from launching your website to customizing your pages, using a step-by-step approach anyone can follow. Whether you’re a complete beginner or looking to simplify your website-building process, this tutorial will help you get your site live and looking professional in minutes.
Table of Contents
- Step 1: Pick a Name for Your Website 🏷️
- Step 2: Get Your Domain and Hosting 📦
- Step 3: Log In to Your WordPress Website 🔐
- Step 4: Install the GravityWrite Website Builder Plugin 🧩
- Step 5: Connect WordPress to GravityWrite 🔗
- Step 6: Add Your Website Details 📝
- Step 7: Choose a Template for Your Website 🎨
- Step 8: Customize Your Template 🖌️
- Step 9: Build Your Site with AI-Generated Content 🤖
- Step 10: Review and Edit Your Website Content ✍️
- Bonus Tips for a Professional Website 🌟
- Frequently Asked Questions (FAQ) ❓
- Conclusion: Your Website is Just Minutes Away 🚀
Step 1: Pick a Name for Your Website 🏷️
Every website starts with a name—a domain name that represents your brand and makes it easy for visitors to find you online. Choosing the right domain is crucial because it not only impacts your brand identity but also affects your search engine ranking and user experience.
To begin, think about what best reflects your business or project. It should be memorable, relevant, and ideally short enough to type easily. For example, if you’re building a restaurant website, you might choose something like DeliciousEats.online or TastyBites.com.
Once you have a name in mind, you’ll want to check if it’s available. This can be done quickly through domain registrar websites or hosting platforms. Simply enter your desired name and see if it’s free to register.
Pro Tip: While .com domains are the most popular, I highly recommend considering a .online domain. It’s perfect for all types of online businesses and helps your website stand out as modern and professional. Plus, “online” is a keyword with high search volume, potentially improving your visibility on Google and other search engines.
Using a trusted platform to check and register your domain name ensures you get the best deals and reliable service. Many registrars offer free domain registration when you purchase hosting plans, which leads us to the next step.
Step 2: Get Your Domain and Hosting 📦
After selecting your website name, the next essential step is to secure your domain and hosting. Let’s break down what each means:
- Domain: This is your website’s address on the internet, like yourwebsite.online.
- Hosting: This is the online space where your website’s files, images, and content are stored, making your site accessible to visitors 24/7.
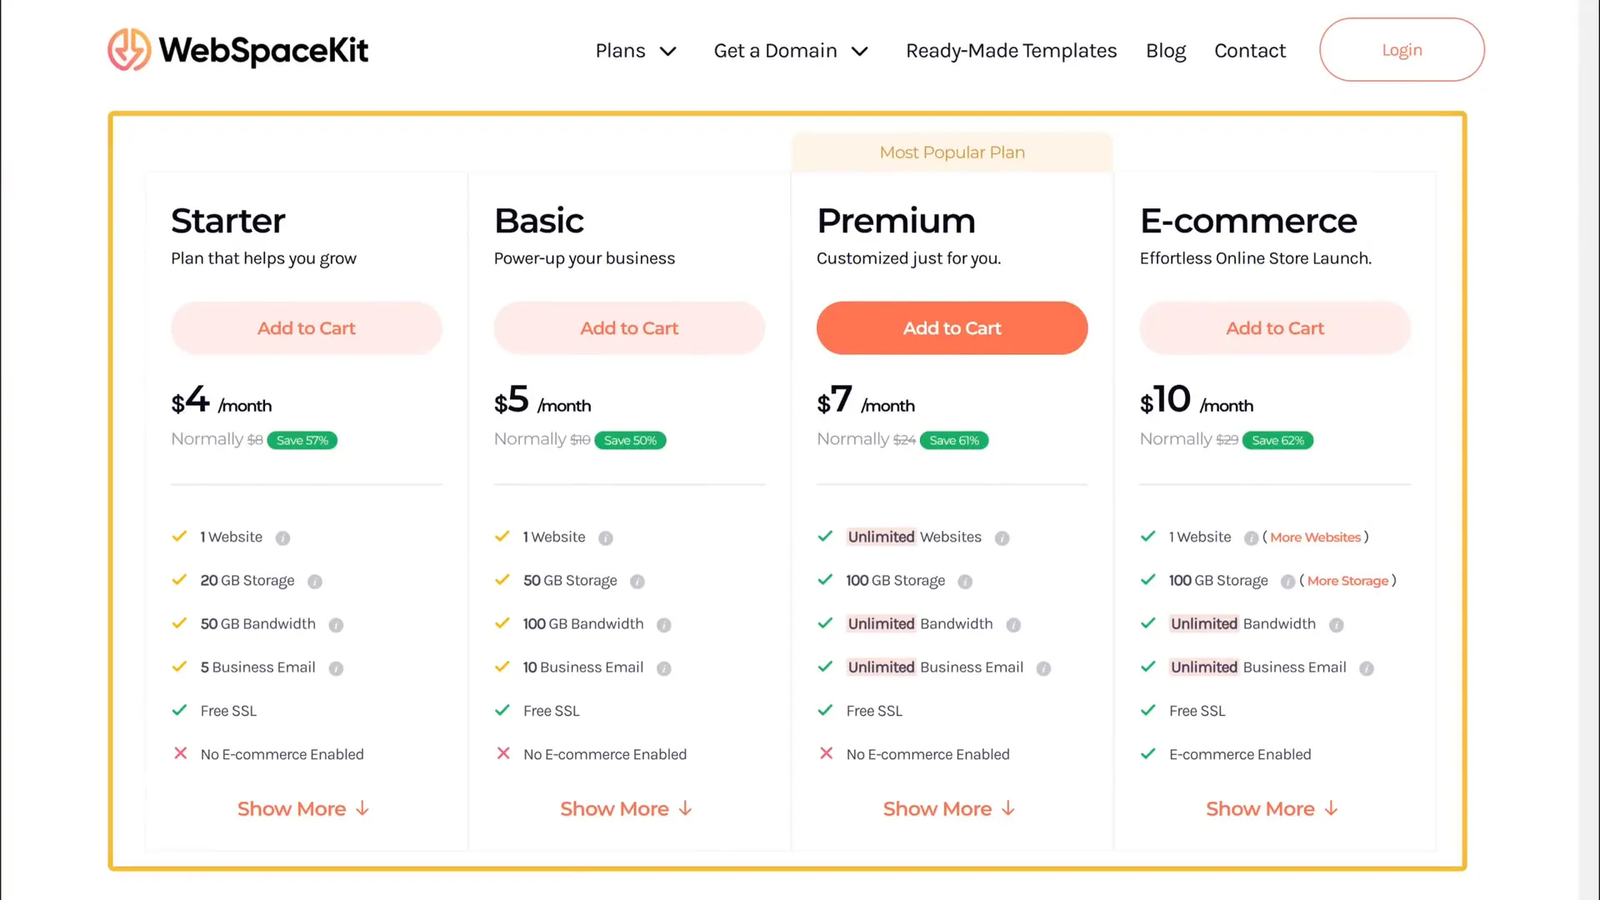
For beginners, it’s best to choose a hosting provider that offers a simple sign-up process, excellent customer support, and easy integration with WordPress. I recommend using WebSpaceKit, a reliable and affordable hosting provider that even offers a free domain when you sign up for their hosting plans.
Here’s how to get started:
- Visit your hosting provider’s website (like WebSpaceKit) via a trusted link.
- Choose a hosting plan. For a single website, the basic plan is perfect.
- Select the duration of your hosting—12 months is a common choice, but if you want to save more, opt for a 36-month plan which can cost as little as $5 per month.
- Your previously chosen domain will be automatically added for free.
- Fill in your account details and payment information.
- Complete the checkout process, and your domain and hosting will be activated.
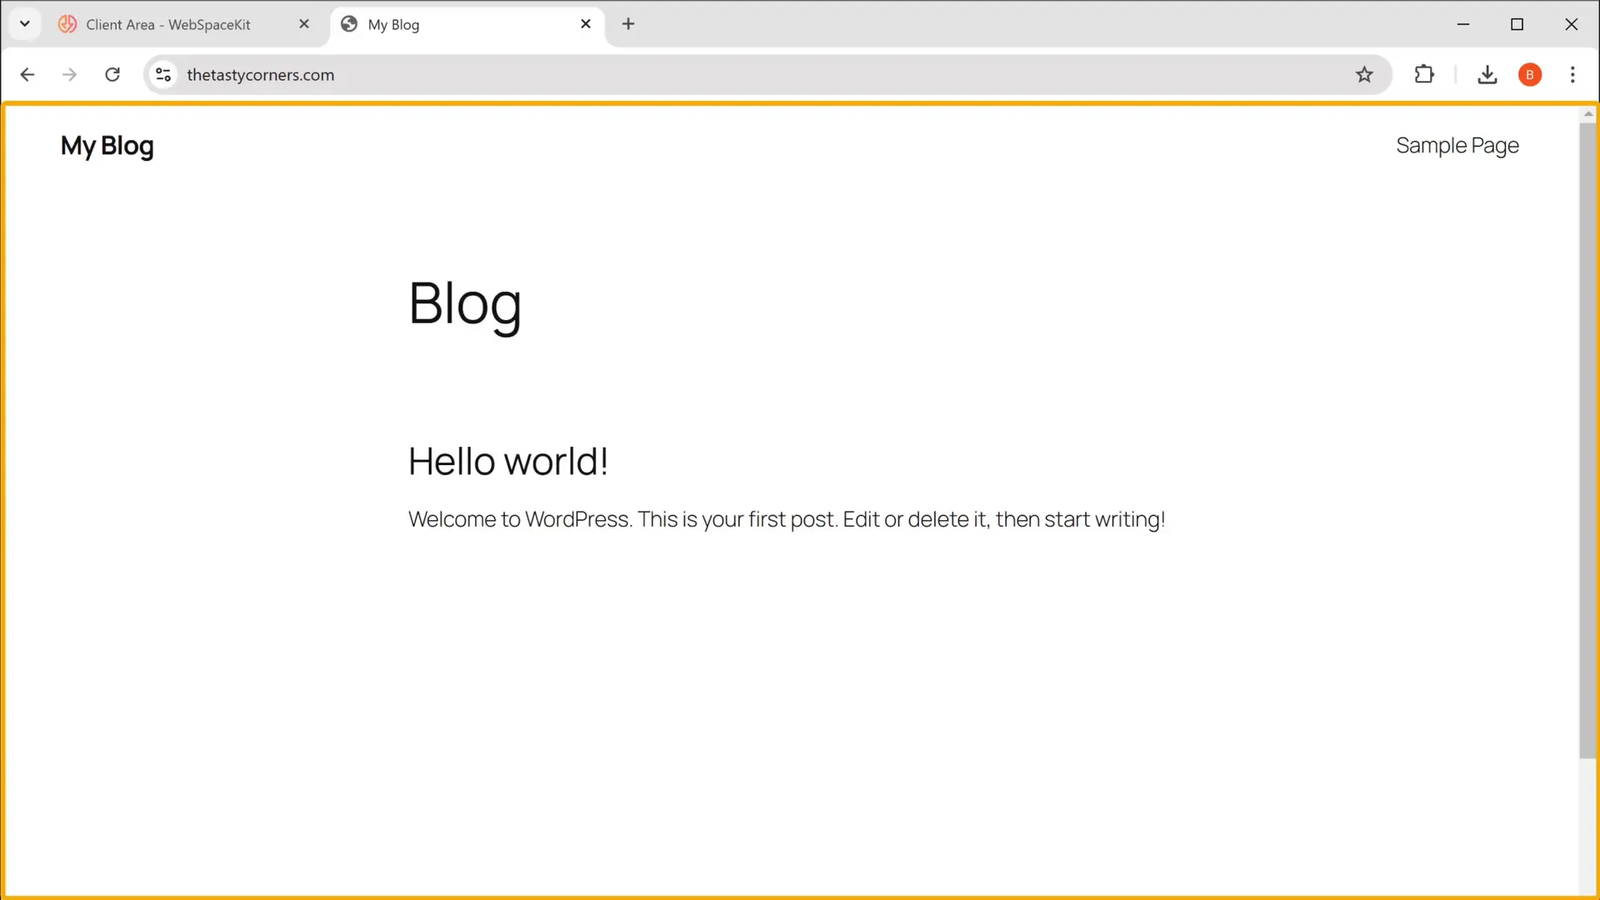
Once your payment is confirmed, your website will officially be live on the internet, although it will appear blank initially. Don’t worry—we’ll fix that in the next steps.
Step 3: Log In to Your WordPress Website 🔐
With your domain and hosting set, it’s time to start building your website using WordPress—the world’s most popular content management system. WordPress is user-friendly, flexible, and supports thousands of plugins that can enhance your site’s functionality.
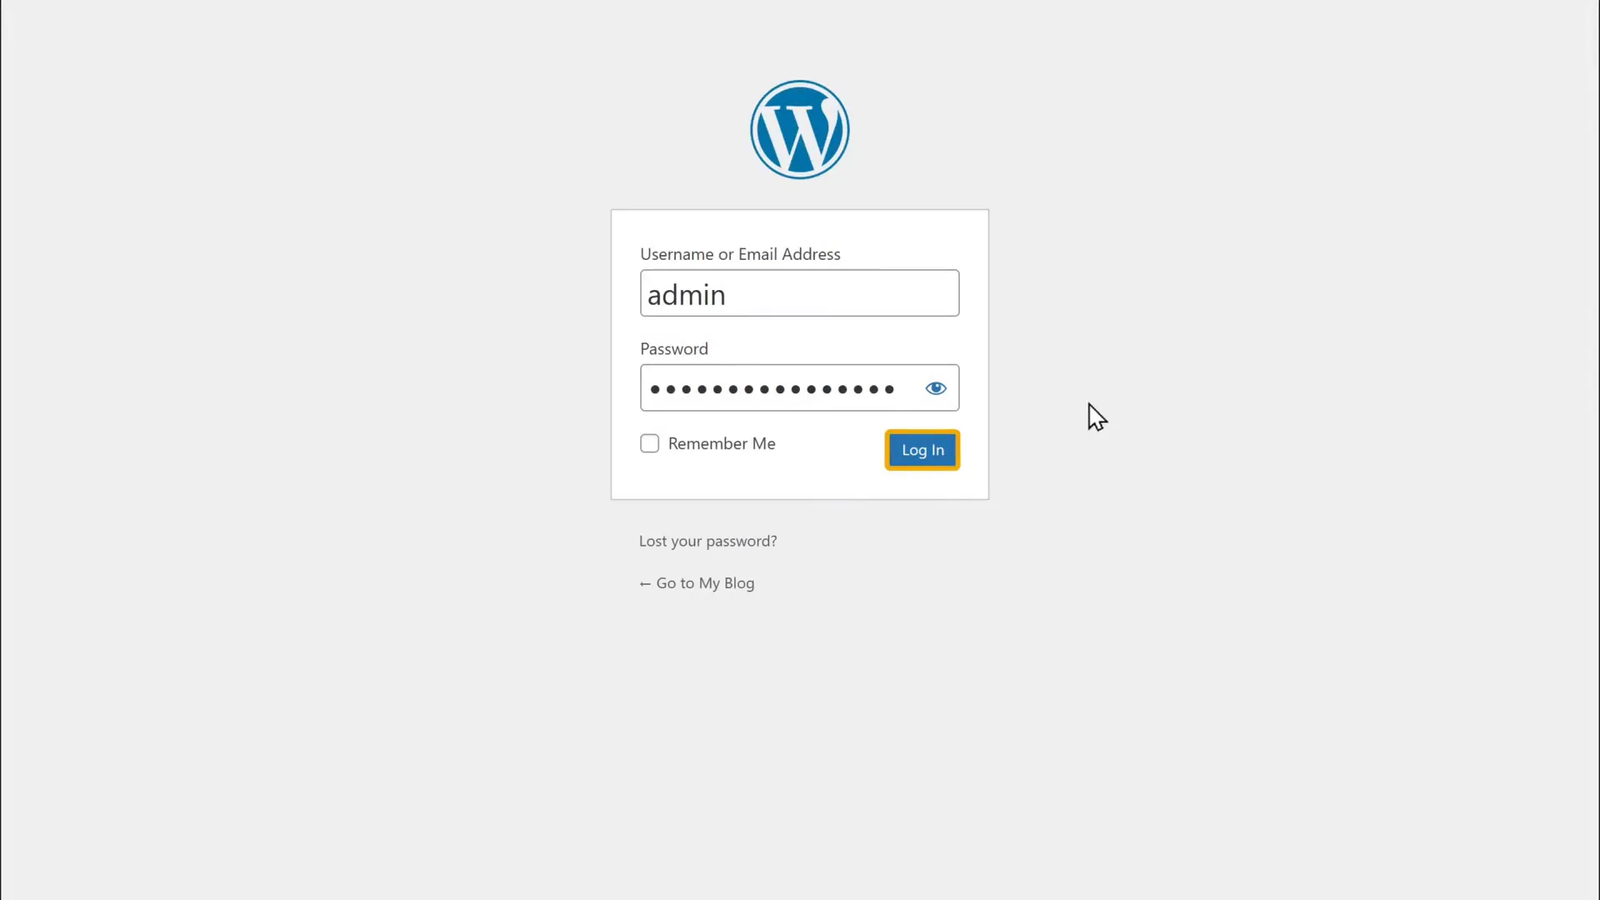
To access your WordPress dashboard, simply type yourdomain.com/wp-admin in your browser. This will bring you to the login page, where you’ll enter your username and password.
These login credentials are typically emailed to you right after your hosting is activated. Make sure to keep this email safe as it’s your gateway to managing your website.
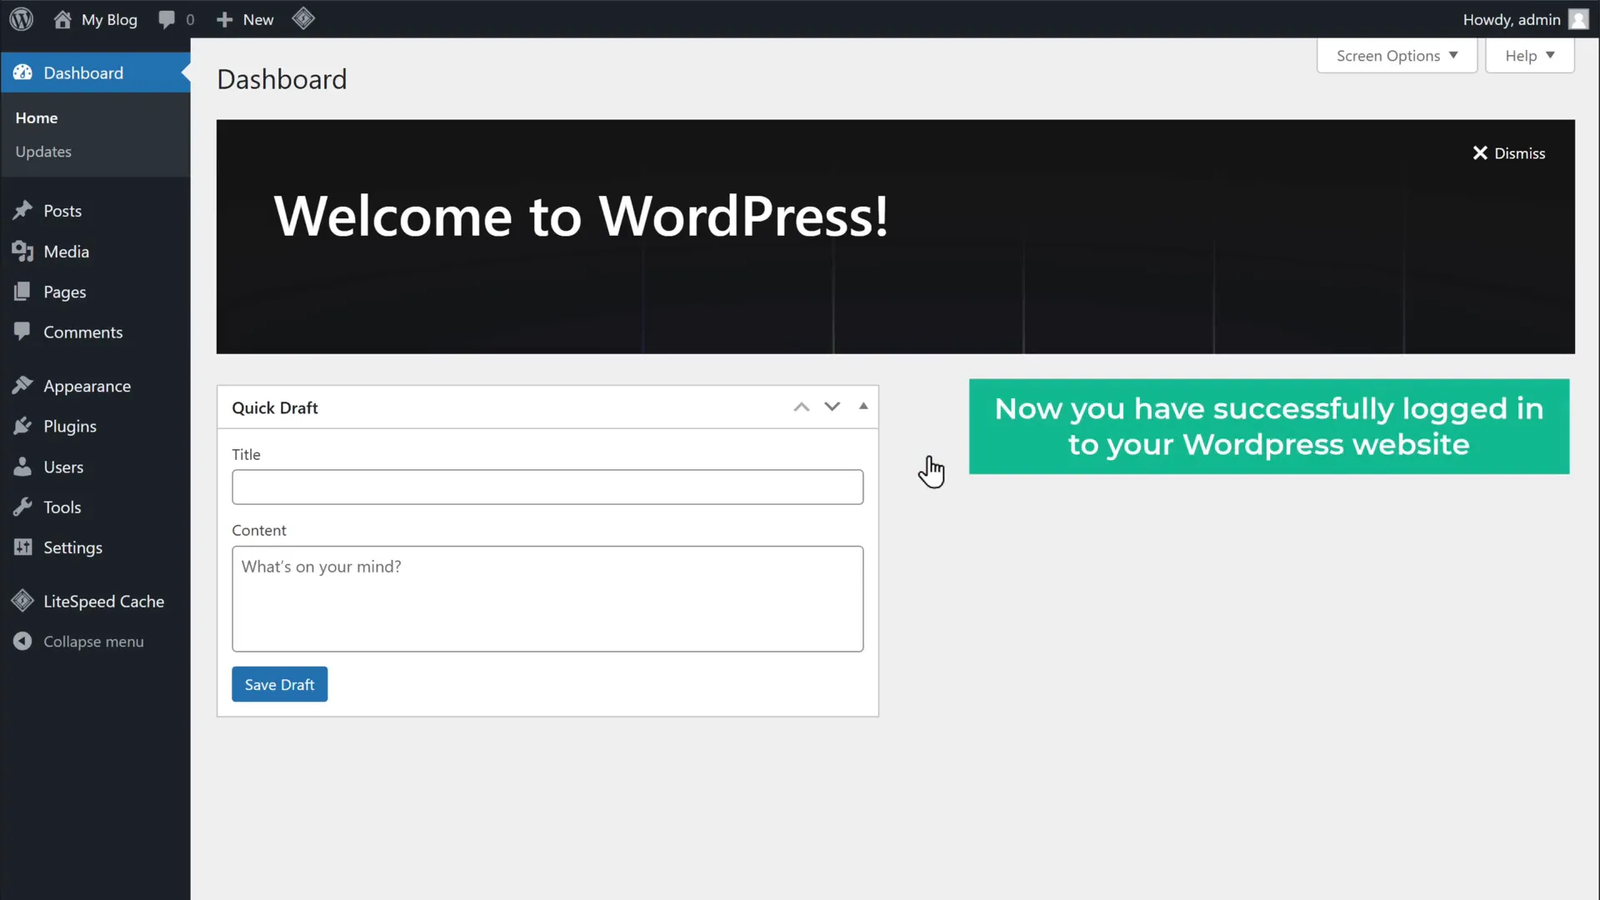
Once logged in, you’ll arrive at the WordPress dashboard—the control center for your entire website. From here, you can install plugins, customize themes, add pages, and much more.
Step 4: Install the GravityWrite Website Builder Plugin 🧩
Building a beautiful website from scratch can be intimidating, but with the GravityWrite Website Builder plugin, the process is simplified dramatically. This powerful plugin uses AI to automatically design and create your entire website based on minimal input from you.
To install the plugin:
- Click the download link to get the GravityWrite plugin file.
- In your WordPress dashboard, navigate to Plugins > Add New.
- Click on Upload Plugin and select the GravityWrite plugin file you downloaded.
- Click Install Now, then Activate the plugin once installation is complete.
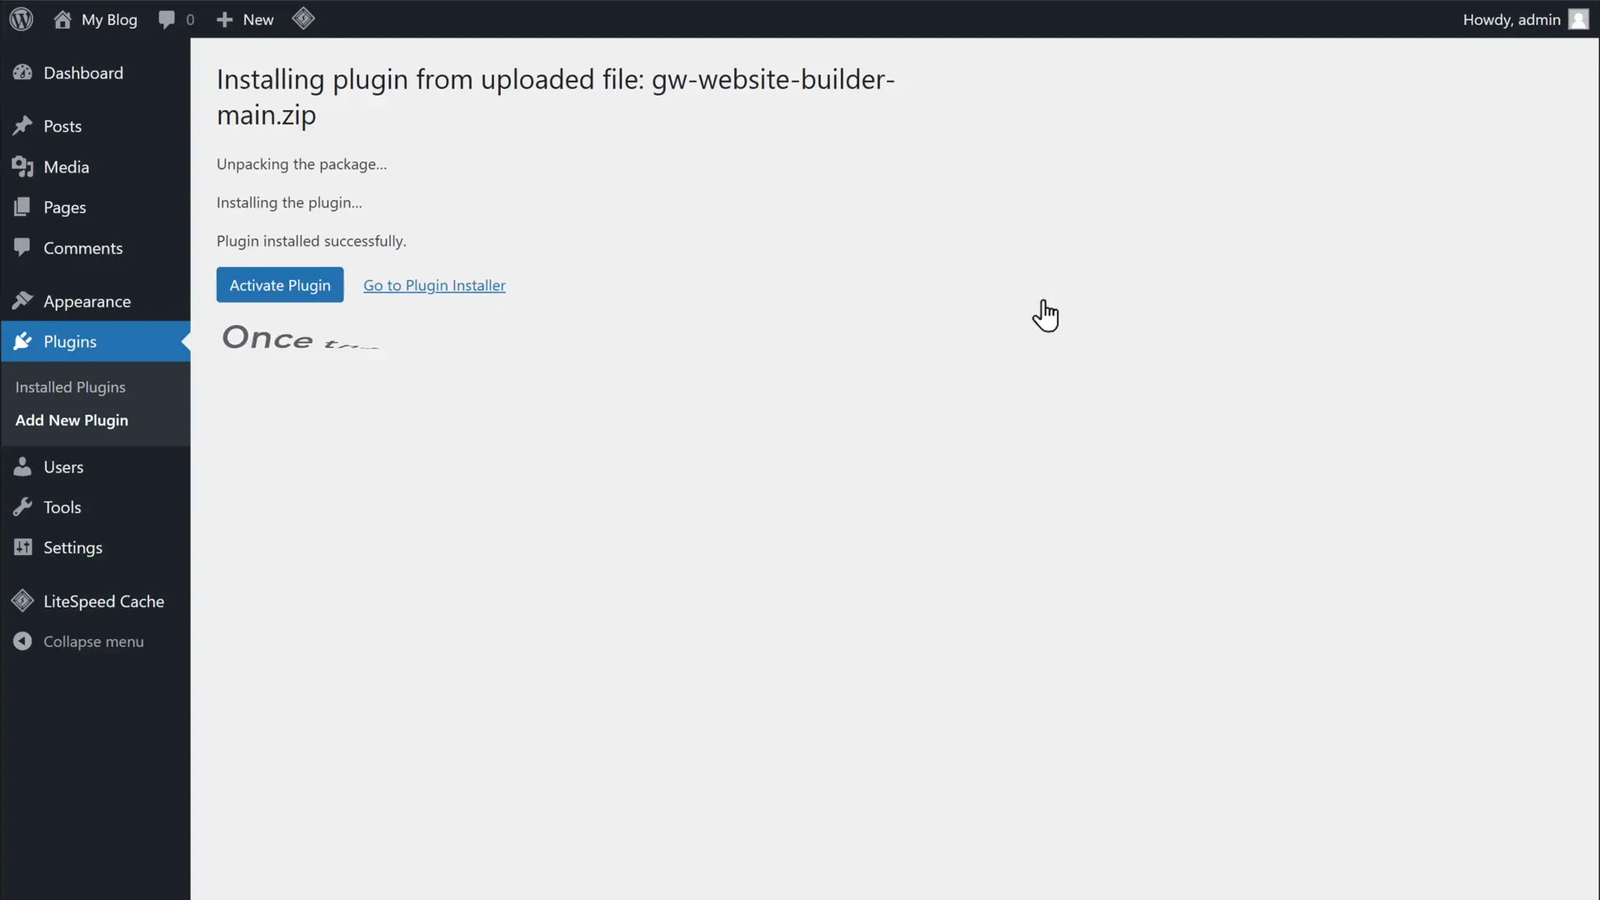
With GravityWrite activated, you’re ready to connect your WordPress site to this AI-powered builder to start generating your website automatically.
Step 5: Connect WordPress to GravityWrite 🔗
Connecting GravityWrite to your WordPress site is straightforward and secure. This connection allows the AI to communicate with your website and build pages based on your inputs.
Here’s how to do it:
- In your WordPress dashboard, click on the GravityWrite plugin menu.
- Click Let’s Get Started.
- Select Continue with GravityWrite.
- Sign in with your Google account to authenticate.
- Click Continue to complete the connection.
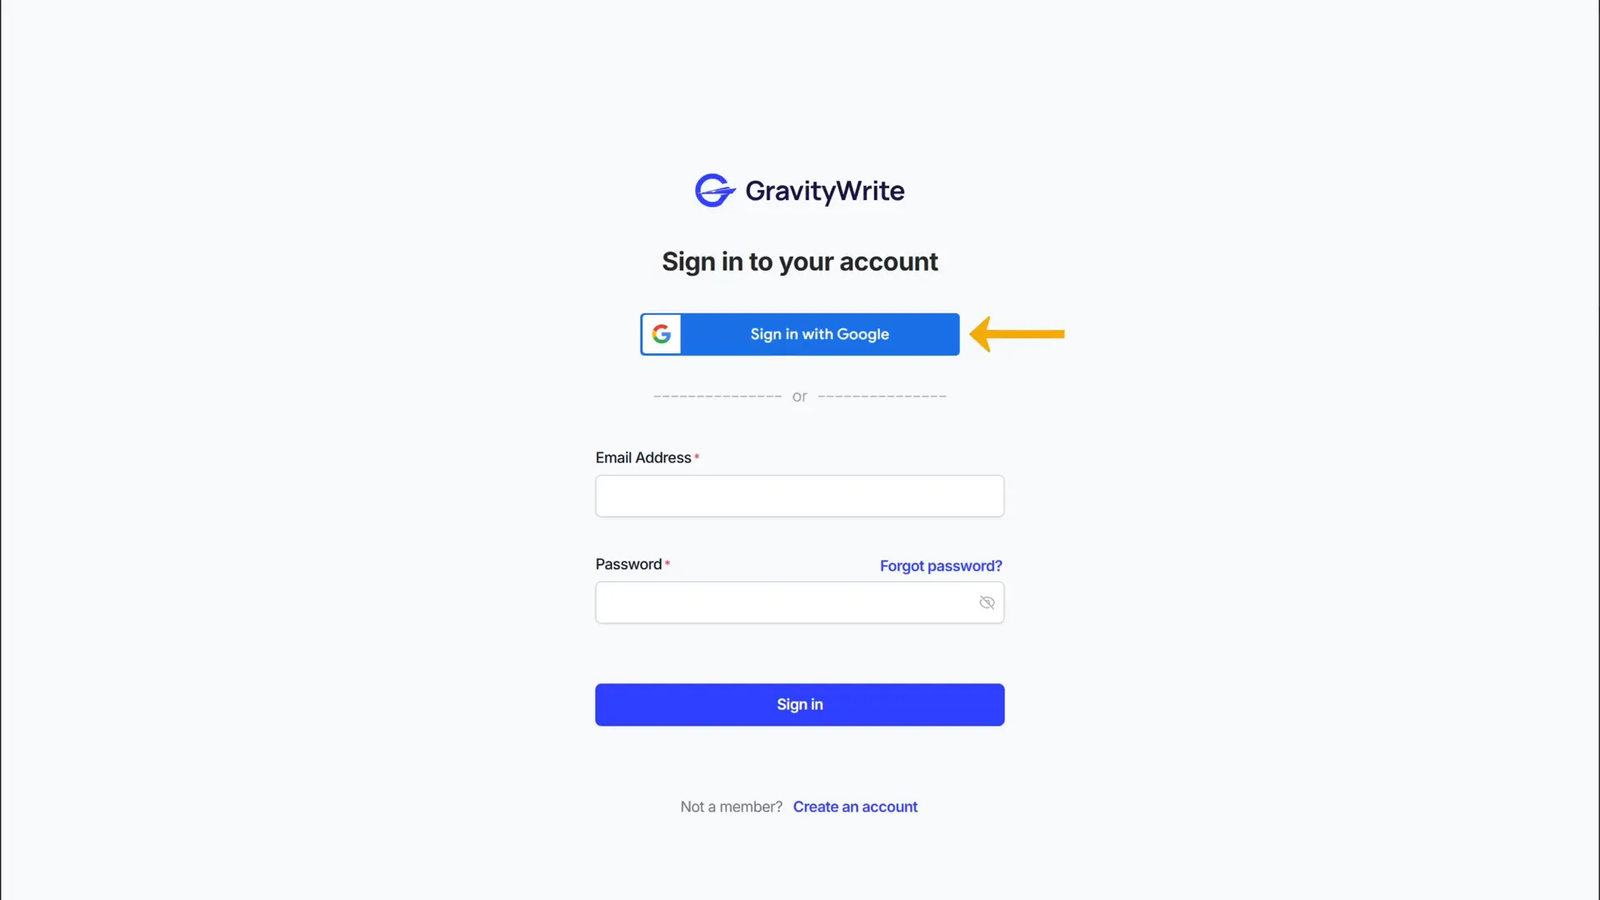
Once connected, GravityWrite is ready to begin building your website based on the details you provide next.
Step 6: Add Your Website Details 📝
To create a website that truly represents your brand, GravityWrite needs some information about your business or project. This helps the AI tailor the design, layout, and content to suit your needs perfectly.
Provide the following details:
- Website Type: Choose from options like business, blog, portfolio, restaurant, and more.
- Website Title: Enter the name of your website or business.
- Description: Describe what your business offers or sells. The more detailed, the better the AI can customize your site.
- Contact Information: Add phone numbers, email addresses, and physical location if applicable.
If you’re unsure what to write for your description, you can use the AI’s “Write with AI” feature to generate professional content automatically.
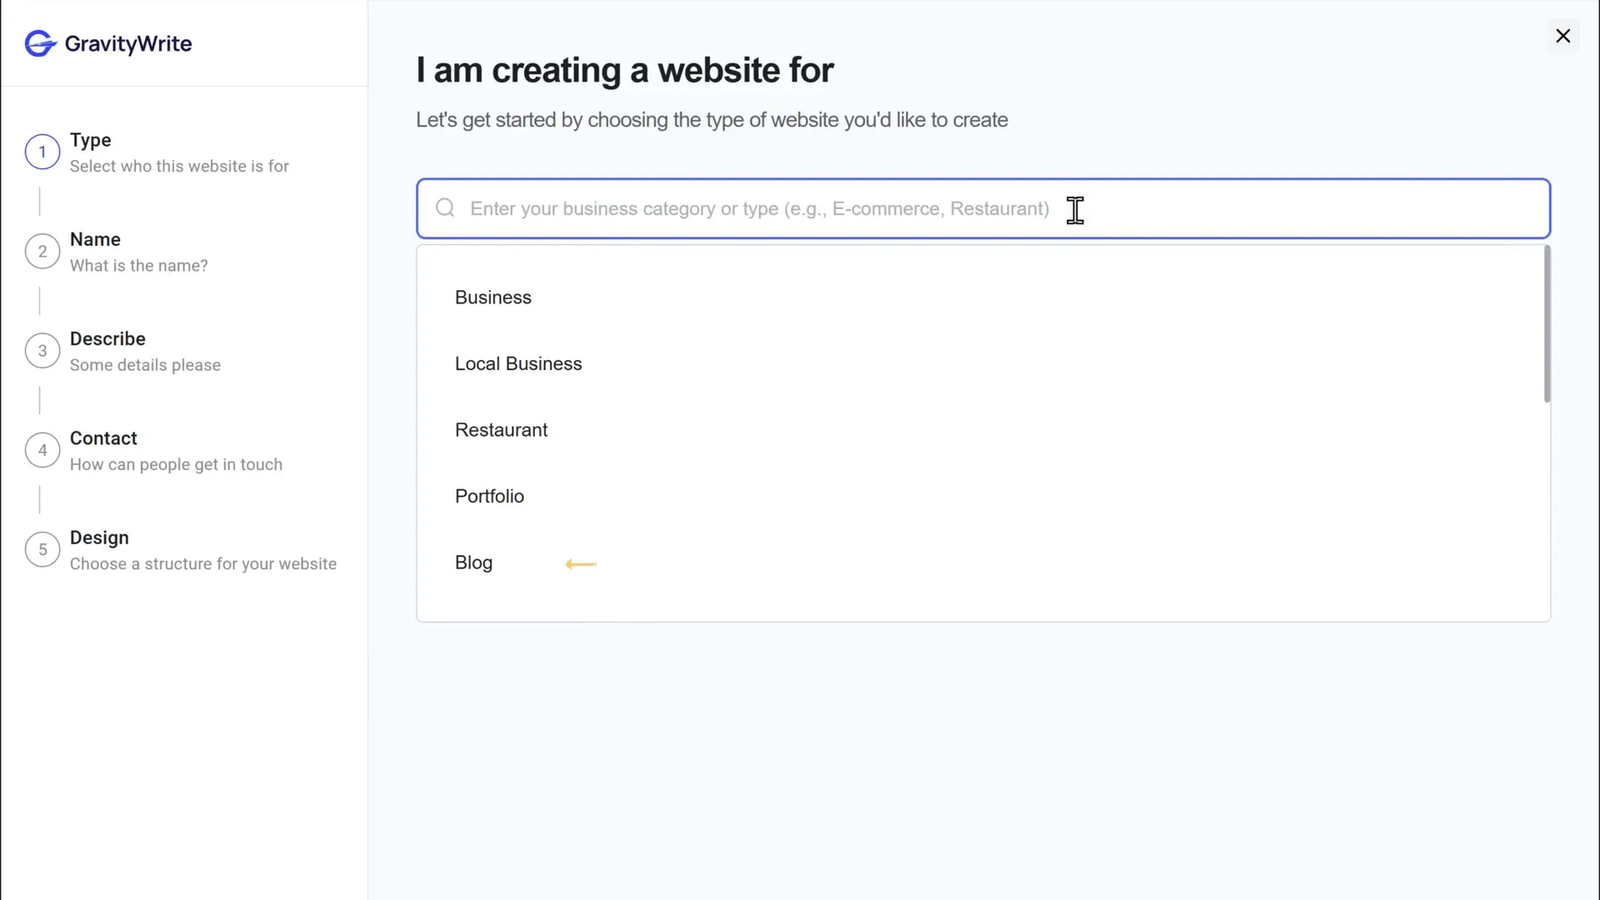
After filling in all the details, click Continue to move on.
Step 7: Choose a Template for Your Website 🎨
Templates are pre-designed website layouts that give your site a professional look and feel without starting from scratch. GravityWrite offers a wide variety of templates tailored to different industries and styles.
Browse through the options and pick the template that resonates with your brand’s personality and goals. Whether you want something sleek and modern, warm and inviting, or bold and creative, there’s a template for you.
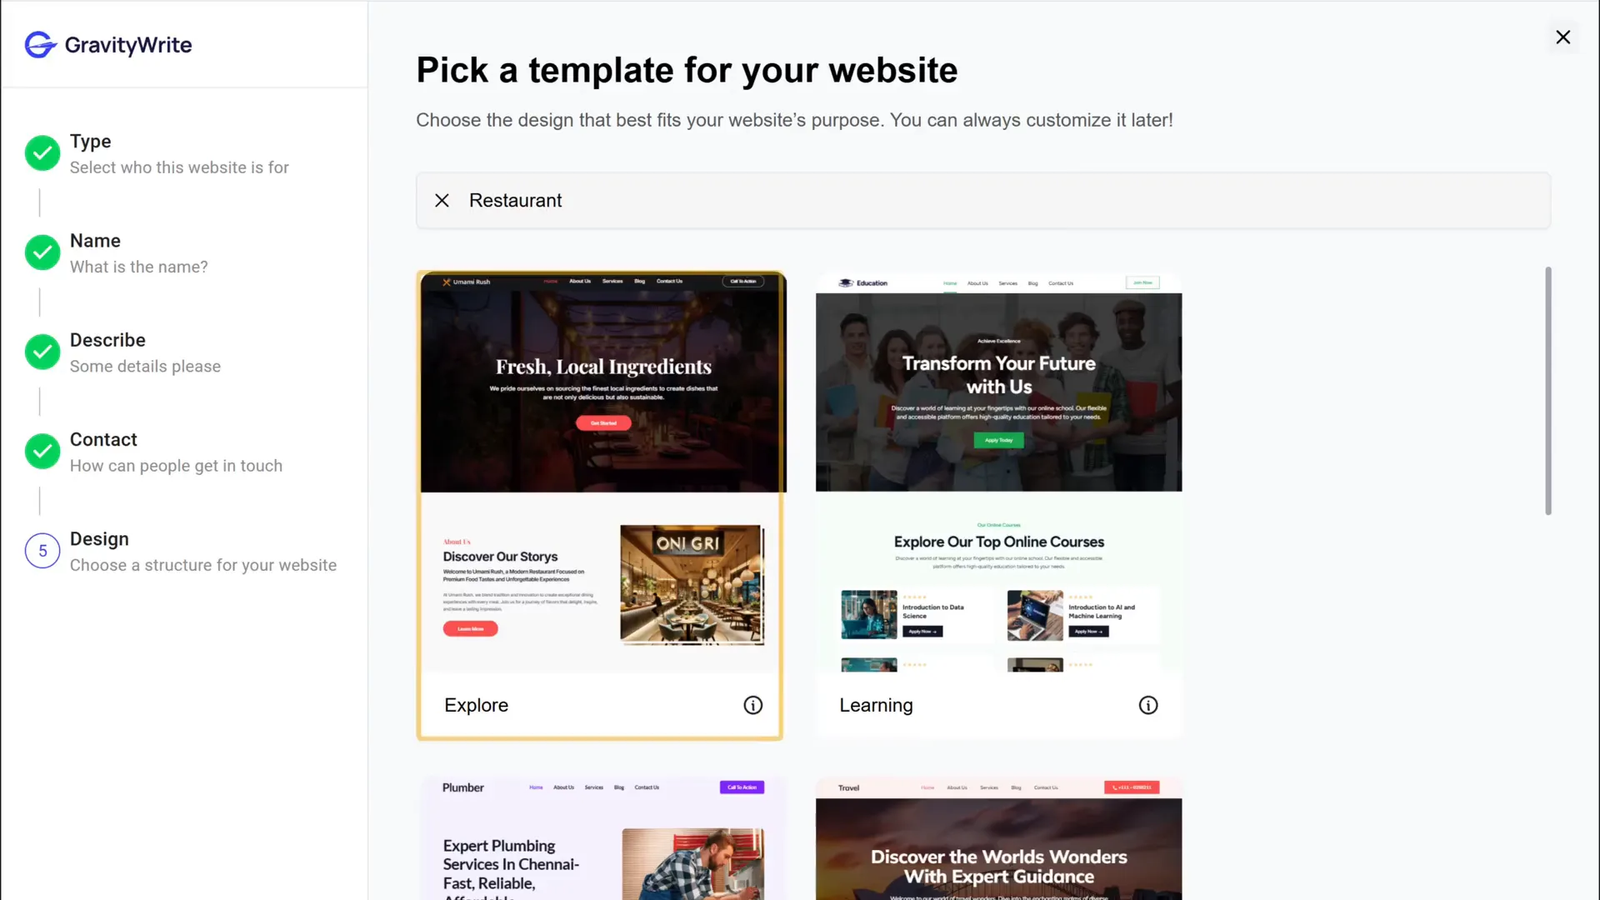
Once you’ve chosen your template, click Continue. You’ll then see a summary of all the details you’ve provided so far. Take a moment to review everything and make sure it’s accurate. If you need to make any changes, you can go back and edit.
When you’re satisfied, click Start Customizing to begin personalizing your template.
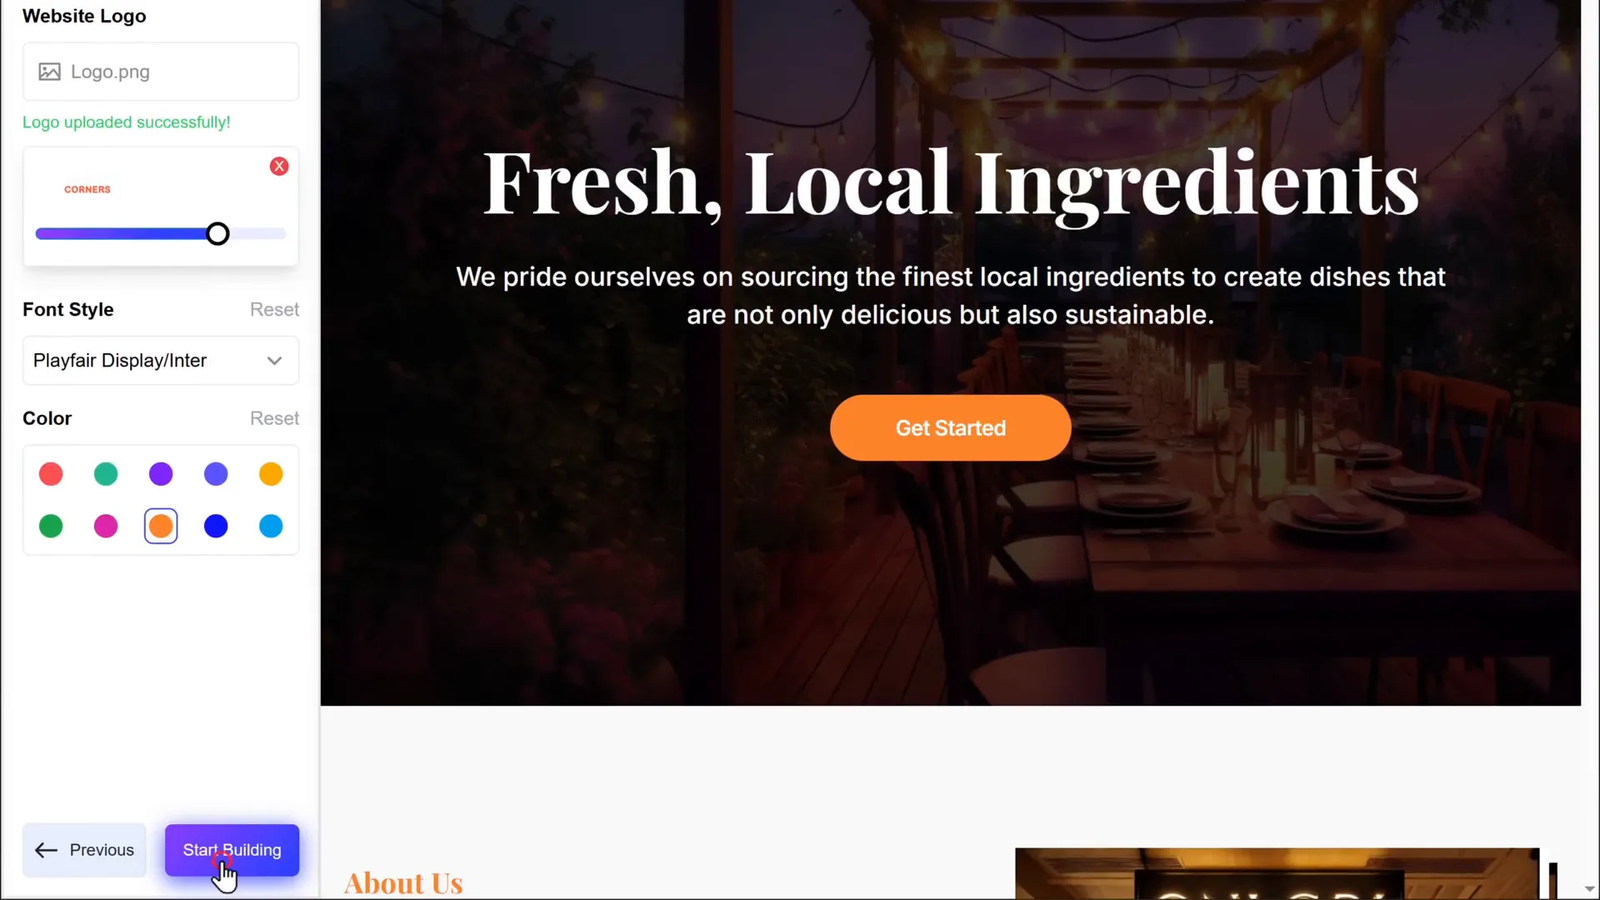
Step 8: Customize Your Template 🖌️
Before the AI starts generating your full website, you have the opportunity to make some key customizations to the template to better fit your brand.
Key customizations include:
- Adding Your Logo: Upload your business logo to enhance brand recognition.
- Changing Font Styles: Choose fonts that match your brand’s tone—whether professional, casual, or playful.
- Updating Colors: Adjust font and background colors to align with your brand palette.
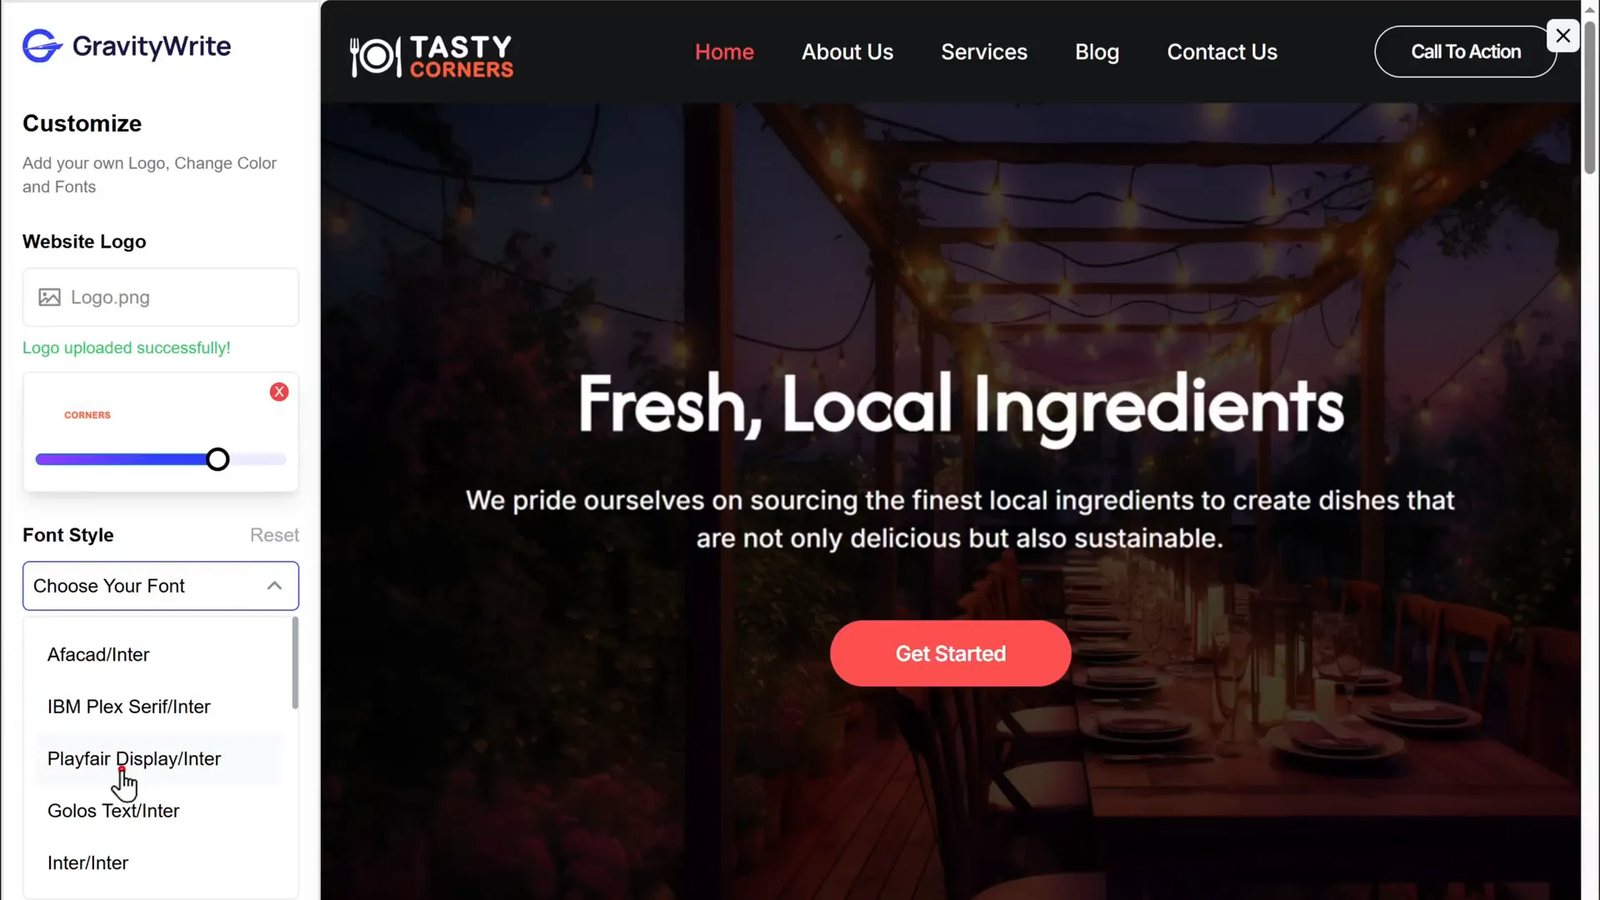
These small tweaks go a long way in making your website feel uniquely yours before the content is automatically added.
Step 9: Build Your Site with AI-Generated Content 🤖
Now it’s time for the exciting part—watch GravityWrite build your website instantly using the template and details you provided.
Click on Start Building, and you’ll see your homepage and other pages populate with content, images, and layouts tailored for your business.
The AI even creates unique images relevant to your business, so you don’t have to hunt for stock photos or design graphics yourself.
After the homepage is generated, GravityWrite will suggest additional pages such as About Us, Services, Contact, and more. You can choose which pages you want to include by clicking Generate Page or skip ones you don’t need.
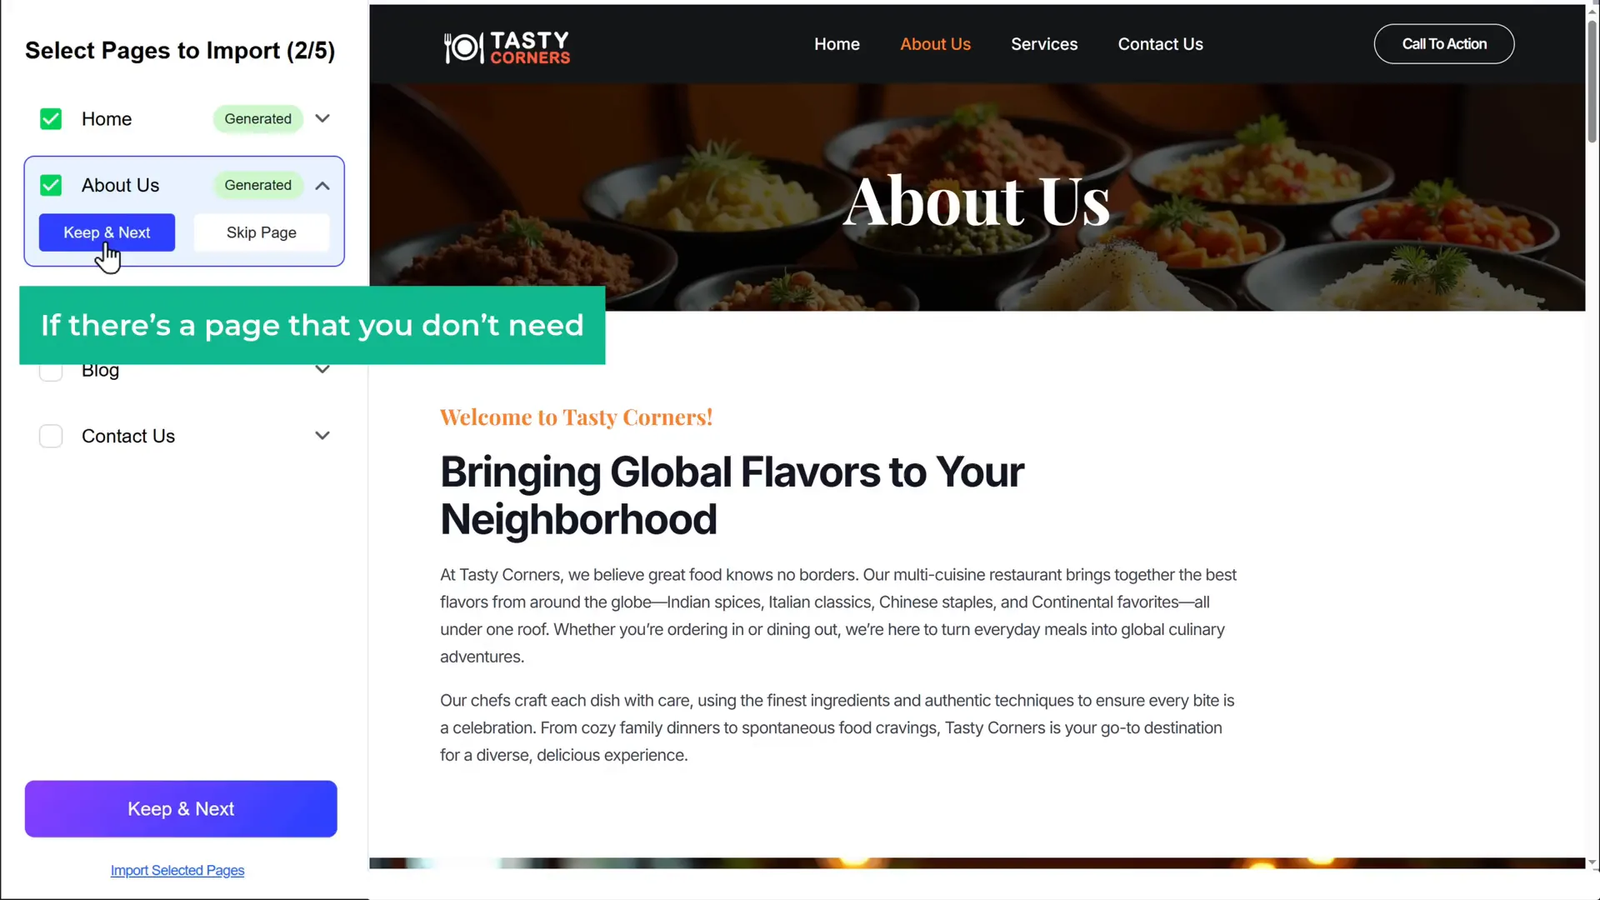
Once you have selected all desired pages, click Import Selected Pages. GravityWrite will then build your entire website with all the content and design elements in place.
Step 10: Review and Edit Your Website Content ✍️
Your website is now live and filled with AI-generated content, but personalization is key to making it truly yours. Thankfully, WordPress combined with the Elementor page builder plugin makes editing easy and intuitive.
To edit any page:
- Navigate to the page you want to edit in the WordPress dashboard.
- Click Edit with Elementor.
- In the Elementor editor, click on any text block to modify the content. Simply select the text and start typing.
- To edit buttons or links, click on them and update the text or URL.
- Change images by clicking on them, uploading new ones, and selecting Insert.
- Once you’re happy with your changes, click Publish to save.
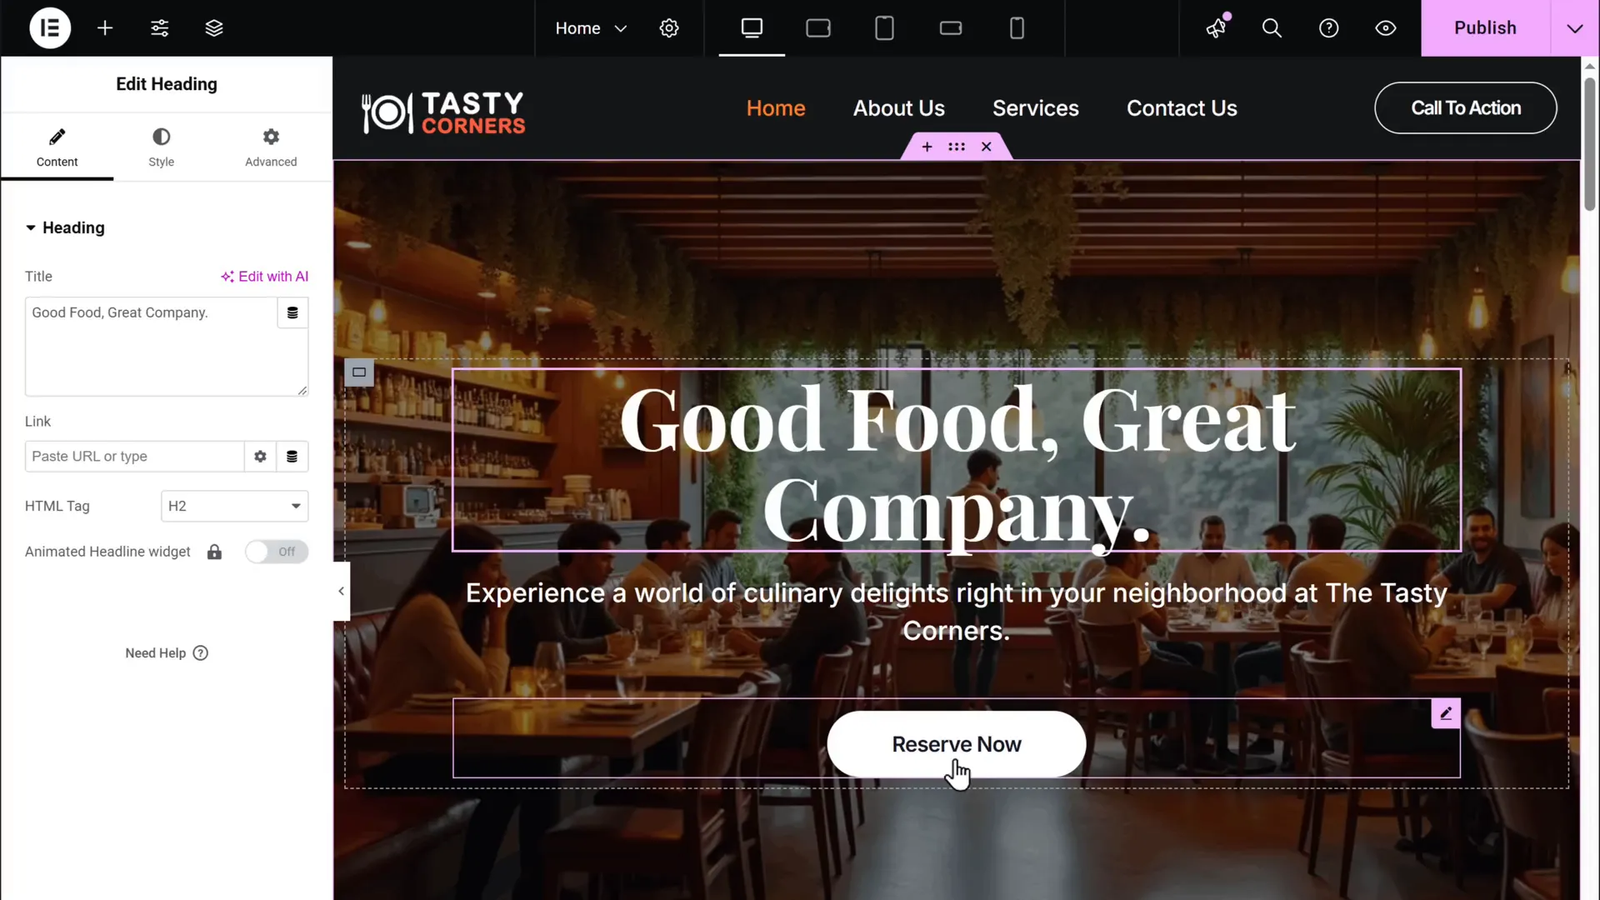
Refreshing your website in a browser will show all the updates live, so you can continuously tweak and improve your site’s content and appearance.
Bonus Tips for a Professional Website 🌟
- Choose a .online domain: This modern extension helps your site stand out and improves your search engine ranking potential.
- Use AI for content creation: Beyond your website, tools like GravityWrite can generate blog posts, social media content, and images to save you time and maintain consistency.
- Keep your site updated: Regularly update your content, images, and plugins to keep your site secure and engaging.
- Optimize for SEO: Use keywords relevant to your business throughout your site to improve Google rankings.
- Leverage social proof: Add testimonials, reviews, or case studies to build trust with your visitors.
Frequently Asked Questions (FAQ) ❓
Q1: Do I need any coding knowledge to build a website using this method?
No, this entire process is designed for beginners with zero coding experience. The AI-powered builder and WordPress plugins handle all the technical aspects for you.
Q2: How much does it cost to build a website using this method?
The main costs are for domain registration and hosting. With deals like free domain registration included with hosting plans, you can get started for as little as a few dollars per month. The GravityWrite plugin may have subscription fees, but it often offers discounts.
Q3: Can I customize my website after it’s built?
Absolutely! You have full control over your website’s content and design using WordPress and page builders like Elementor. You can edit text, images, layouts, and more.
Q4: Will my website be mobile-friendly?
Yes, the templates provided are responsive, meaning your website will look great on desktops, tablets, and smartphones.
Q5: Can I add a blog or online store to my website?
Yes, WordPress supports blogs and eCommerce functionality through plugins like WooCommerce, which you can add as your site grows.
Q6: How do I get help if I run into issues?
Most hosting providers and WordPress communities offer extensive documentation and support. Additionally, many plugins come with dedicated support teams.
Conclusion: Your Website is Just Minutes Away 🚀
Building a website doesn’t have to be complicated or stressful. With the right tools and a clear step-by-step approach, anyone can create a professional, beautiful website in a matter of minutes. By choosing a memorable domain, securing reliable hosting, and leveraging AI-powered tools like GravityWrite, you can focus on what matters most—growing your business and engaging your audience.
Remember, your website is your digital storefront and brand ambassador. Investing a little time now to build it right will pay off immensely in the long run. So don’t wait—take the first step today and launch your online presence effortlessly!
If you’re planning to create a restaurant or hotel-related WordPress website, don’t miss our list of the 10 best booking plugins and themes for WordPress — it’s a must-read guide to get started quickly and professionally.
