

Creating a professional WordPress website has never been easier, especially if you’re a beginner with no prior experience. In this comprehensive guide, I’ll walk you through the best and easiest way to build your own WordPress website from scratch. Using only free themes, free plugins, and a powerful drag-and-drop page builder called Elementor, you’ll be able to design a stunning, fully customizable, and mobile-friendly website without writing a single line of code.
This tutorial is designed for complete beginners, and I will make sure to guide you through every single step without skipping any important details. The only cost involved will be hosting, and I’ll also show you how to get the best WordPress hosting for as little as three dollars per month, including an exclusive discount. Plus, I’ll introduce you to hundreds of professionally designed templates that you can import and customize to suit your needs.
Let’s dive in and get started on building your WordPress website today!
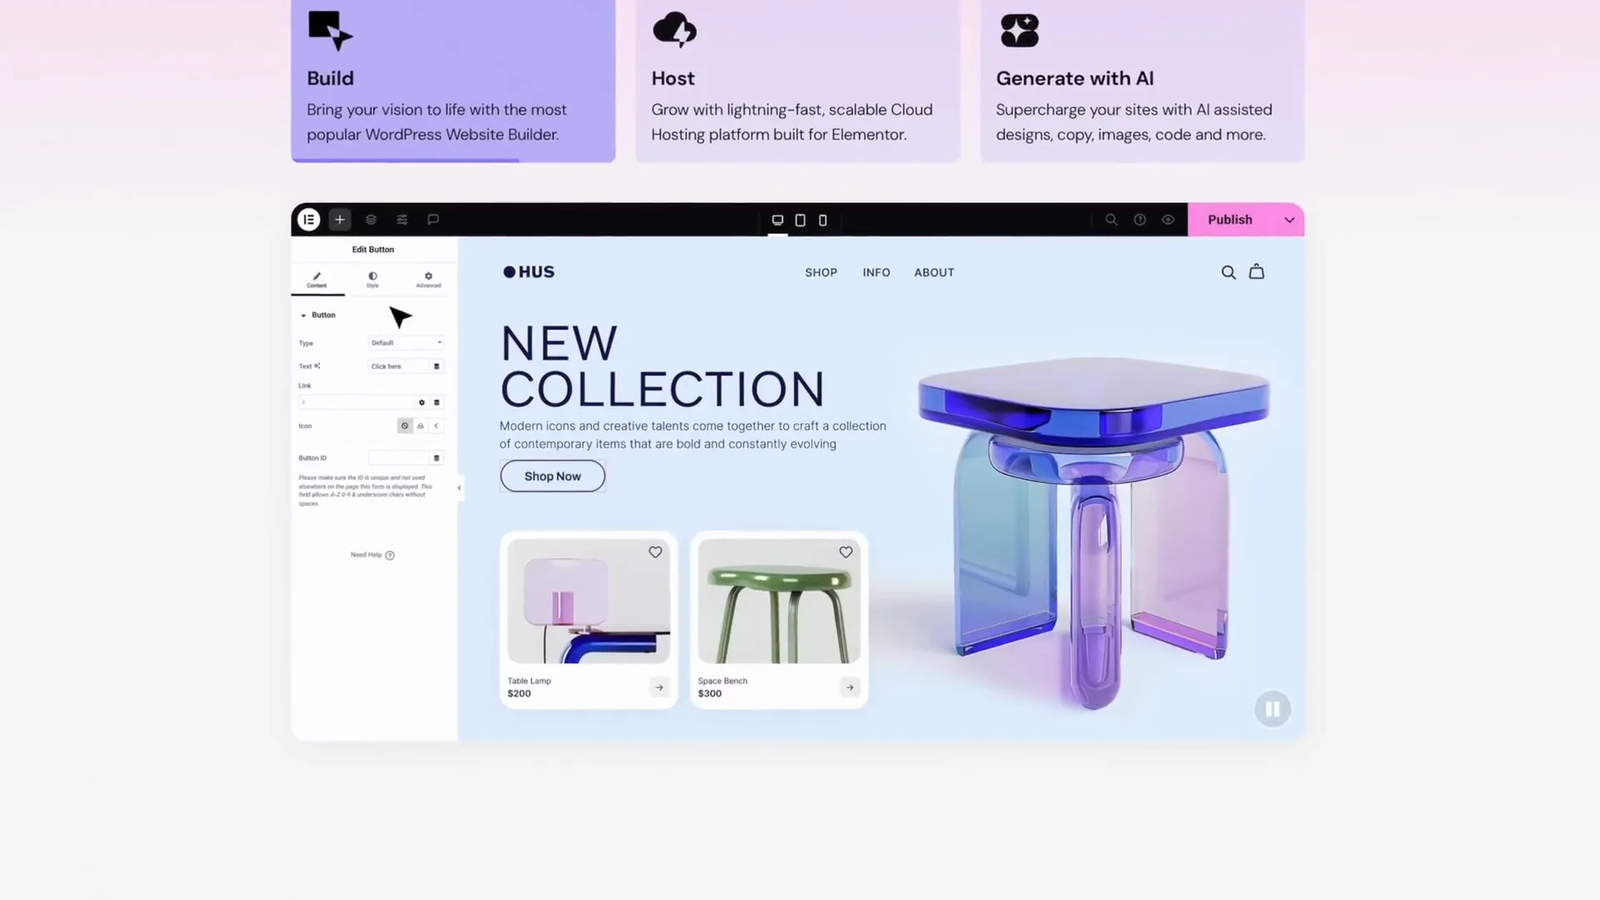
Table of Contents
- 🌐 Understanding the Difference Between WordPress.com and WordPress.org
- 💻 The Correct Process for Setting Up Your WordPress Website
- 💡 Choosing the Best Hosting for Your WordPress Website
- 🔗 Registering Your Domain Name
- ⚙️ Installing WordPress on Your Hosting Server
- 🎨 Installing Your Theme and Essential Plugins
- 🧱 Choosing the Best Page Builder and Template for Your Website
- 🛠️ Customizing Your WordPress Website with Elementor
- 📄 Adding and Customizing New Pages
- 🖼️ Customizing the Header and Footer of Your Website
- ❓ Frequently Asked Questions (FAQ)
- 🚀 Conclusion
🌐 Understanding the Difference Between WordPress.com and WordPress.org
Before we start building, it’s crucial to understand the difference between two platforms often confused by beginners: WordPress.com and WordPress.org. Choosing the wrong one can cost you time, money, and frustration.
When you search for WordPress on Google, you’ll see two main websites at the top:
- WordPress.com
- WordPress.org
WordPress.org is the home of the free, open-source WordPress software. This is the software that powers millions of websites worldwide. You can download it for free, install it on your own server, and have full control over your website’s design and functionality.
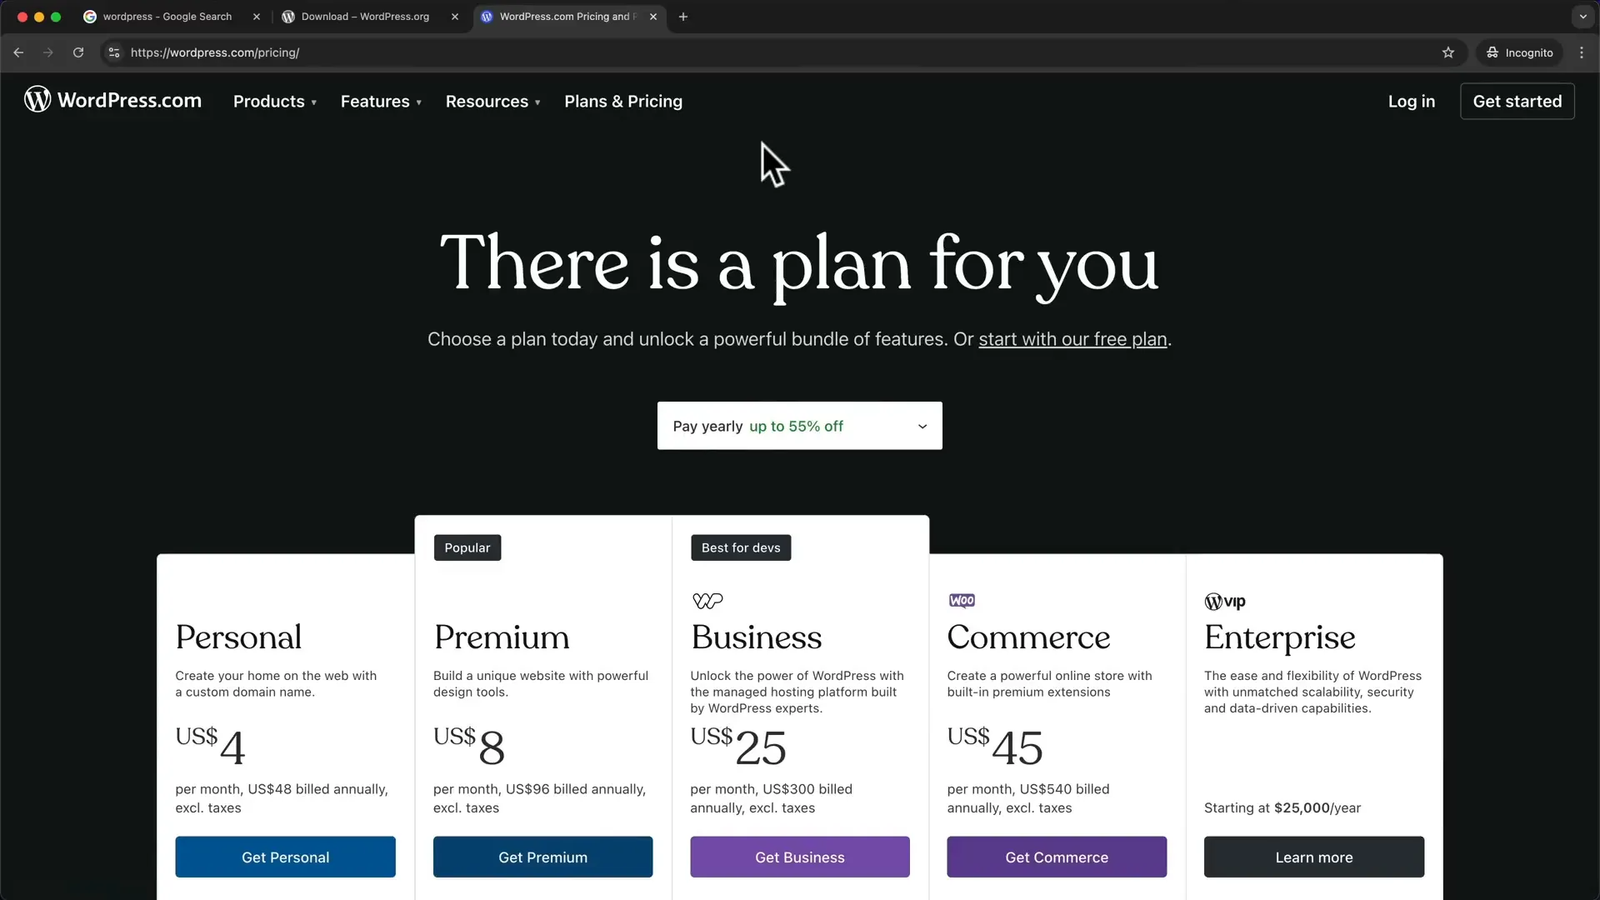
On the other hand, WordPress.com is a for-profit company that offers hosting and website builder plans. While they do offer a free plan, it is very limited. Their paid plans start from $4 per month (paid annually) and go up to $45 per month for the business plan. Unfortunately, the lower-tier plans don’t give you access to the full WordPress ecosystem, including the vast library of plugins and themes that make WordPress so powerful.
To get access to essential features and popular plugins on WordPress.com, you often have to upgrade to their business plan, which can cost around $40 per month. This can be confusing and frustrating for beginners who expect WordPress to be free or affordable.
“This is why I don’t recommend using WordPress.com to create a WordPress website. There are much more affordable and better options because WordPress is just free software that anybody can use.”
The key takeaway here is: WordPress.org gives you the software, but you need hosting, whereas WordPress.com offers hosting but at a higher price and with limitations. Hosting simply means renting space on a server where your website files are stored and served to visitors 24/7.
In this tutorial, we’ll be using WordPress.org software with affordable hosting, which is the most flexible and cost-effective way to build a professional website.
💻 The Correct Process for Setting Up Your WordPress Website
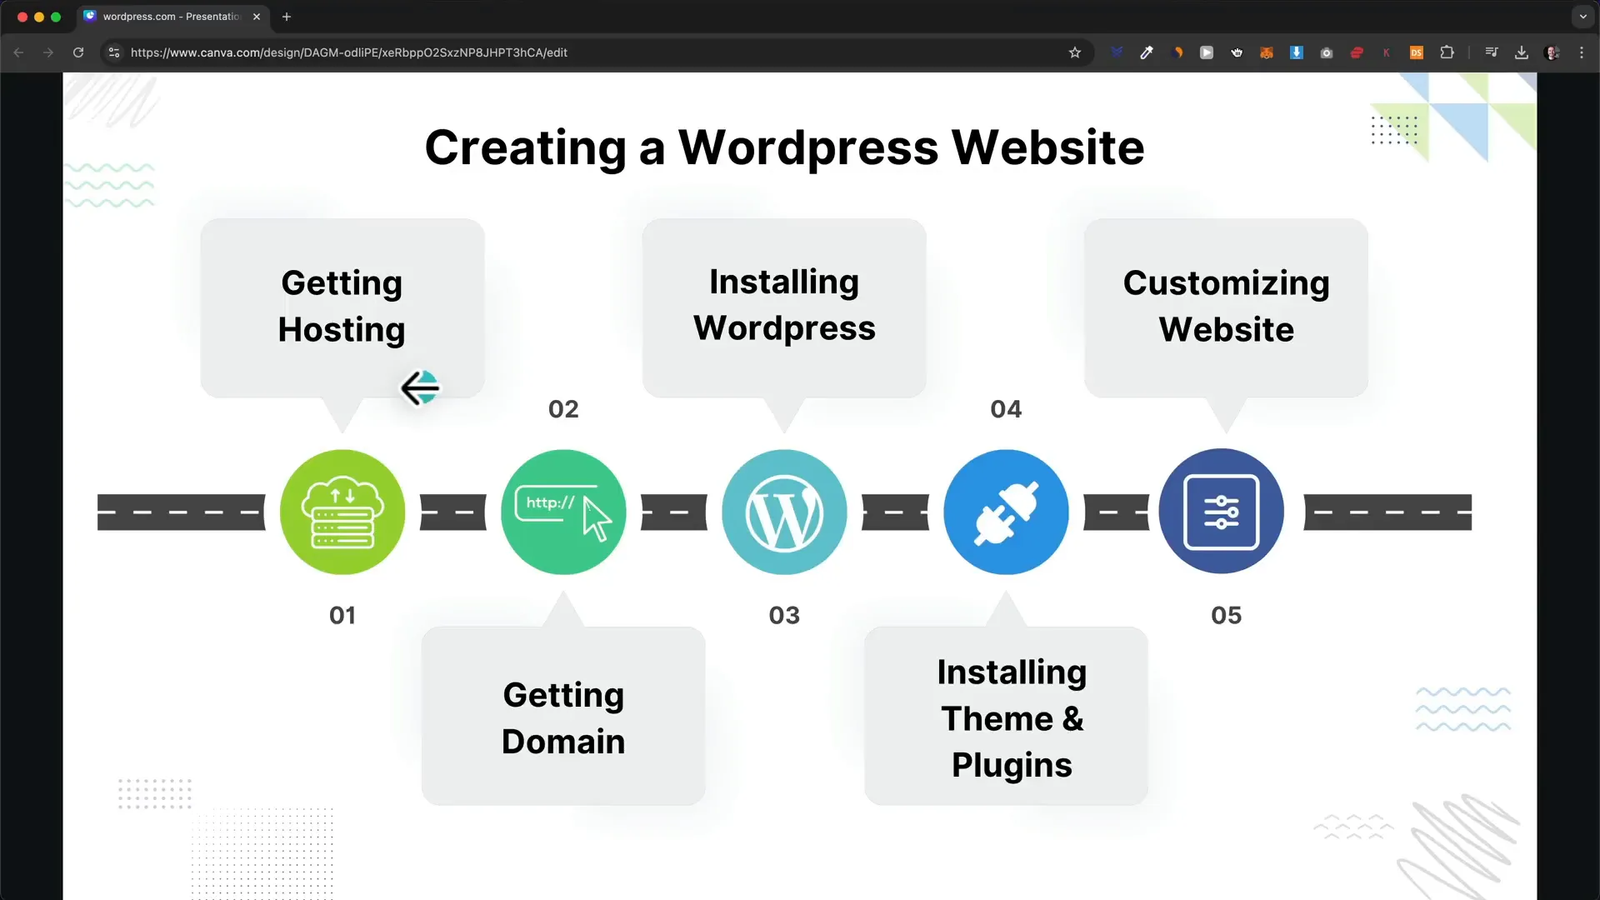
Now that you know which WordPress to use, let’s outline the exact steps we will follow to create your website:
- Set up hosting: Rent server space to store your website files.
- Register your domain name: Choose a memorable website address like yourname.com or yourbusiness.com.
- Install WordPress: Install the free WordPress software on your hosting server.
- Install a free theme and plugins: Use the Astra theme and essential plugins to make your website easy to build and customize.
- Customize your website: Use Elementor page builder and pre-made templates to design your site without coding.
This step-by-step approach ensures that you build a fully functional and professional website efficiently.
💡 Choosing the Best Hosting for Your WordPress Website
Hosting is the foundation of your website, and choosing the right provider is essential for performance, affordability, and ease of use. While WordPress.org recommends providers like Bluehost, Hostinger, and DreamHost, I personally recommend Hostinger for beginners.
Hostinger is affordable, user-friendly, and offers excellent performance. I’ve partnered with Hostinger to offer you an exclusive discount, which you can access through the special link in this article.
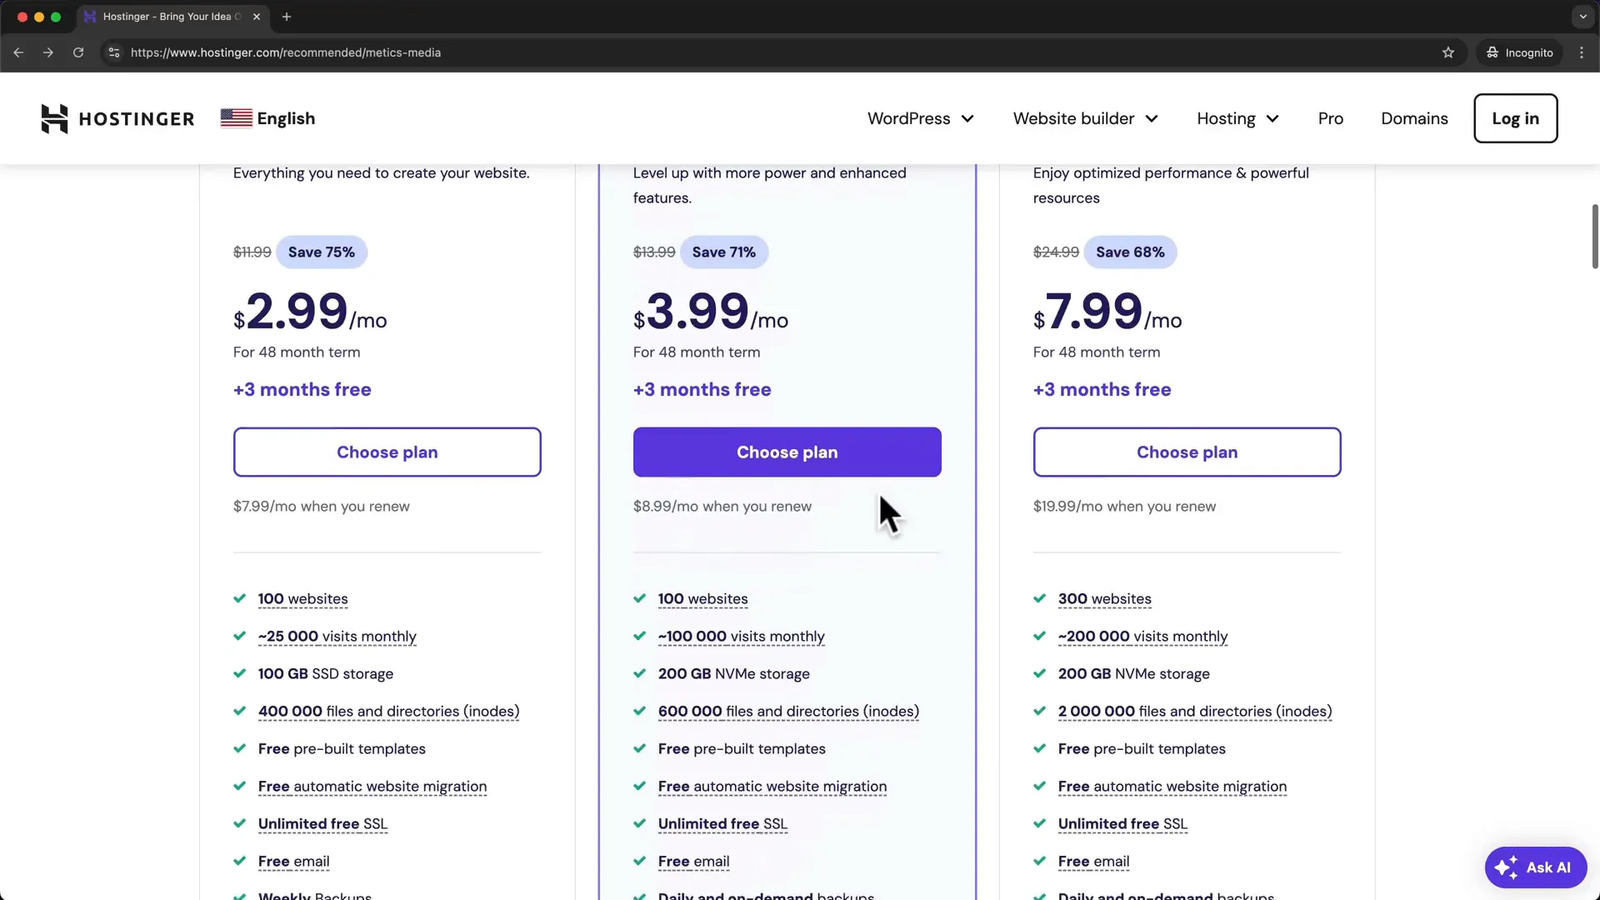
When you visit Hostinger’s website, you’ll see multiple hosting plans, but for most beginners, the Premium or Business plans are ideal:
- Business Plan: Best for websites expecting higher traffic, offering more storage and faster loading speeds through CDN (Content Delivery Network).
- Premium Plan: A great budget-friendly option if you don’t need enhanced performance features.
Choosing a longer payment period upfront will save you money in the long run. For example, paying for 48 months upfront can reduce your monthly cost to about $3.99, which is an incredible deal for hosting a professional website.
Remember, Hostinger offers a 30-day money-back guarantee, so you can try it risk-free.
Here’s how to sign up:
- Go to the Hostinger partner link provided.
- Choose your preferred plan (Premium or Business).
- Enter your email and create an account.
- Before payment, apply the coupon code meticsmedia for an additional 10% discount.
- Complete your payment and access your Hostinger dashboard.
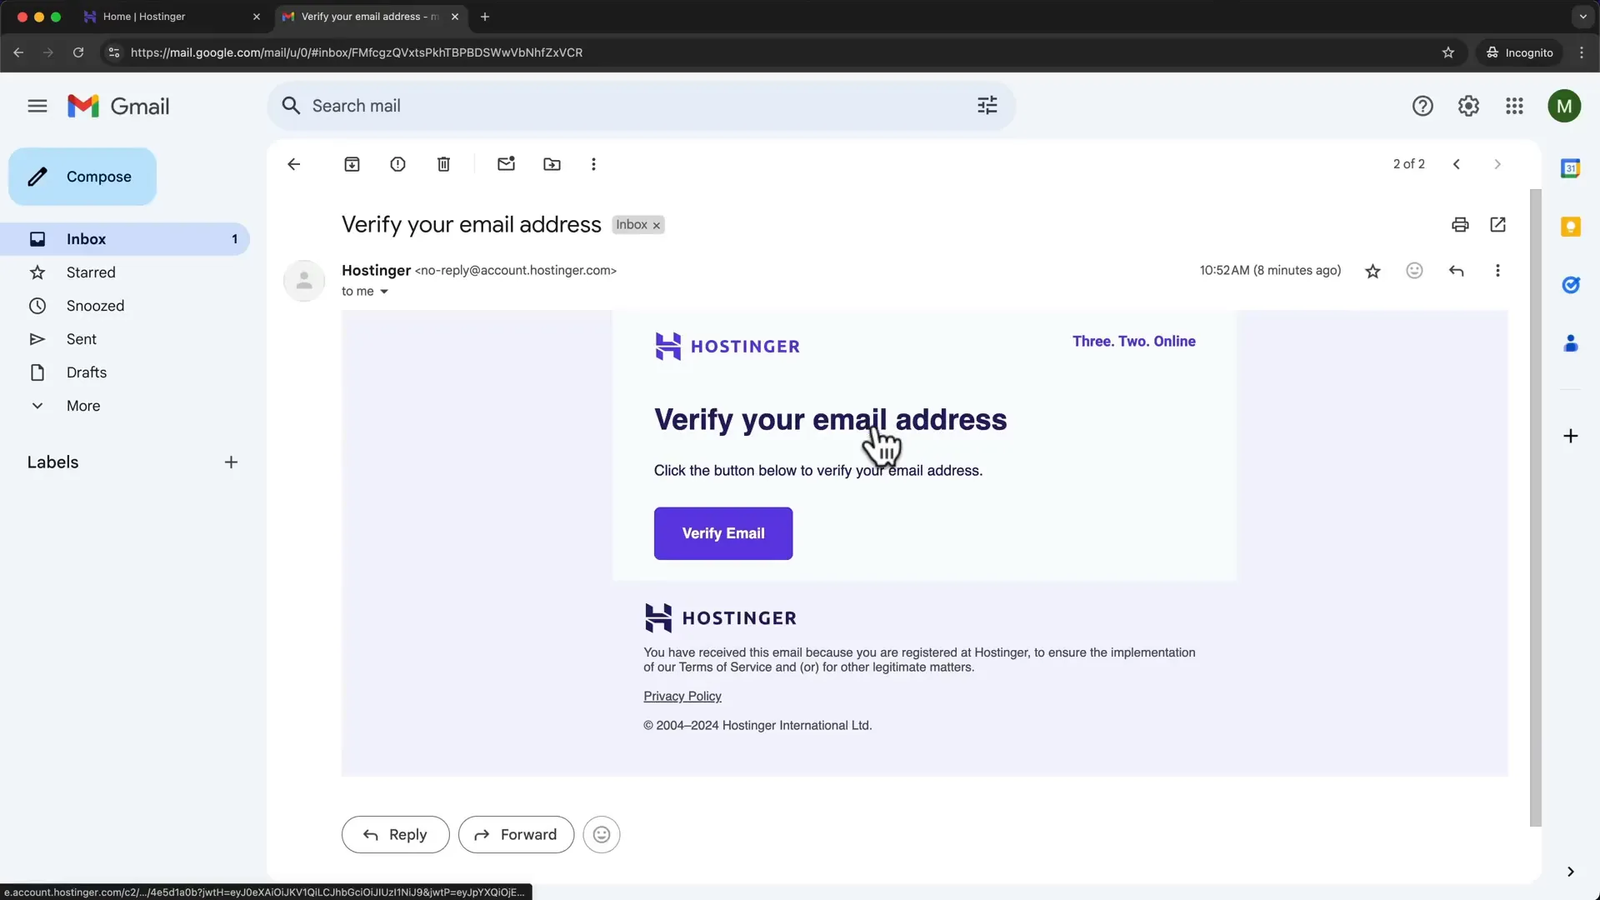
Once signed up, verify your email address to activate your hosting account.
🔗 Registering Your Domain Name
Your domain name is your website’s address on the internet, like yourbusiness.com. Picking the right domain is crucial for branding and ease of remembering.
From your Hostinger dashboard:
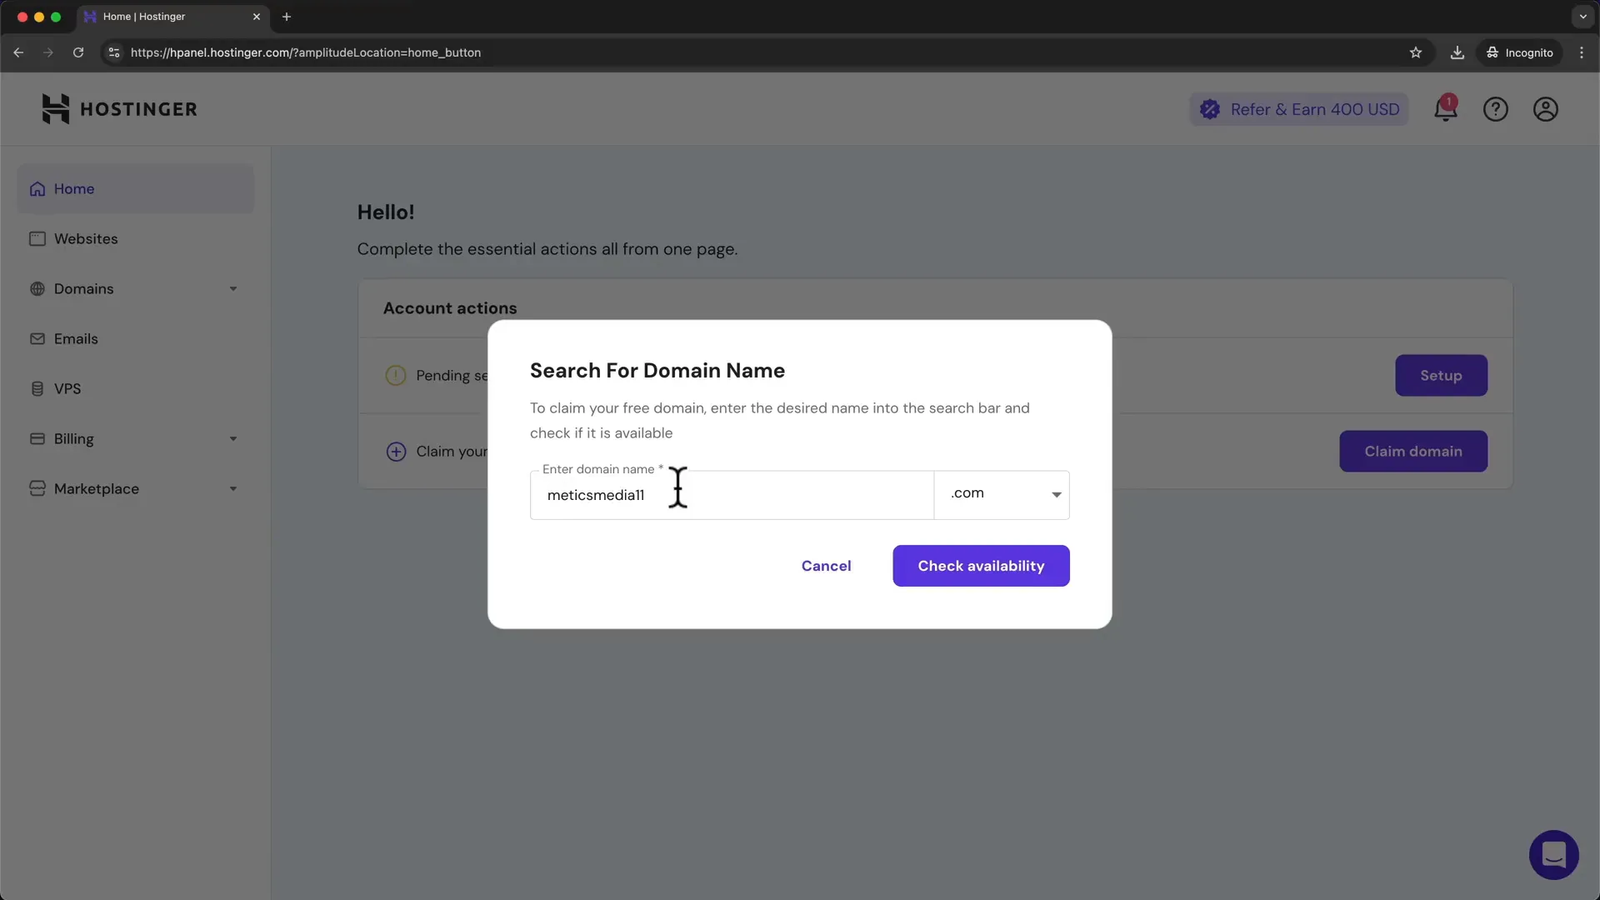
- Click on Claim Domain.
- Choose a .com extension, as it’s the most recognized and trusted.
- Enter your desired domain name. For personal websites, your name works well; for businesses, use your company name.
- Avoid numbers or complicated spellings to keep it professional.
- Click Check Availability and claim your domain if available.
- Enter your contact details and complete the registration.
- Verify your email again for domain registration.
Once verified, your domain will be active and ready to use.
⚙️ Installing WordPress on Your Hosting Server
With hosting and domain in place, the next step is installing WordPress.
On Hostinger:
- Go to your dashboard home and click Setup on your hosting plan.
- Skip any onboarding questions to save time.
- Select Create a Website.
- Choose WordPress as your website platform.
- Create your WordPress admin account using your email and set a strong password.
- Select Create Blank Site.
- Choose your registered domain name.
- Select the server location closest to your visitors for optimal speed (or any if using a Business plan with CDN).
- Click next to start the installation.
After installation, you will be taken to your WordPress dashboard. If not, you can access it anytime by typing yourdomain.com/wp-admin in your browser and logging in with your WordPress credentials.

🎨 Installing Your Theme and Essential Plugins
Now that WordPress is installed, it’s time to install a theme and plugins that will make your website beautiful and functional.
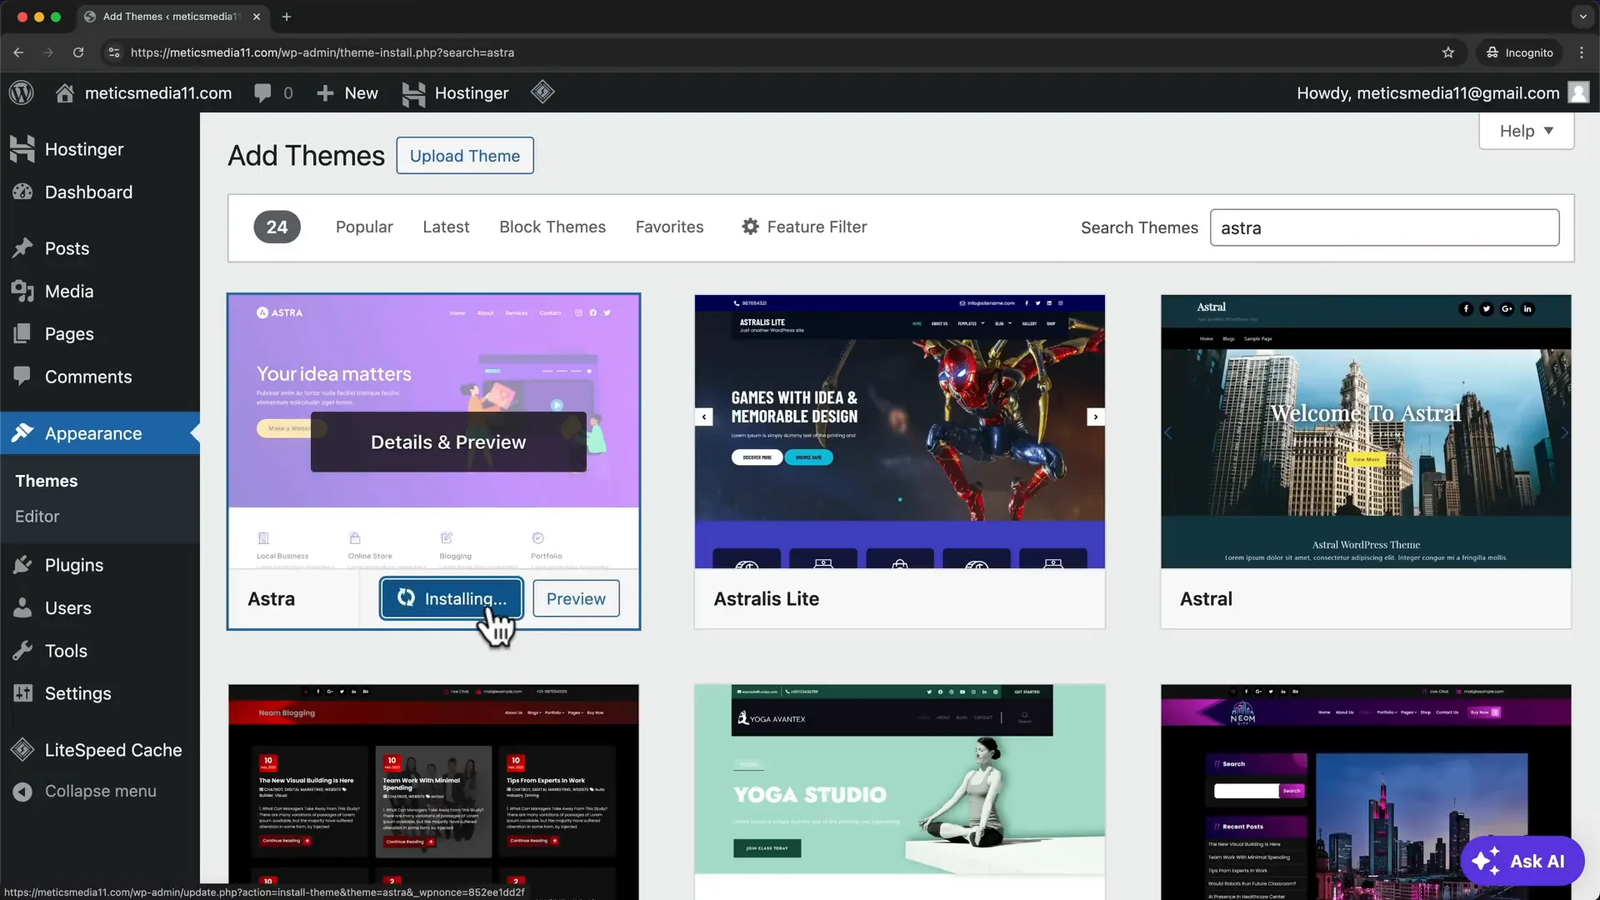
First, we’ll install the Astra theme, one of the most popular and versatile free themes available:
- In your WordPress dashboard, go to Appearance > Themes.
- Click Add New at the top.
- Search for Astra.
- Click Install and then Activate.
The Astra theme provides a clean structure and is optimized for use with page builders like Elementor, enabling easy drag-and-drop customization.
Next, install the Starter Templates plugin, which gives you access to hundreds of professionally designed website templates:
- Go to Plugins > Add New.
- Search for Starter Templates.
- Click Install and then Activate.
Once activated, you may notice some pre-installed plugins from Hostinger like Hostinger AI and Hostinger Tools. These are unnecessary for this tutorial, so deactivate and delete them to keep your site clean.
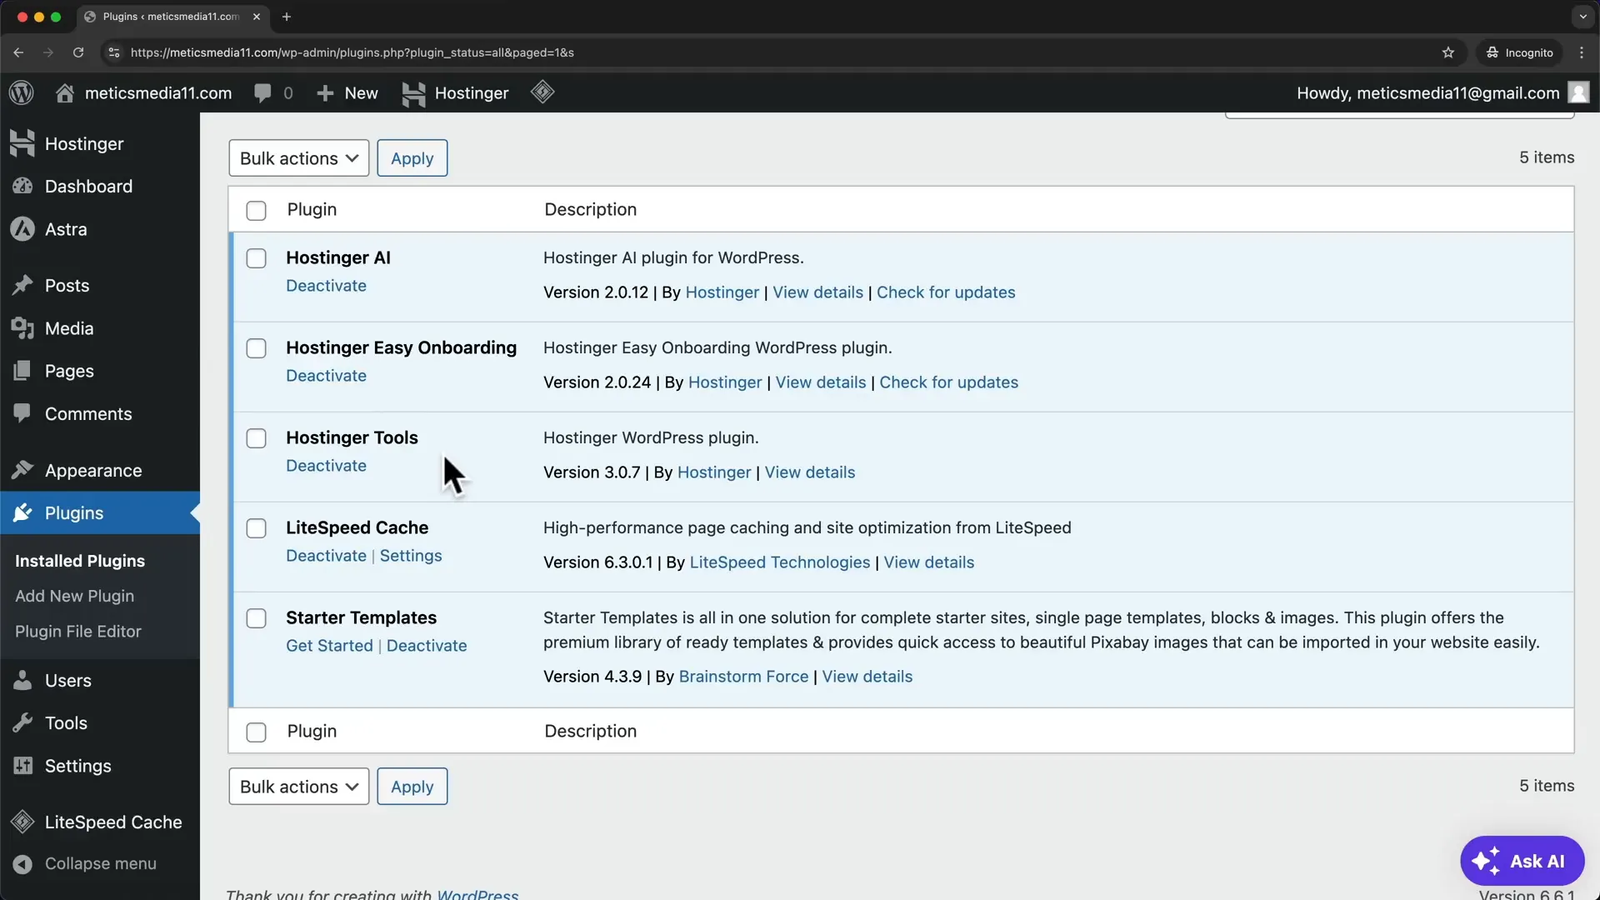
Also, while the LiteSpeed Cache plugin is useful for speeding up your site, it’s best to deactivate it while building your website to avoid caching issues.
🧱 Choosing the Best Page Builder and Template for Your Website
With the theme and plugins installed, it’s time to pick a page builder and website template to get started designing your site.
Elementor is the most popular WordPress page builder. It allows you to design your website visually with drag-and-drop ease, no coding required.
Using the Starter Templates plugin:
- Click Get Started to launch the plugin.
- Choose Elementor as your page builder.
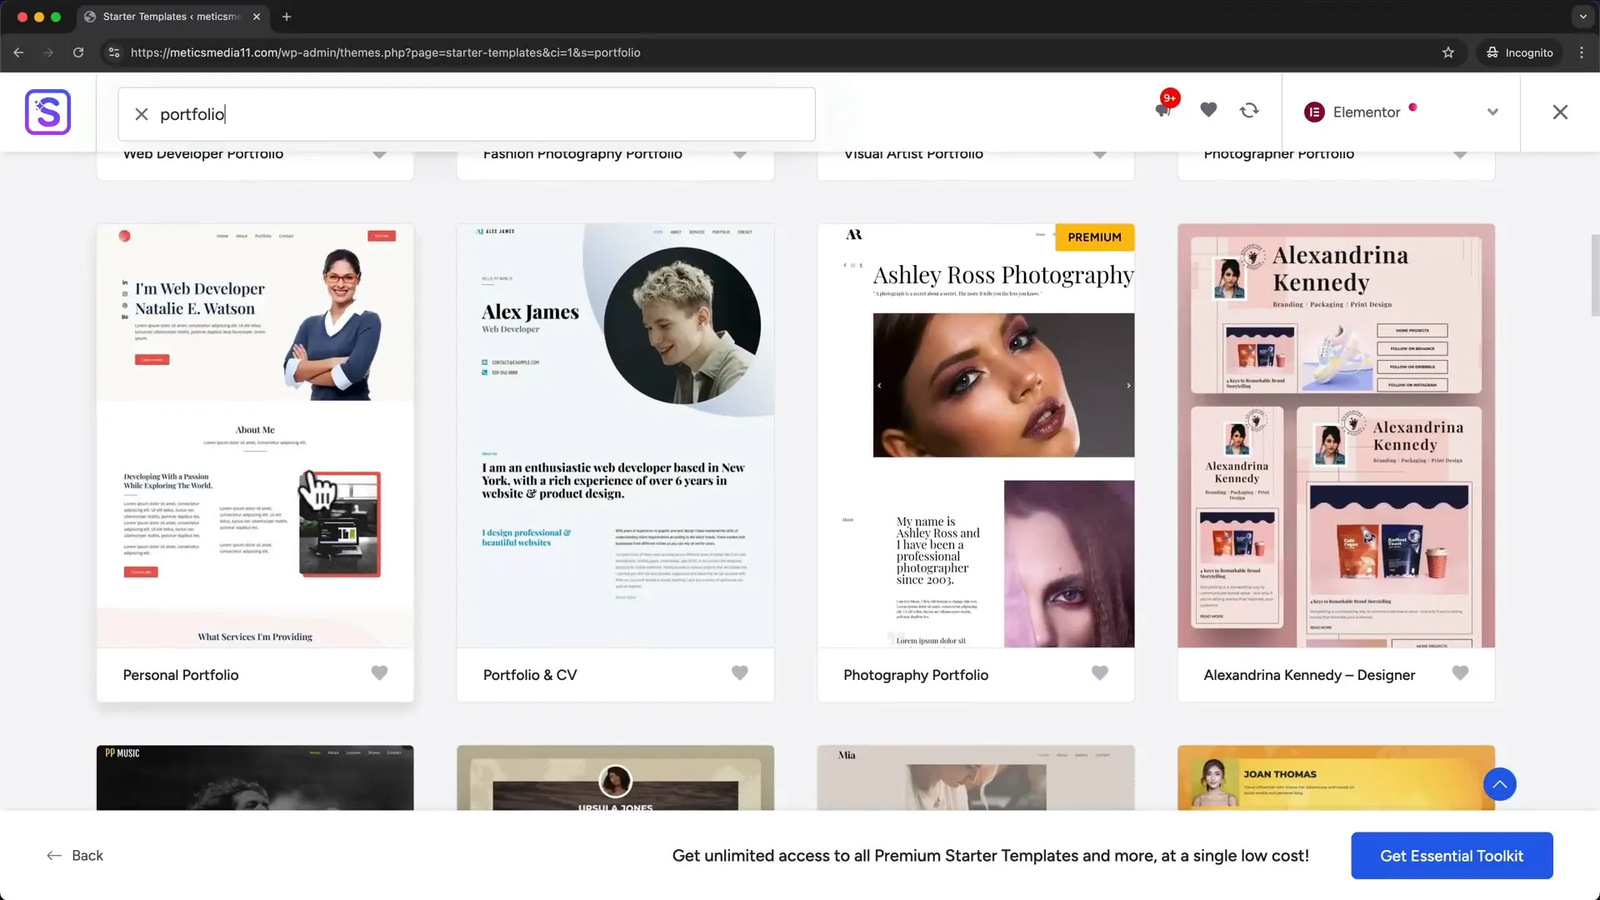
- Browse through the library of templates categorized by website type (e.g., restaurant, portfolio, business).
Starting with a template is highly recommended for beginners because it saves time and ensures a professional look. For instance, if you want a portfolio site, search for “portfolio” and choose a free template you like.
Once you select a template, you can customize basic settings like site logo, fonts, and color schemes before building your site.
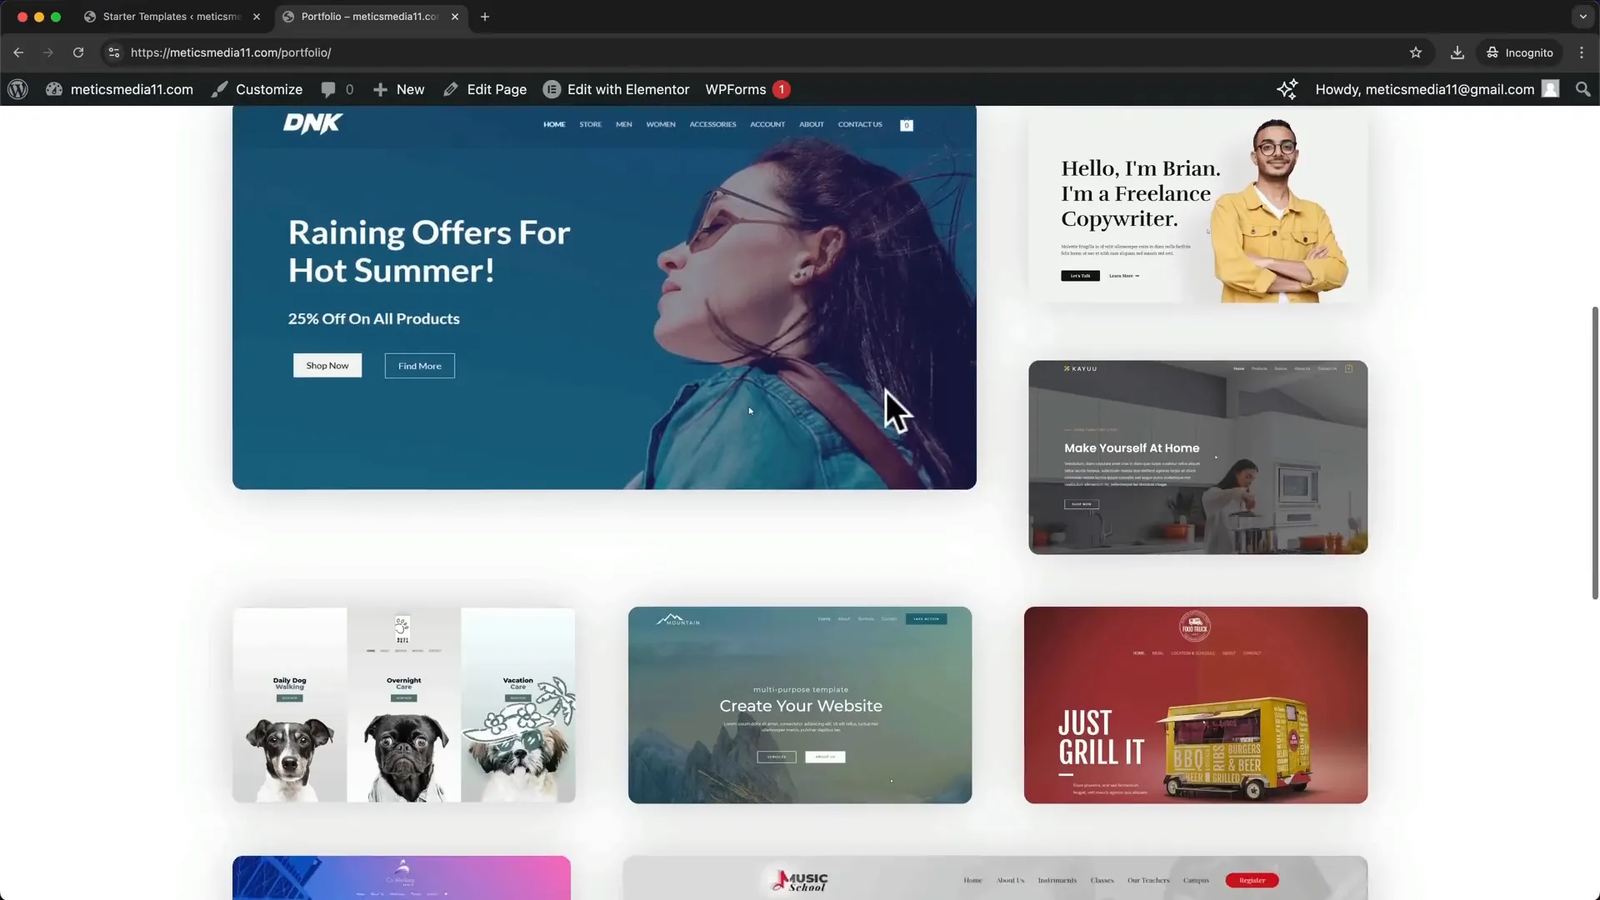
After confirming your choices, Starter Templates will install the required plugins and build your website from the template.
Once the process is complete, click View Your Website to see your new site live.
🛠️ Customizing Your WordPress Website with Elementor
Now that your website is live, let’s learn how to customize it using Elementor.
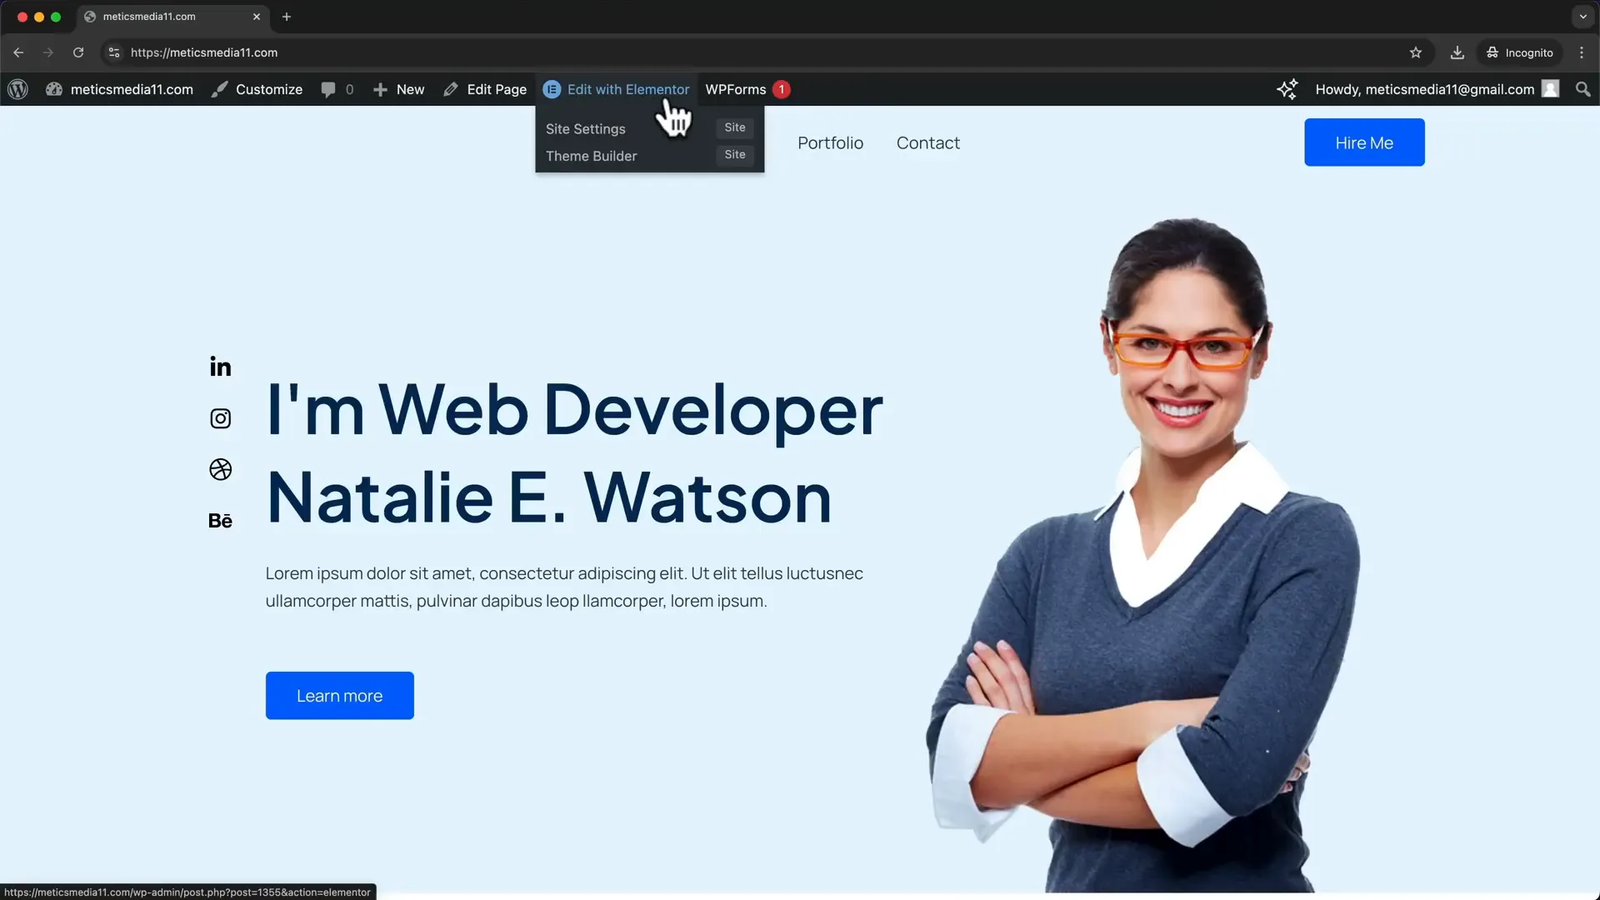
You can access Elementor in two ways:
- Visit your website URL while logged in to WordPress, then click Edit with Elementor on the top admin bar.
- Or from your WordPress dashboard, go to Pages, hover over the page you want to edit, and click Edit with Elementor.
Understanding the structure of pages in Elementor is important:
- Pages are built with containers which hold columns.
- Inside columns, you place elements like headings, text, images, buttons, icons, etc.
For example, a container may have three columns, each containing different elements such as text, buttons, or images.
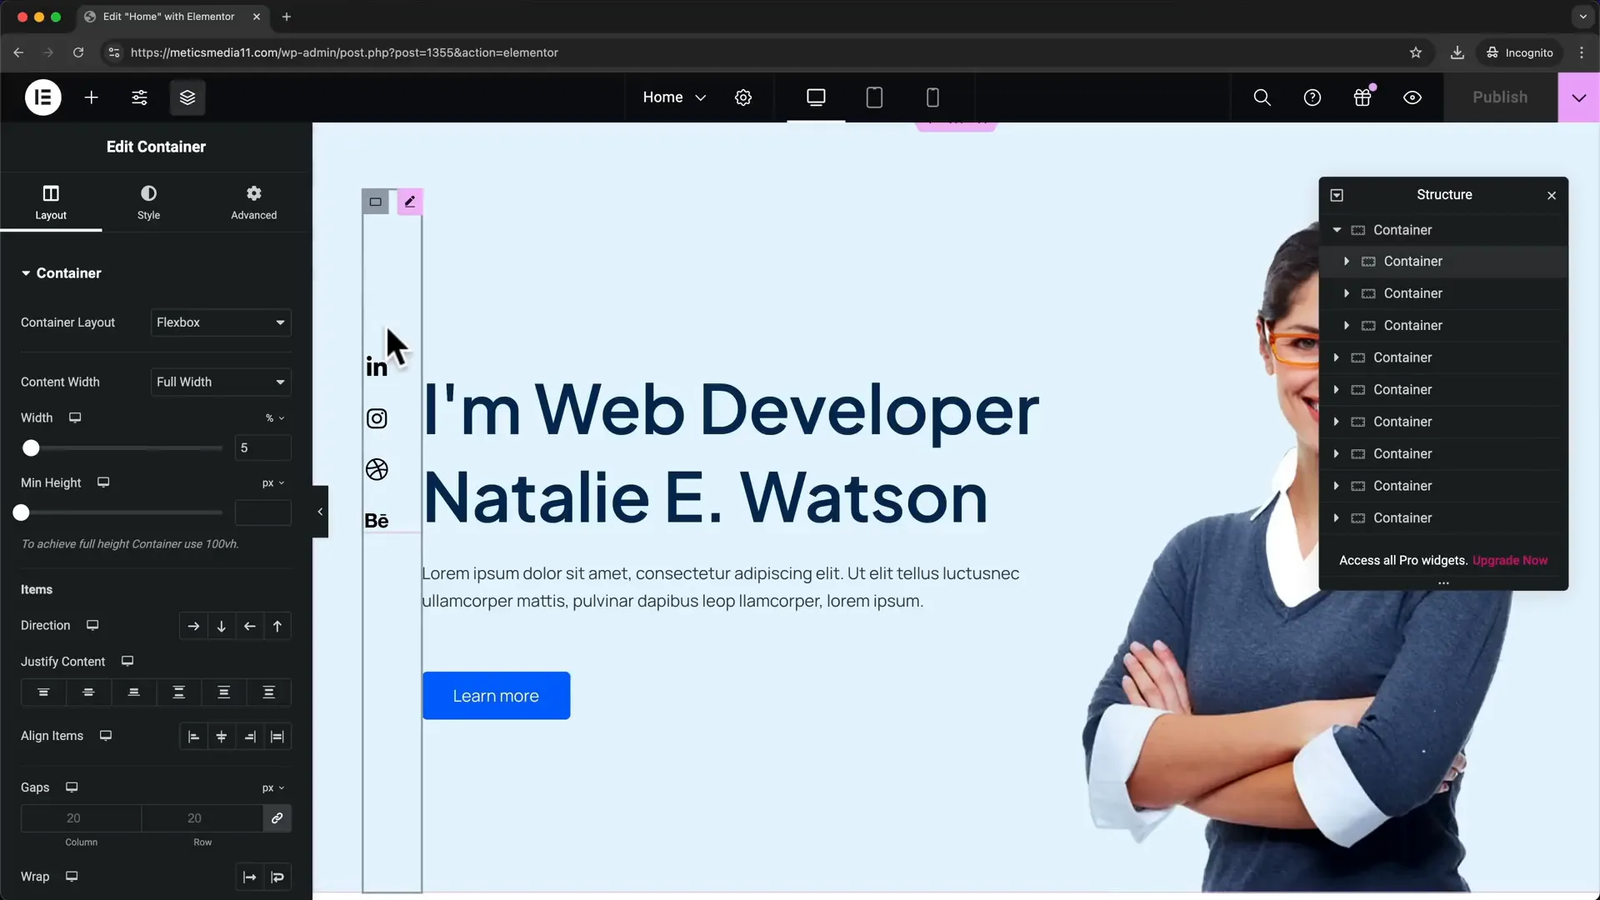
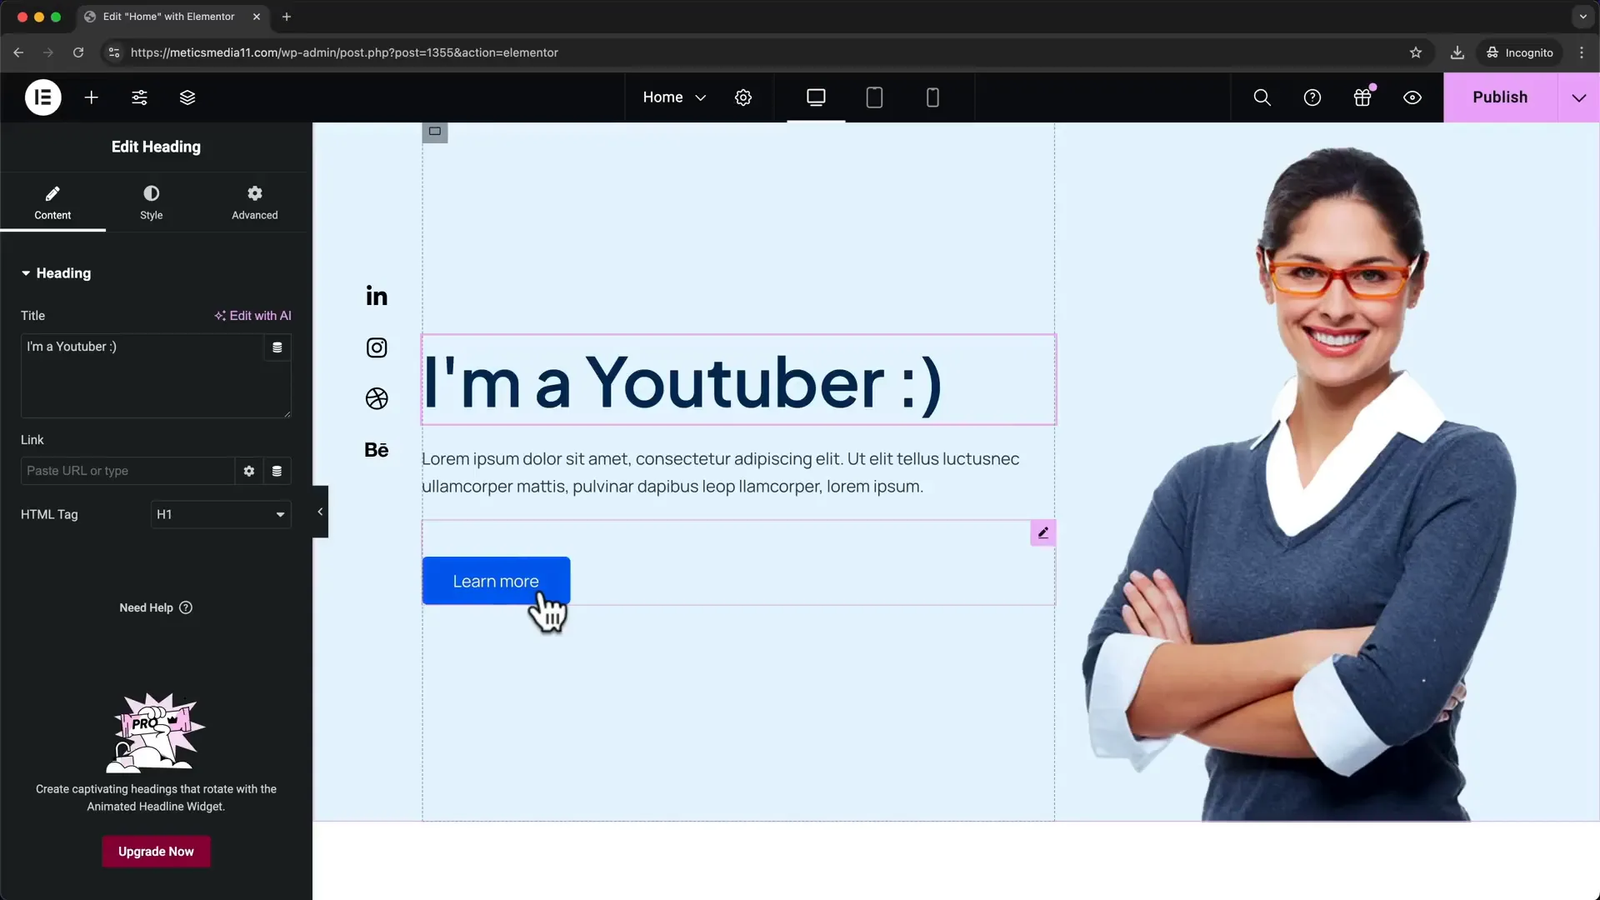
Editing elements is straightforward:
- Click on any text to edit it directly in the left panel.
- Change button text and add links to pages or external URLs.
- Replace images by clicking the image and uploading/selecting a new one.
- Add new elements by clicking the plus icon and dragging elements onto the page.
- Delete unwanted elements or containers by right-clicking and selecting delete or clicking the “X”.
Once you’re happy with your changes, click Publish at the top to make them live.
📄 Adding and Customizing New Pages
Adding new pages to your website is easy:
- Go to your website while logged in.
- Click New > Page from the top admin bar.
- Name your page (e.g., Our Team) and publish it.
- Click Edit with Elementor to design the new page.
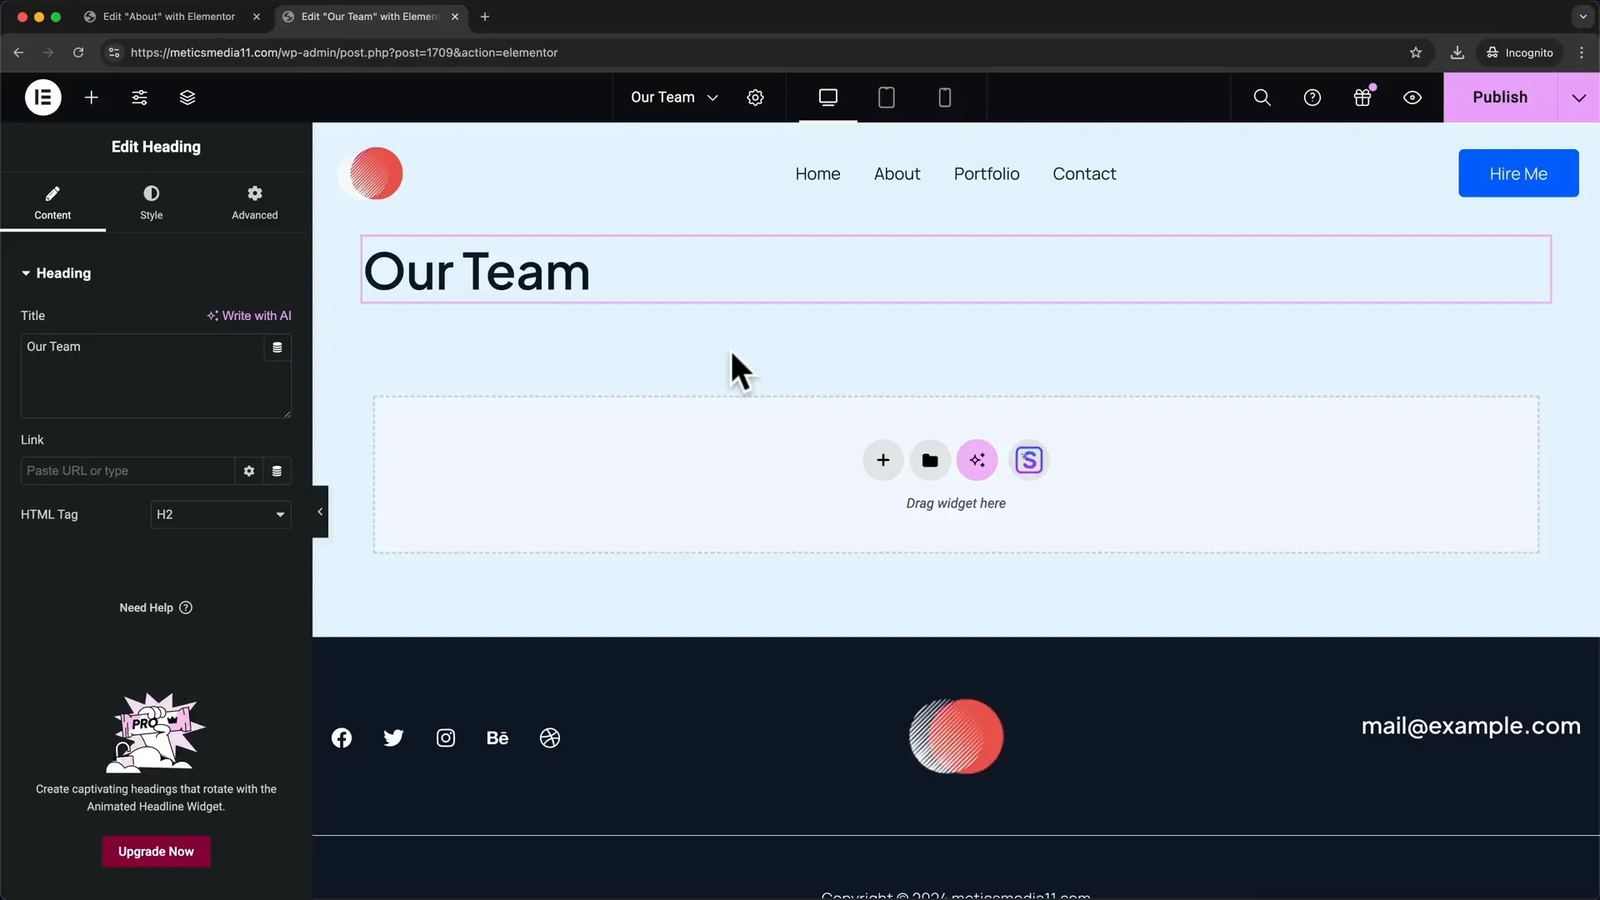
You can add content by dragging in headings, text, images, and more. To speed things up, use the premade blocks and templates from Elementor:
- Click the folder icon in Elementor to open the template library.
- Search for blocks like “team” to find relevant layouts.
- Import blocks or entire pages and customize them to fit your content.
After customizing, preview your page and publish it.
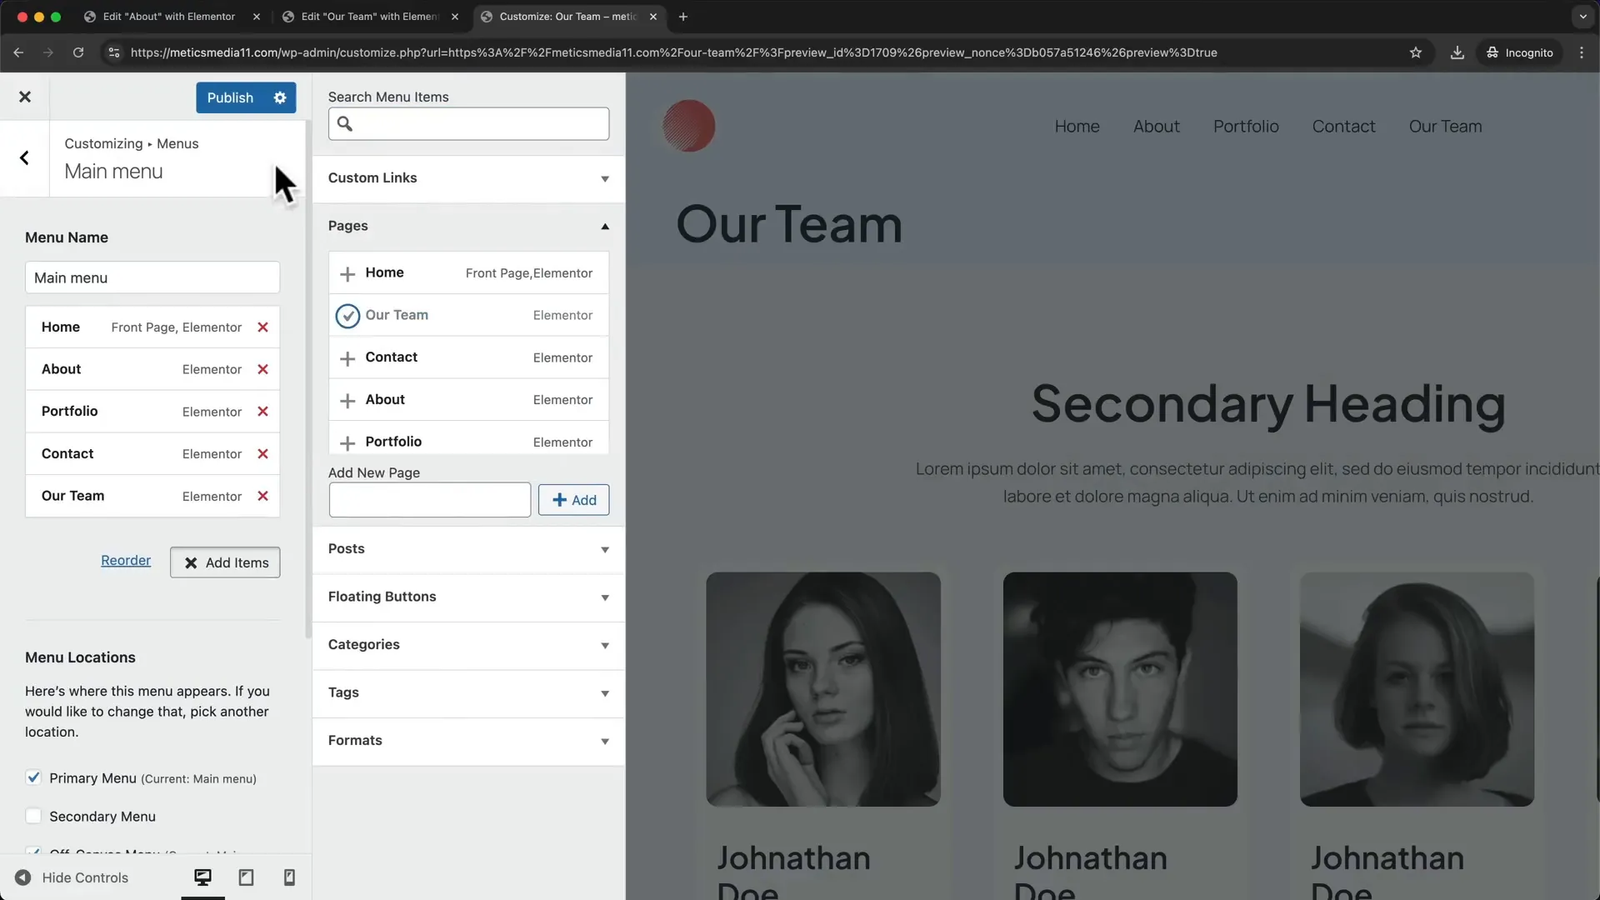
To add your new page to the navigation menu:
- Click Customize in the top admin bar.
- Go to Menus > Main Menu.
- Click Add Items and select your new page.
- Publish the menu changes.
🖼️ Customizing the Header and Footer of Your Website
Beyond page content, customizing the header (top of your site) and footer (bottom) is essential for branding and navigation.
To edit these areas:
- Click Customize in the top admin bar.
- Hover over the header area to reveal edit icons (pen icons).
- Click the pen icon to change elements like the logo.
- Scroll down to the footer and click the pen icons to edit text, icons, and contact info.
This live customizer makes it easy to tweak your site’s global elements without diving into code.
❓ Frequently Asked Questions (FAQ)
What is the difference between WordPress.com and WordPress.org?
WordPress.org provides free open-source software that you install on your own hosting, giving you full control over your website. WordPress.com is a paid hosting service with limitations unless you purchase higher-tier plans.
Do I need any coding skills to build a WordPress website?
No! Using Elementor and pre-made templates, you can build and customize your site visually with drag-and-drop, no coding required.
How much does it cost to build a WordPress website?
The WordPress software is free. Your main cost is hosting, which can be as low as $3 per month with Hostinger. You can build your site with free themes and plugins.
Can I change my website design after building it?
Absolutely. With Elementor and WordPress, you can edit pages, add new pages, and customize headers and footers anytime.
Is my website mobile-friendly?
Yes. The Astra theme and Elementor templates are designed to be fully responsive and look great on mobile devices.
How do I secure my website?
Choose a reliable hosting provider like Hostinger, keep your WordPress, themes, and plugins updated, and consider installing security plugins for added protection.
Can I add an online store to my WordPress website?
Yes. By installing plugins like WooCommerce, you can easily add eCommerce functionality to your WordPress site.
How do I get help if I get stuck?
There are many WordPress communities and tutorials online. You can also watch detailed video tutorials to guide you through the process step-by-step.
🚀 Conclusion
Building a professional WordPress website in 2025 is easier than ever, especially with the right tools and guidance. By choosing WordPress.org software, affordable hosting from Hostinger, the Astra theme, and the Elementor page builder, you can create a stunning website tailored to your needs without any coding.
Using pre-made templates from Starter Templates saves you time and ensures a professional look. Plus, with simple customization options for pages, headers, footers, and menus, your website will be flexible and scalable as your business or personal brand grows.
Remember, the only real investment is hosting, and with options as low as $3 per month, building your online presence is accessible to everyone. So take the first step today, and start creating your WordPress website with confidence!
For more detailed tutorials on WordPress customization, check out additional resources to deepen your skills and make your website truly unique and If you’re planning to create a restaurant or hotel-related WordPress website, don’t miss our list of the 10 best booking plugins and themes for WordPress — it’s a must-read guide to get started quickly and professionally.

1 thought on “WordPress Tutorial for Beginners 2025 – Step by Step Guide to Creating a Professional Website”